
To start the instance created, users need to follow along to complete steps below:
- Set Instance Name
- Network Settings
- Server Configuration
- Instance Advanced Configuration
- Account Setting
- Review and Start
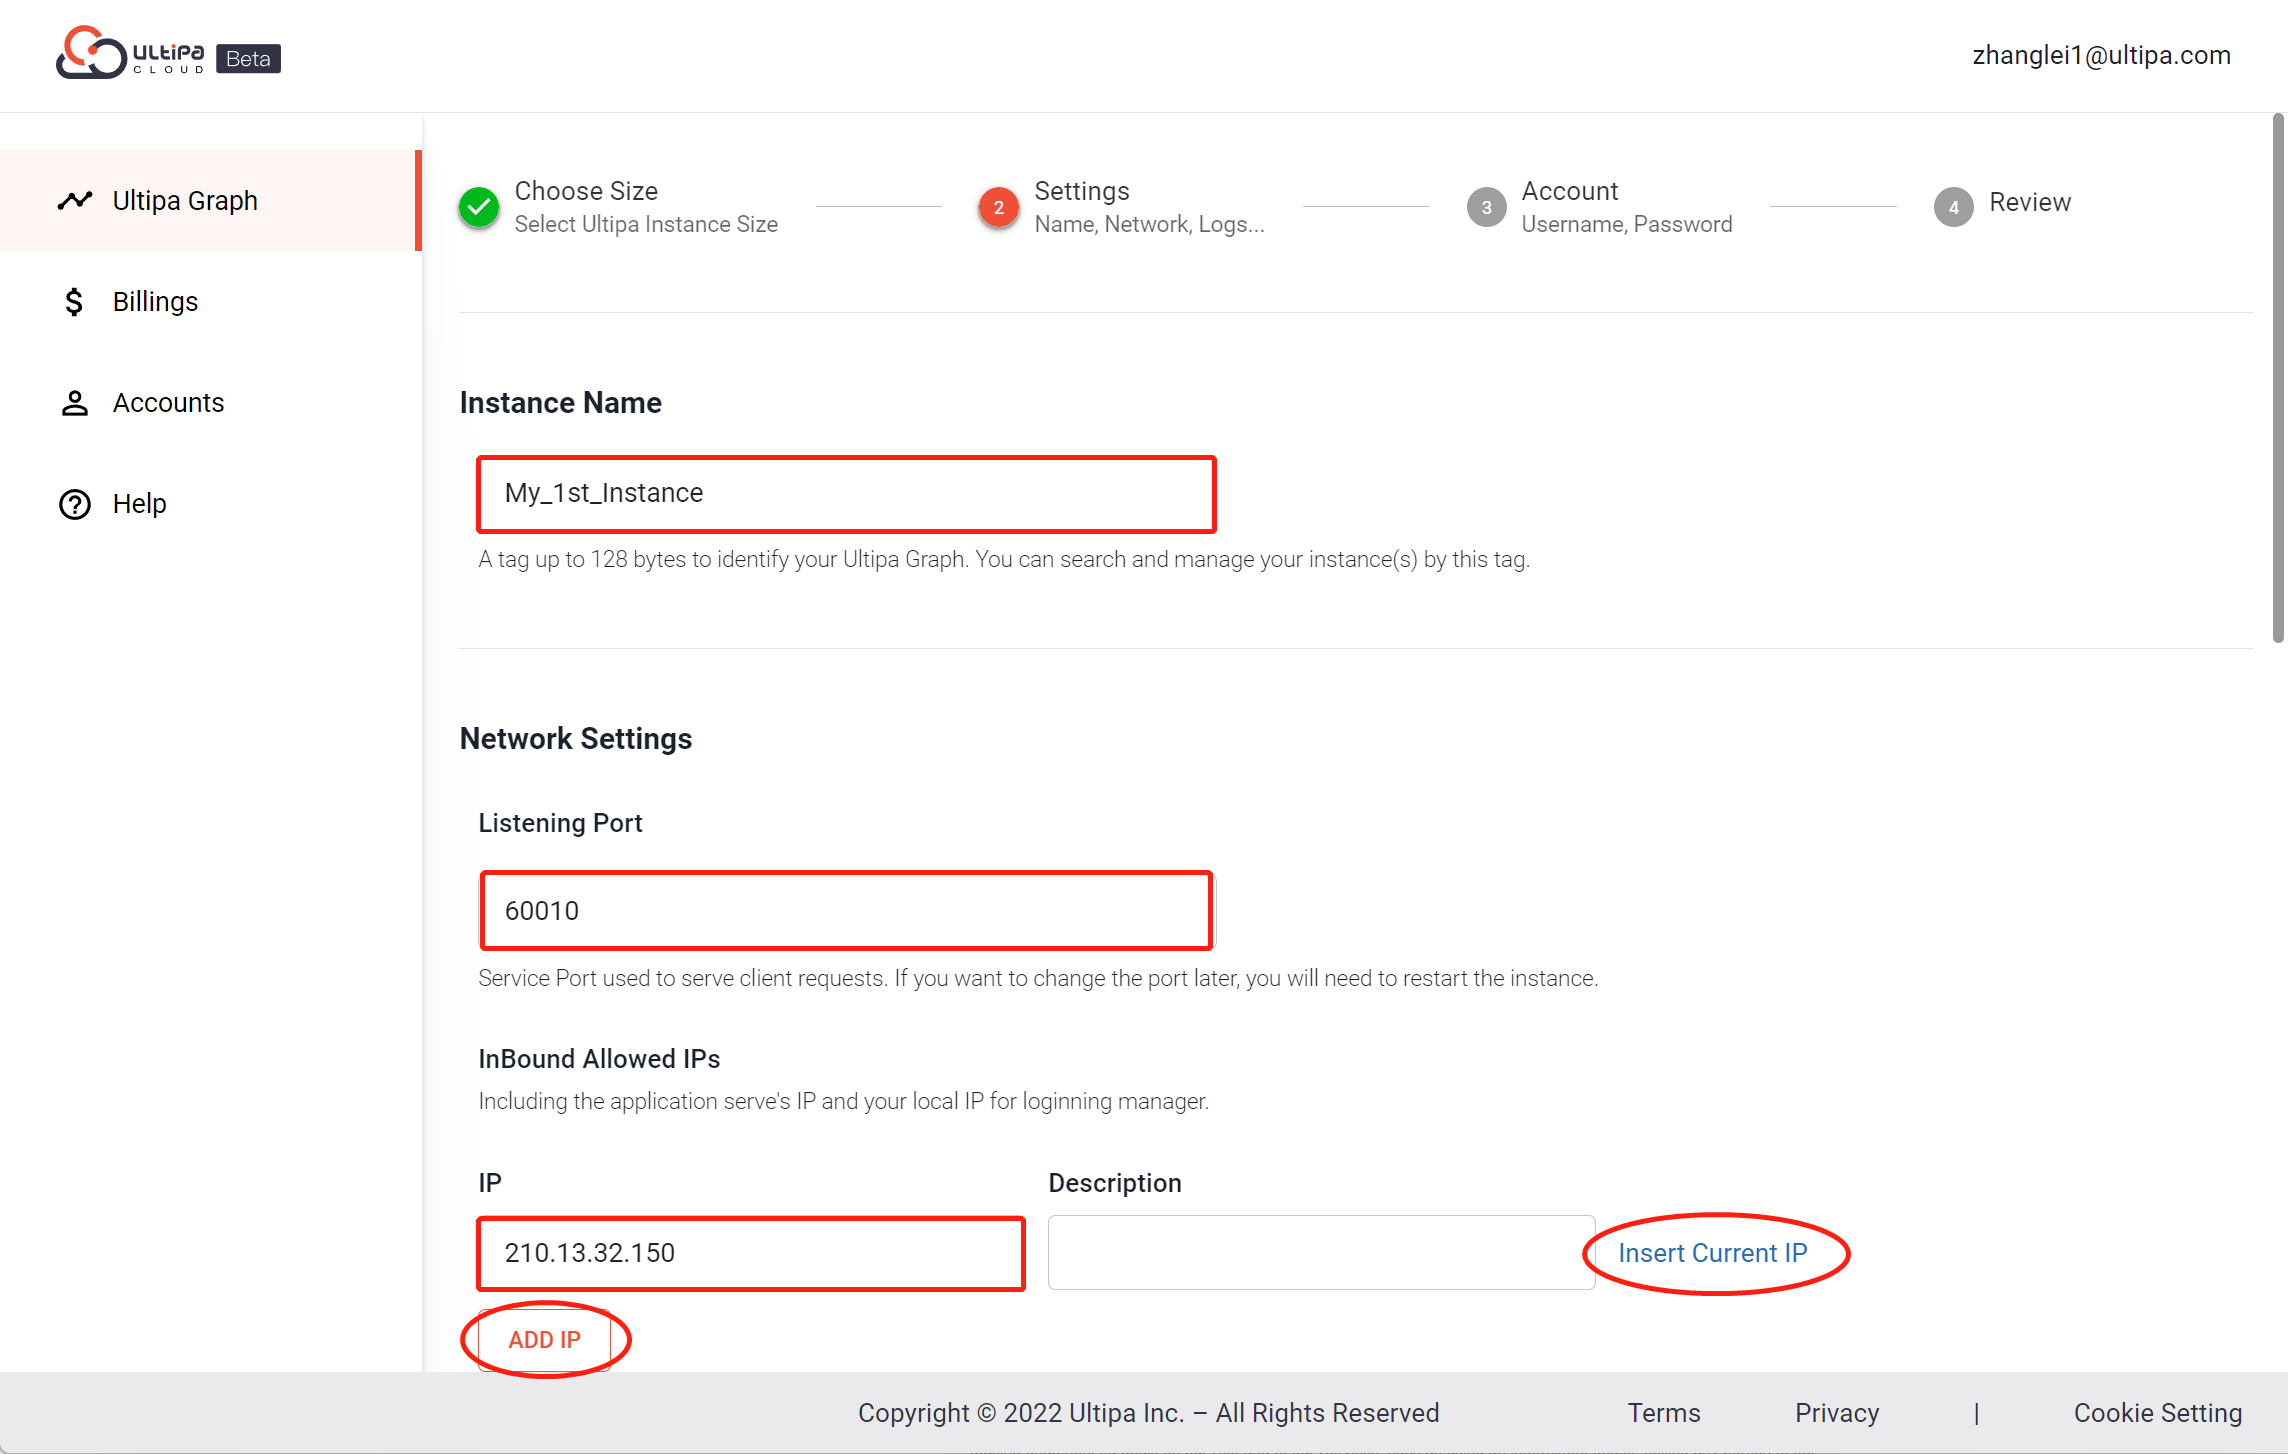
Set Instance Name
Users can set an identifiable name for each instance, so your instance can be found or managed easily.
Parameters |
Description |
|---|---|
| Instance Name | This is a tag up to 128 bytes to identify Ultipa Graph instances. Users can search and manage instance(s) under their accounts by this tag. |
Network Settings
Users need to connect to their cloud instances via stable networks.
Parameters |
Description |
|---|---|
| Listening Port | Service Port used to serve client requests. If users need to change the port later, restarting the instance is required. |
| InBound Allowed IPs | Includes the application server's IP and users' local IP for connecting Ultipa Manager. Users can click "ADD IP" button or "Insert Current IP". |
For instance:
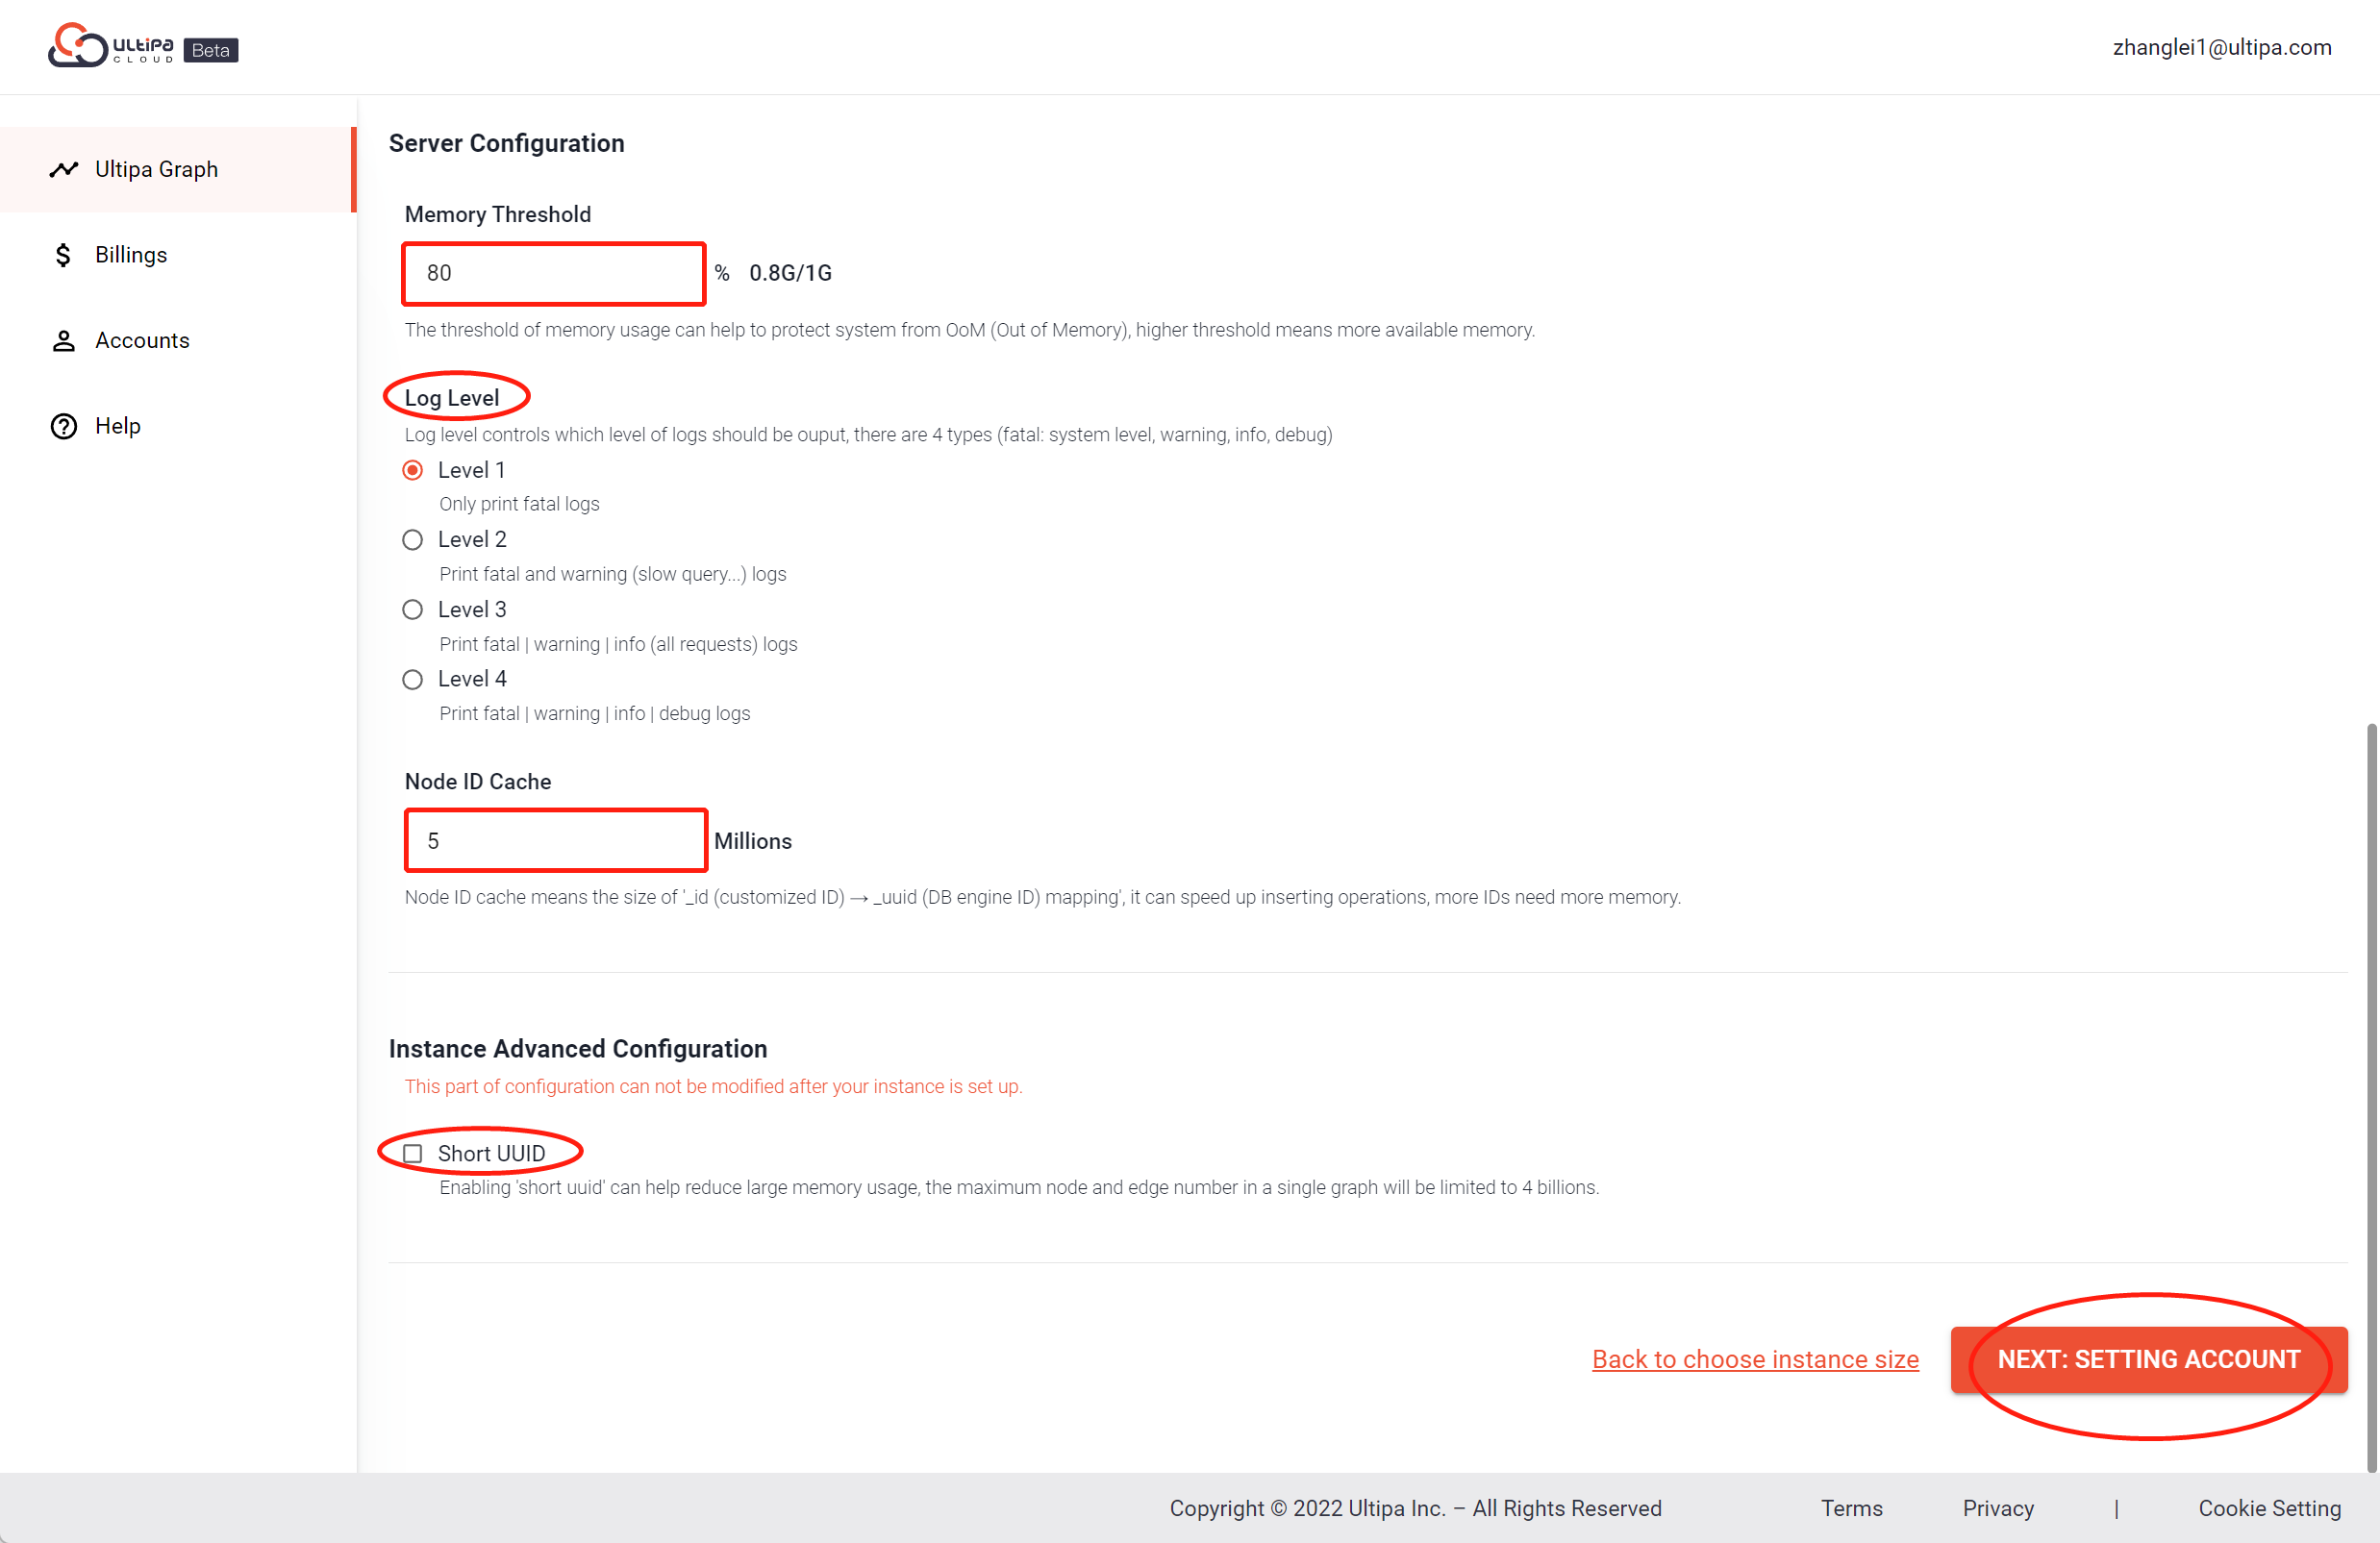
Server Configuration
Parameters |
Description |
|---|---|
| Memory Threshold | The threshold of memory usage by percentage can help to protect system from OoM (Out of Memory), higher threshold means more available memory. |
| Log Level | Log level controls which level of logs should be ouput, there are 4 types (fatal: system level, warning, info, debug). |
| Node ID Cache | Node ID cache means the size of '_id (customized ID) → _uuid (DB engine ID) mapping', it can speed up inserting operations, more IDs need more memory. For instance, 5 Millions. |
Instance Advanced Configuration
Parameters |
Description |
|---|---|
| Short UUID | Enabling 'short uuid' can help reduce large memory usage, the maximum node and edge number in a single graph will be limited to 4 billions. |
Note: Advancced instance configurations can not be re-modified after instances are set up.
With instance configurations completed, users can proceed to account settings.
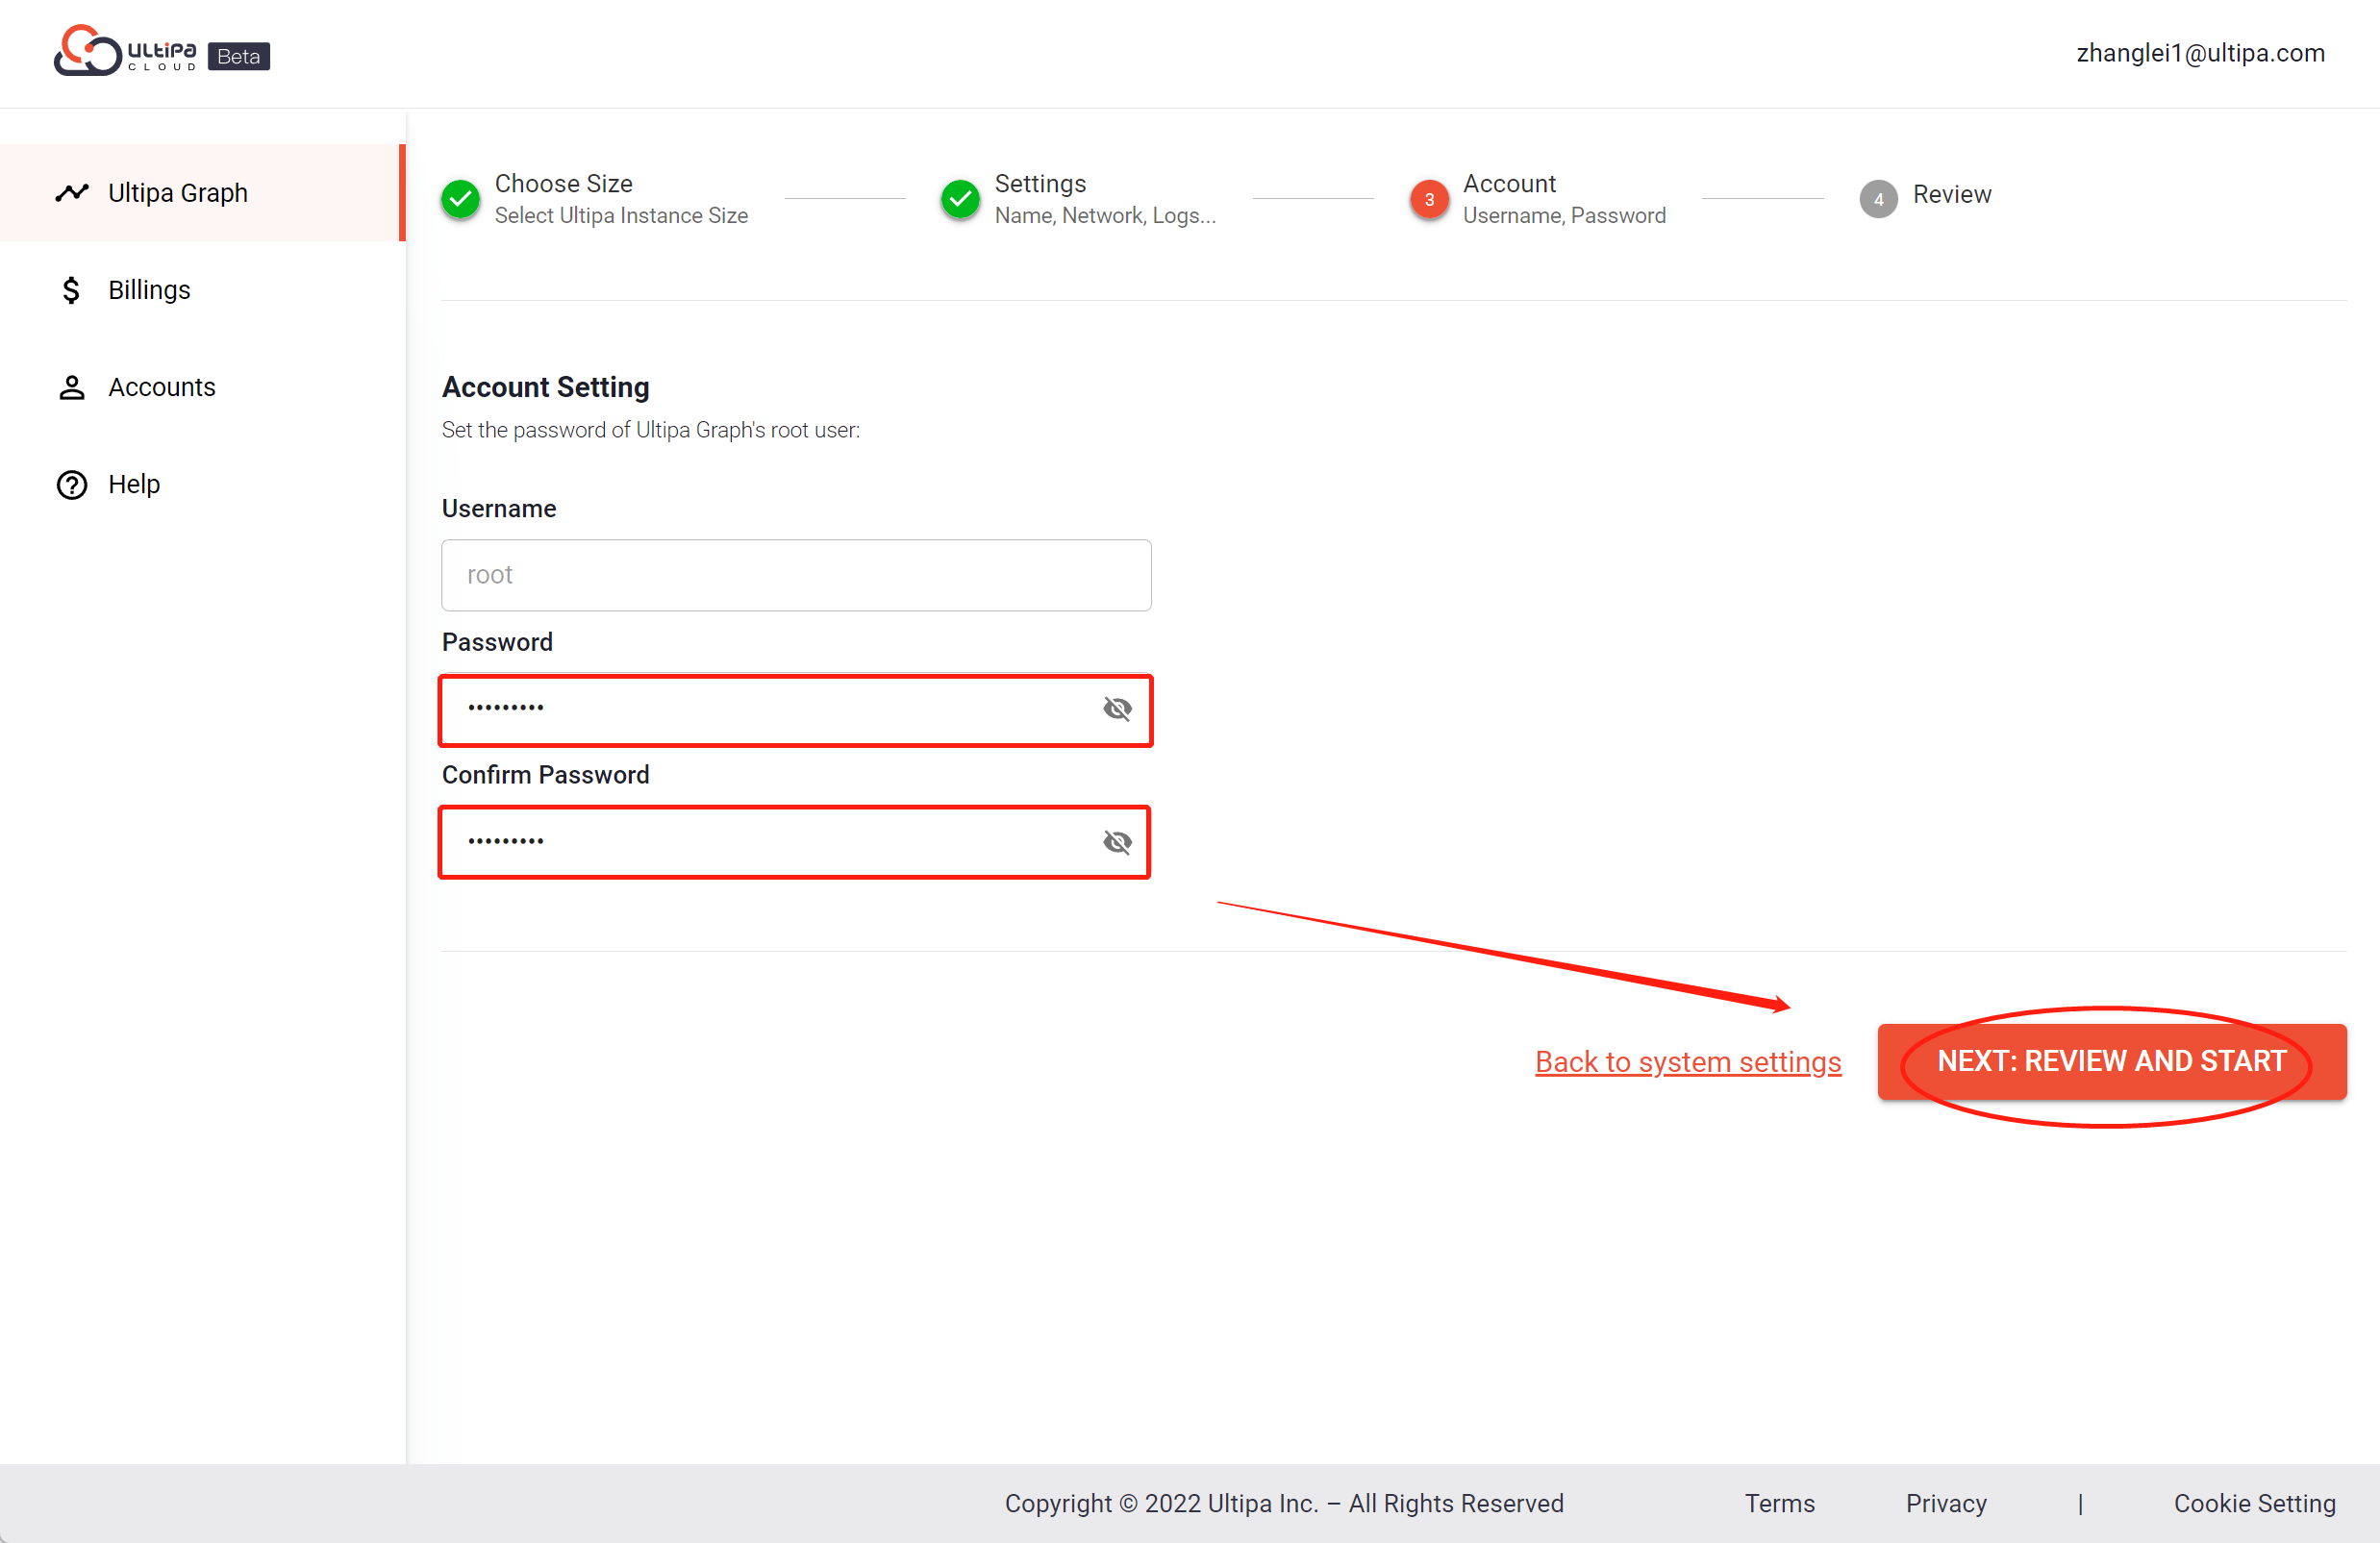
Account Setting
In this step, users need to set up the password of Ultipa Graph's root user by inputting a password with a length between 6~64 ASCII characters and confirming it.
As shown below:
Review & Start
In this page, user can review all instance configuration information or click the pencil icons to get back to previous steps for corrections.
If no more configurations needs to be further modified, the instance is ready to start by clicking "Start" button and the instance will be put into innitializing status and soon to be started, during which state users could create more instances.
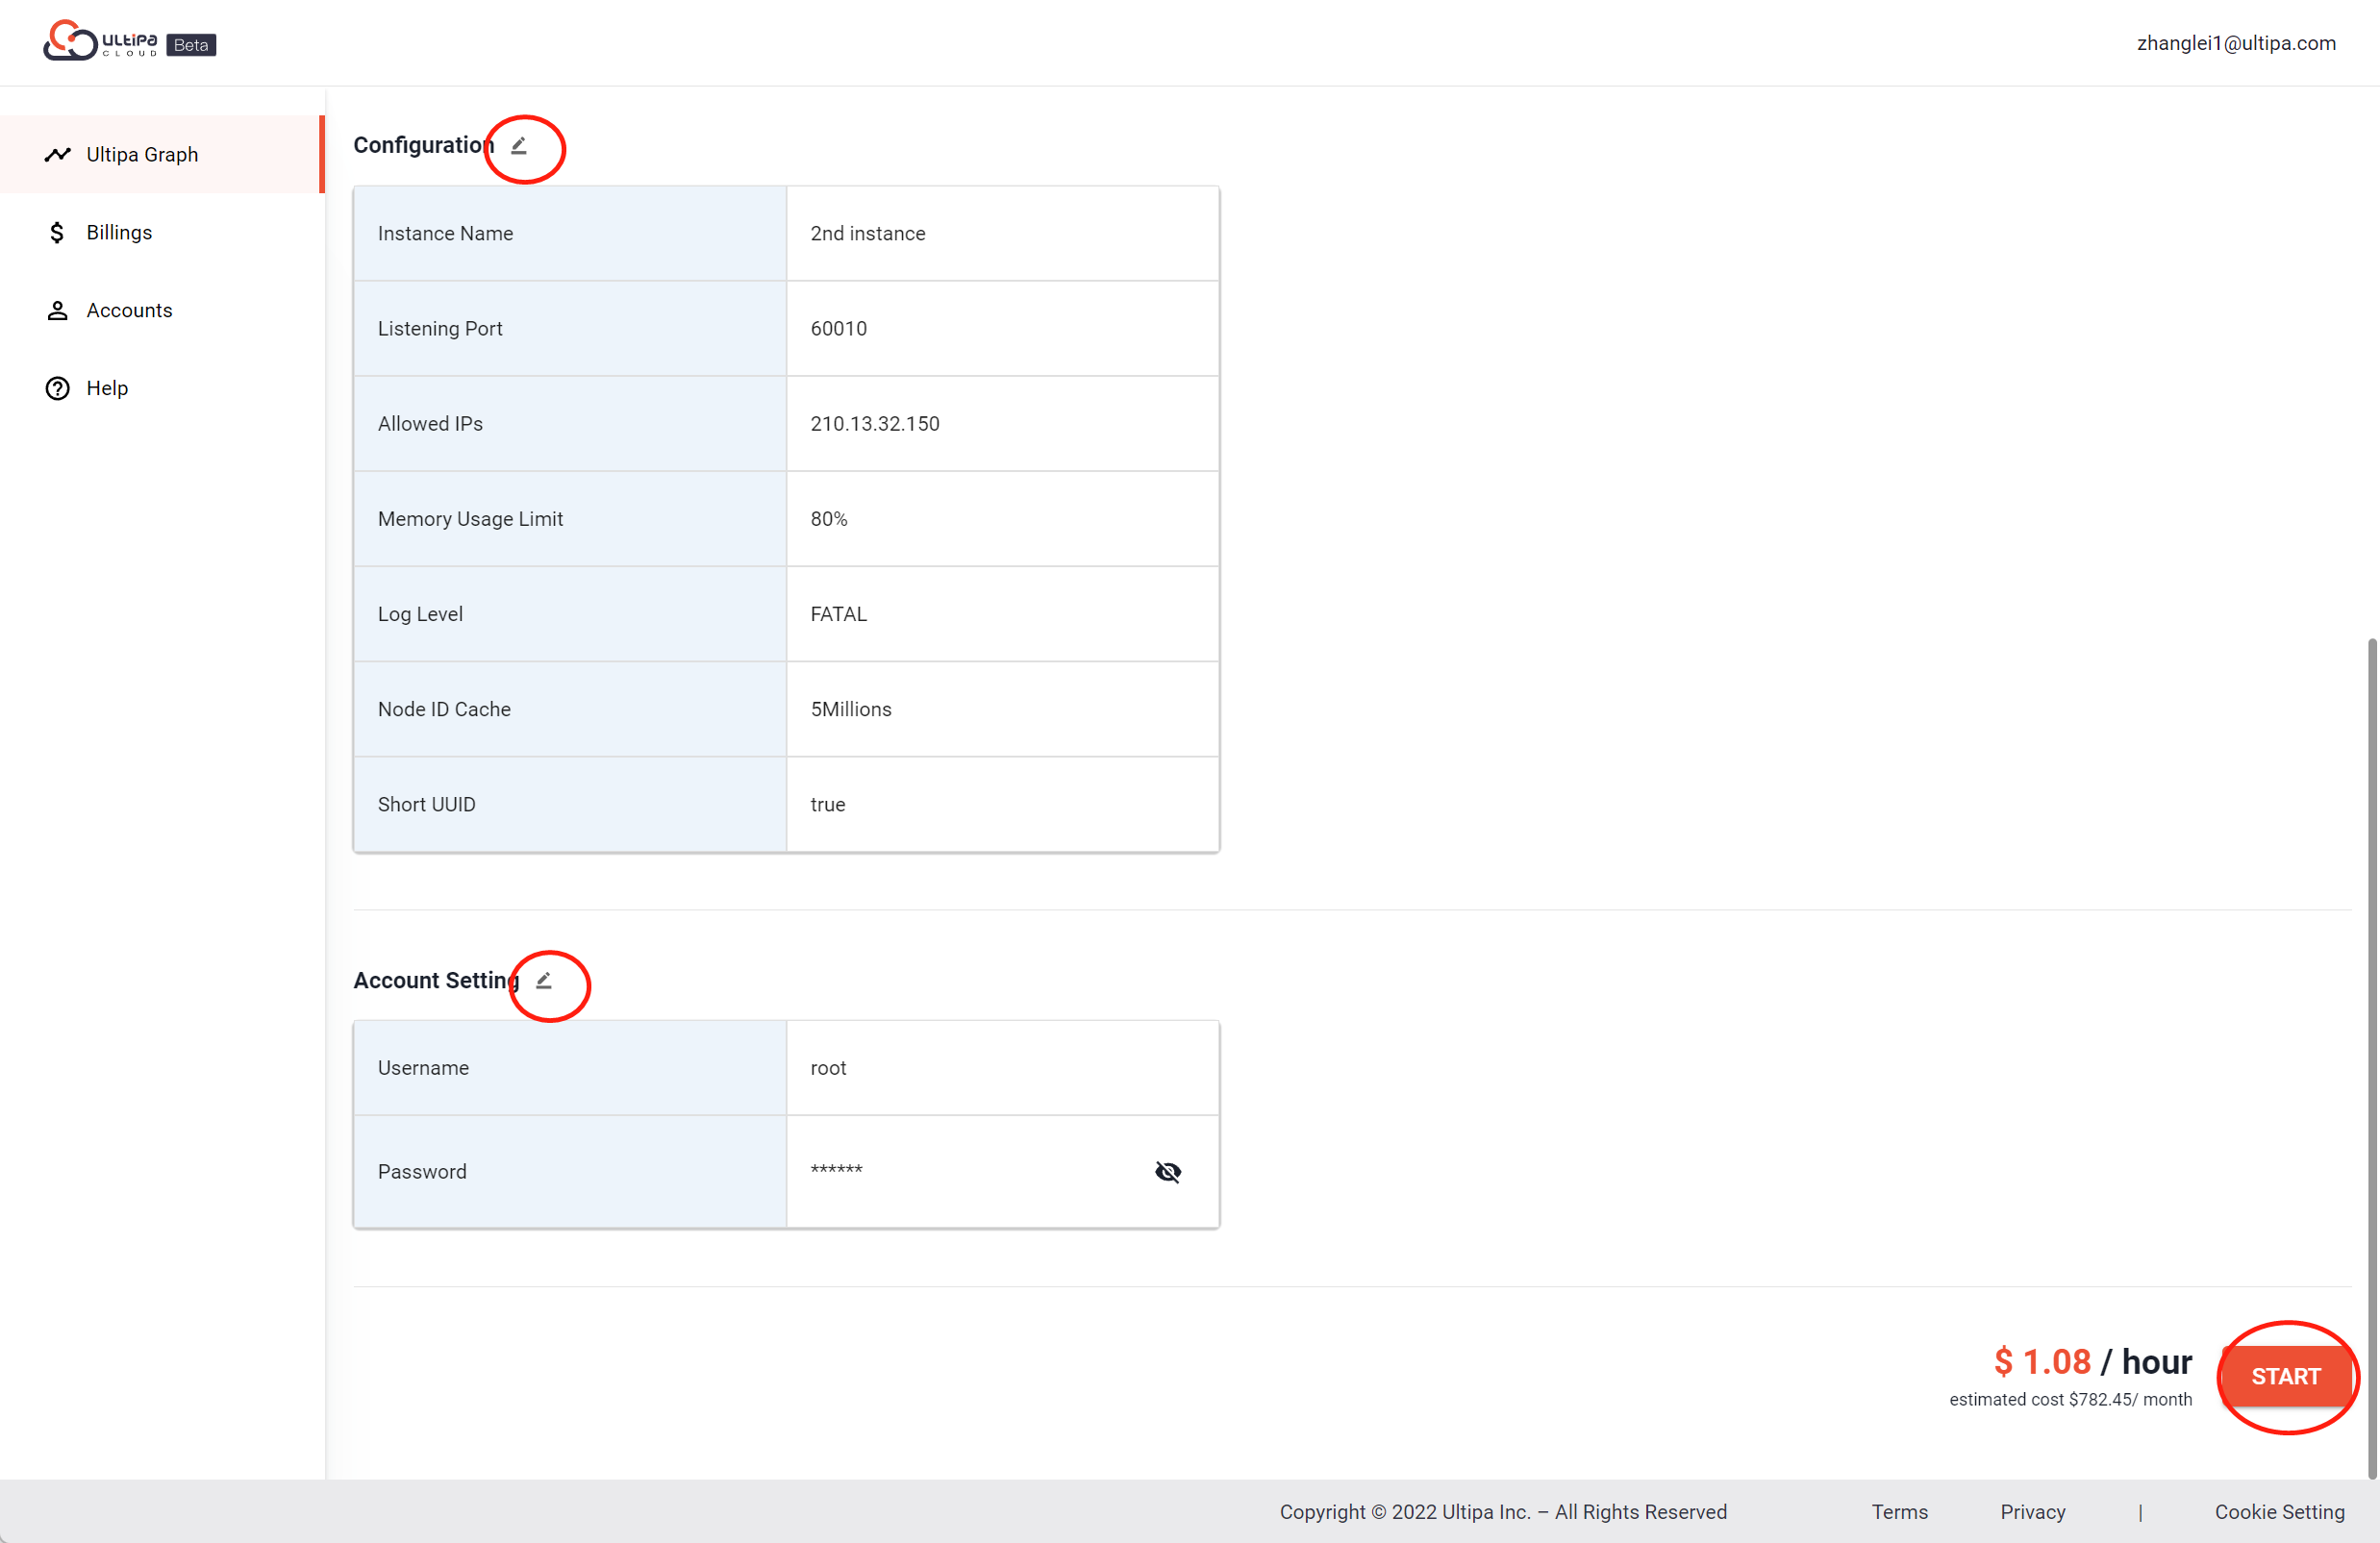
Note: A valid payment method is required to be attached to user's cloud accounts before the instance gets started. There will be a popup window for user to submit payment method information if users haven't added any payment method before starting the instance. For details on adding a payment method, please refer to Billings-Payment Method.