
This page shows how to use Ultipa Manager and Ultipa Transporter-Importer to import data files into a GraphSet.
Graph data used in this article comply to the graph model as introduced in Prepare Graph
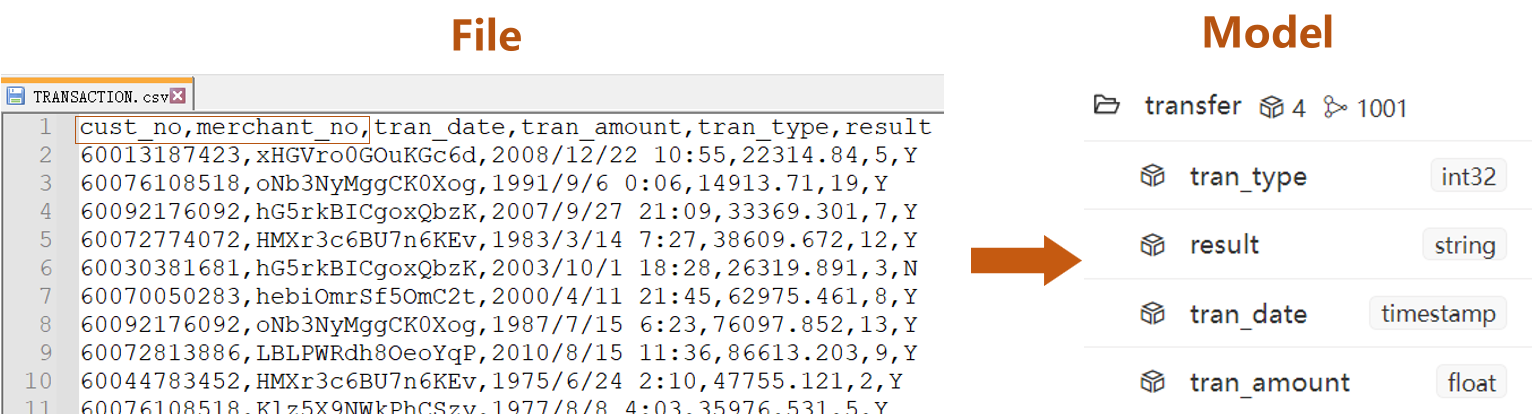
Data File
Prepare a CSV file for each schema in the graph model, which are CUSTOMER.csv, MERCHANT.csv and TRANSACTION.csv. (click to download)

- Columns led by headers
cust_noin node file CUSTOMER.csv andmerchant_noin node file MERCHANT.csv are system property_idof node - The rest of columns are custom properties
- Columns led by headers
cust_noandmerchant_noin edge file TRANSACTION.csv are system properties_fromand_toof edge - The rest of columns are custom properties
Import via Manager
- Import nodes before importing edges
Step Breakdown (for node)
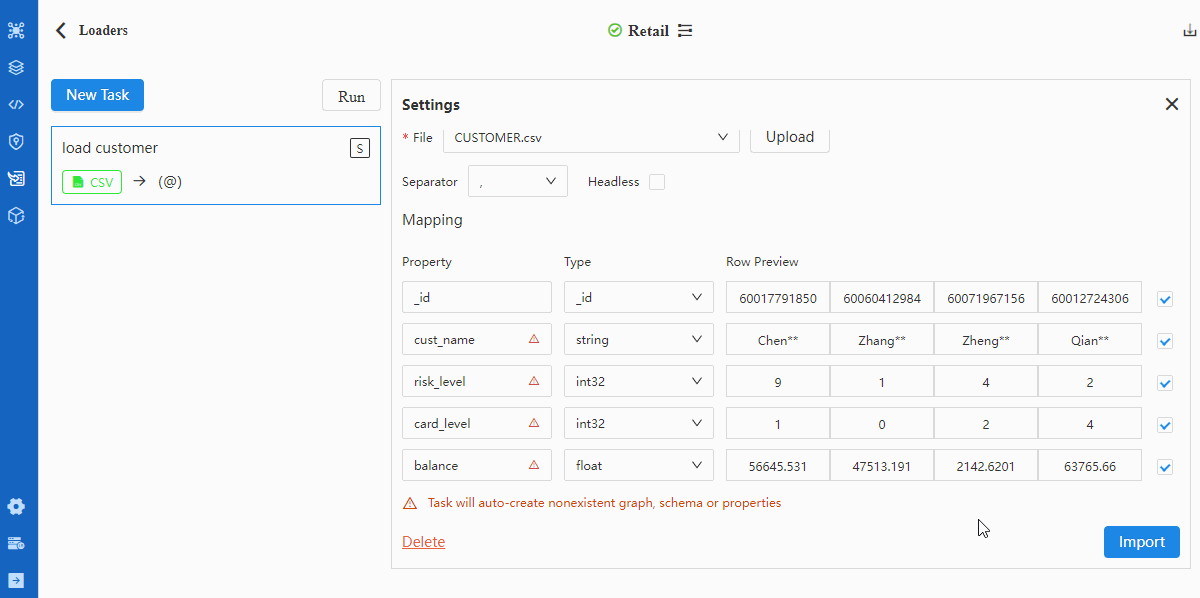
Take importing node file CUSTOMER.csv as an example, the operation includes 5 steps:
- Create Loader
- Create Task
- Configure Settings

Details of configuration items in Settings can be found in documentation of Loader.
- Configure File
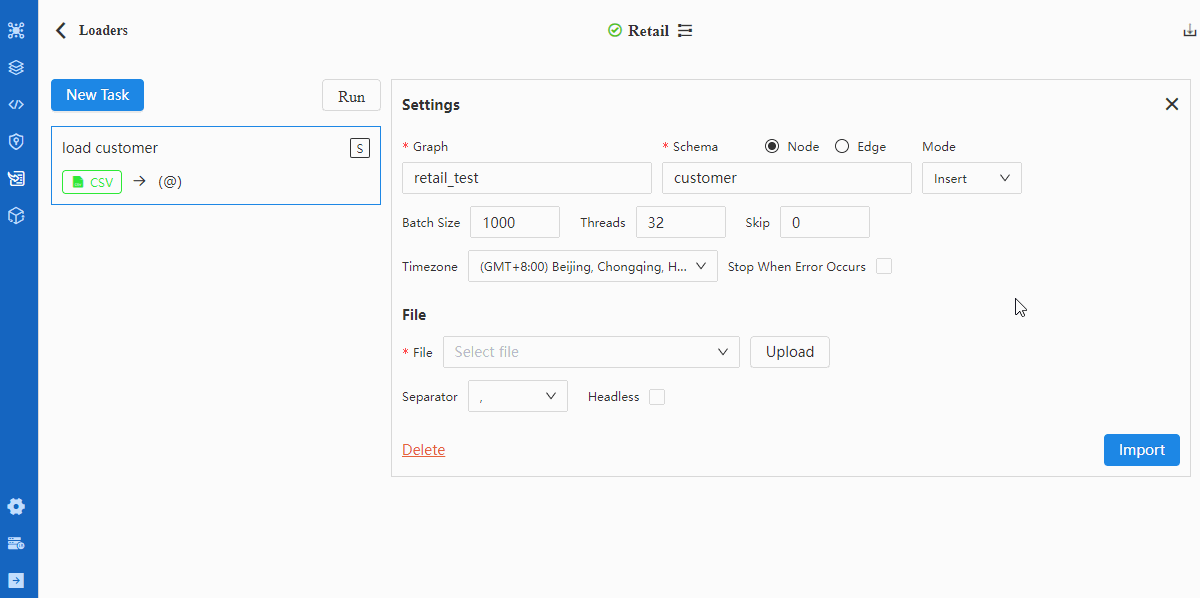
Tips when mappting data fields with properties:
- A red triangle △ for a Property indicates the header does not match with any property under the selected schema, in which case the respective property will be automatically created if the data of this header are to be imported (square box at the left most end checked)
- Configuration item 'Headless' should be checked if the CSV file is headless, in which case the first row of data indicated by the Property should be modified into property names as they each represent
Details of configuration items in Files can be found in documentation of Loader.
Data files in this example use comma ',' as column delimiter and contain headers; header
cust_nois system property_id.
- Import
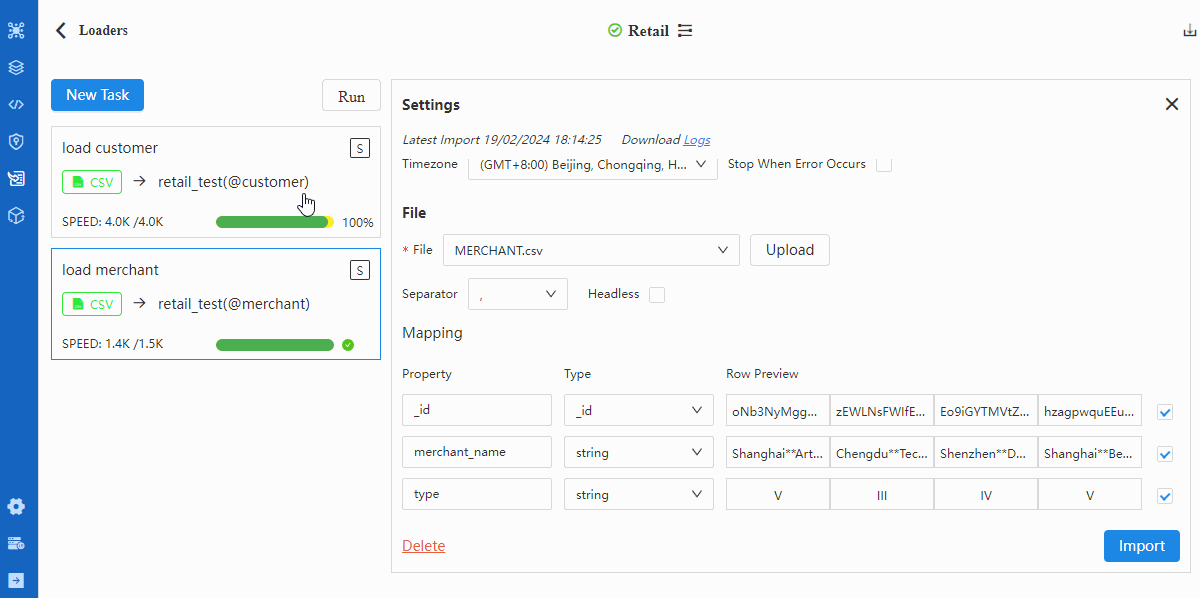
Repeat from step-2 to step-5 to import node file MERCHANT.csv. Make sure in step-3 select merchant as schema and in step-4 select
_idas Type ofmerchant_no.
Complete Demo (for edge)
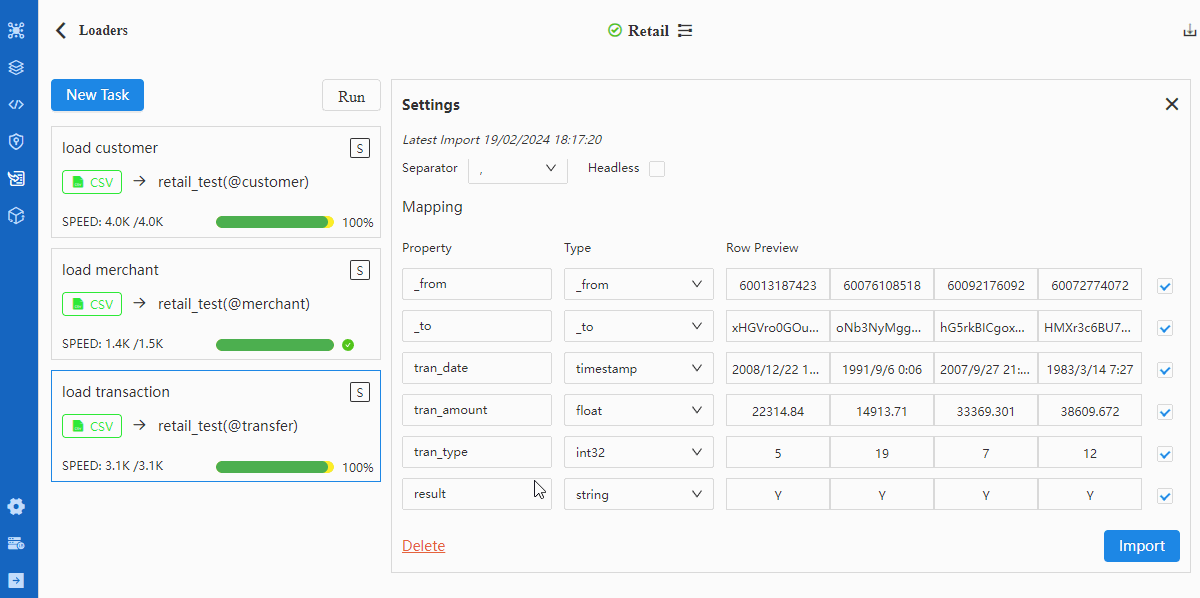
Repeat from step-2 to step-5 to import edge file TRASACTION.csv. Make sure in step-3 switch to 'Edge', in step-3 select transfer as schema and in step-4 select _from and _to as Type of cust_no and merchant_no.
Verification
Import via Transporter
Comparing with Manager, the import operation via Transporter-Importer supports recognition of property types from file headers, such as:
The import operation via Transporter-Importer includes 2 steps:
- Prepare YML file
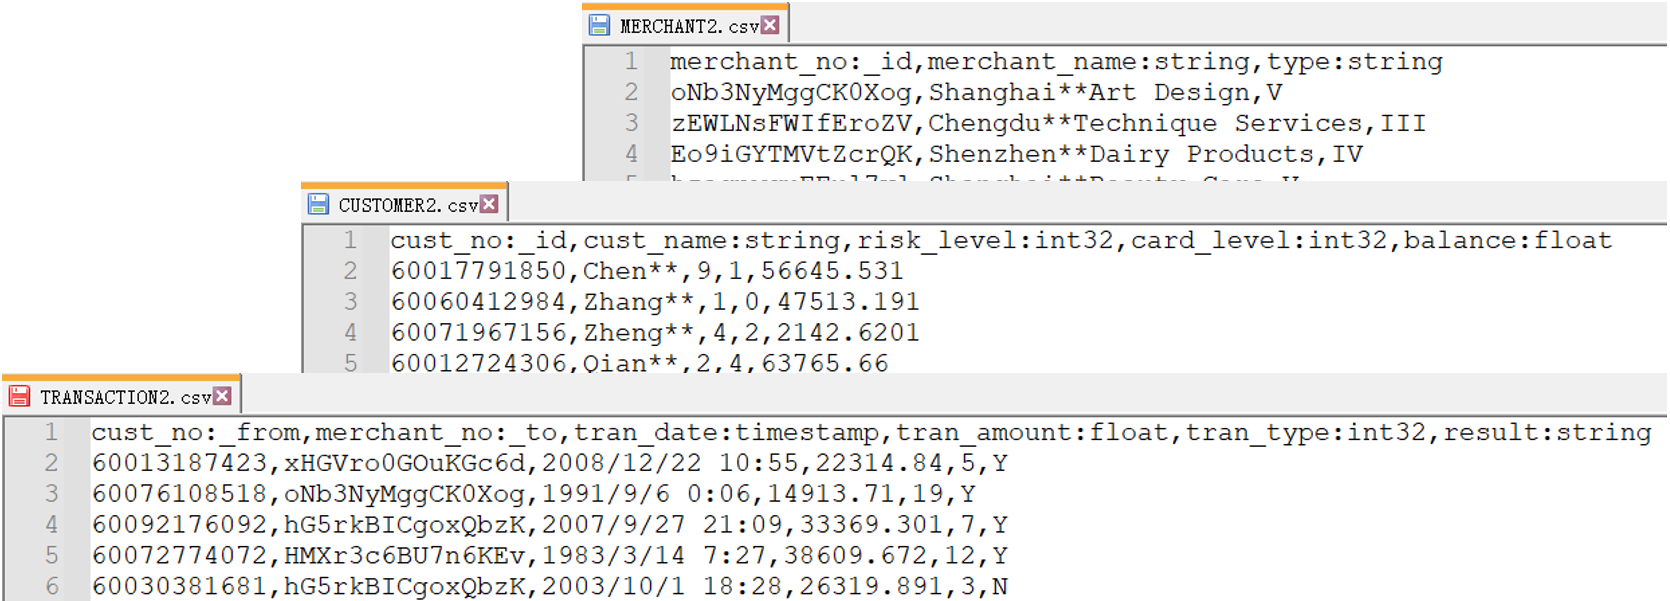
Declare information about Ultipa server and data files in a YML file. Below is part of the YML file:
nodeConfig:
  - schema: "customer"
    file: "./CUSTOMER2.csv"
  - schema: "merchant"
    file: "./MERCHANT2.csv"

edgeConfig:
  - schema: "transfer"
    file: "./TRANSACTION2.csv"
- Download the file package YML_CSV that contains the complete YML file and the data files with updated headers
- Extract this package and keep all the files in one folder
- Make sure you update the server information in the YML file with the one you deployed
See annotations about parameters in the YML file, or read more about the YML file in Import Config.
- Run Ultipa Importer in a command line tool
Place the Importer tool 'ultipa-importer' in the same folder with the extracted YML file and data files, run a command line tool under the same folder and execute command below:
./ultipa-importer --config ./import_retail.yml
Start a command line tool compatible with your system, e.g., right-click the blank space in the folder and click 'Open in Terminal' in an Ubantu system, or shift-right-click and 'Show More' and 'Open in Powershell' in a Windows system.
If message is received as
bash: ./ultipa-importer: Permission deniedwhen running the above command, it suggests that relevant execution privileges are not granted; runchmod +x ultipa-importerto grant privileges required and run the command again.