
In the Schema module, you can oversee and manage all node and edge schemas and properties for the currently selected graph.
Schemas and Properties
Node/Edge Folder

Schemas and properties of nodes and edges are managed separately in two folders. The total number of nodes (or edges) is displayed next to Node (or Edge).
Operation:
- New Schema: Click to add new node (or edge) schema.
Schema Folder
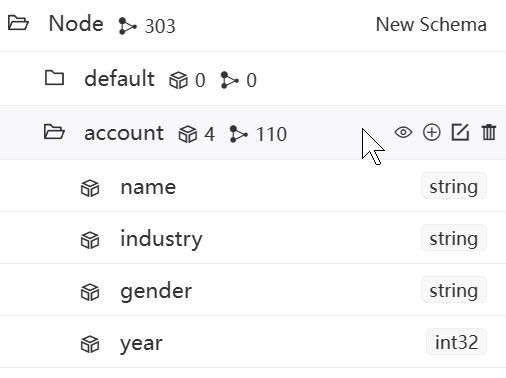
The number of properties and the count of nodes (or edges) for the schema are displayed next to the schema name.
Operations:
- View: Clicking the view icon sends the corresponding UQL to the UQL Editor. Running the UQL allows you to view a limited number of nodes (or edges) for the schema.
- Add: Create new property for the schema.
- Edit: Modify the name and description of the schema.
- Delete: Delete the schema. Nodes (or edges) associated with the schema will also be deleted.
You can modify the default limit number of returned nodes or edges when viewing a schema under Settings > Limit.
Property

Operations:
- Data Type Tag: The data type of a property cannot be changed once it's created.
- LTE/UFE: Load the property to the engine (LTE) or unload the property from the engine (UFE). The icon of an LTE-ed property will be highlighted. Learn more about LTE/UFE
- Edit: Modify the name and description of the property.
- Delete: Delete the property.
Schema Overview
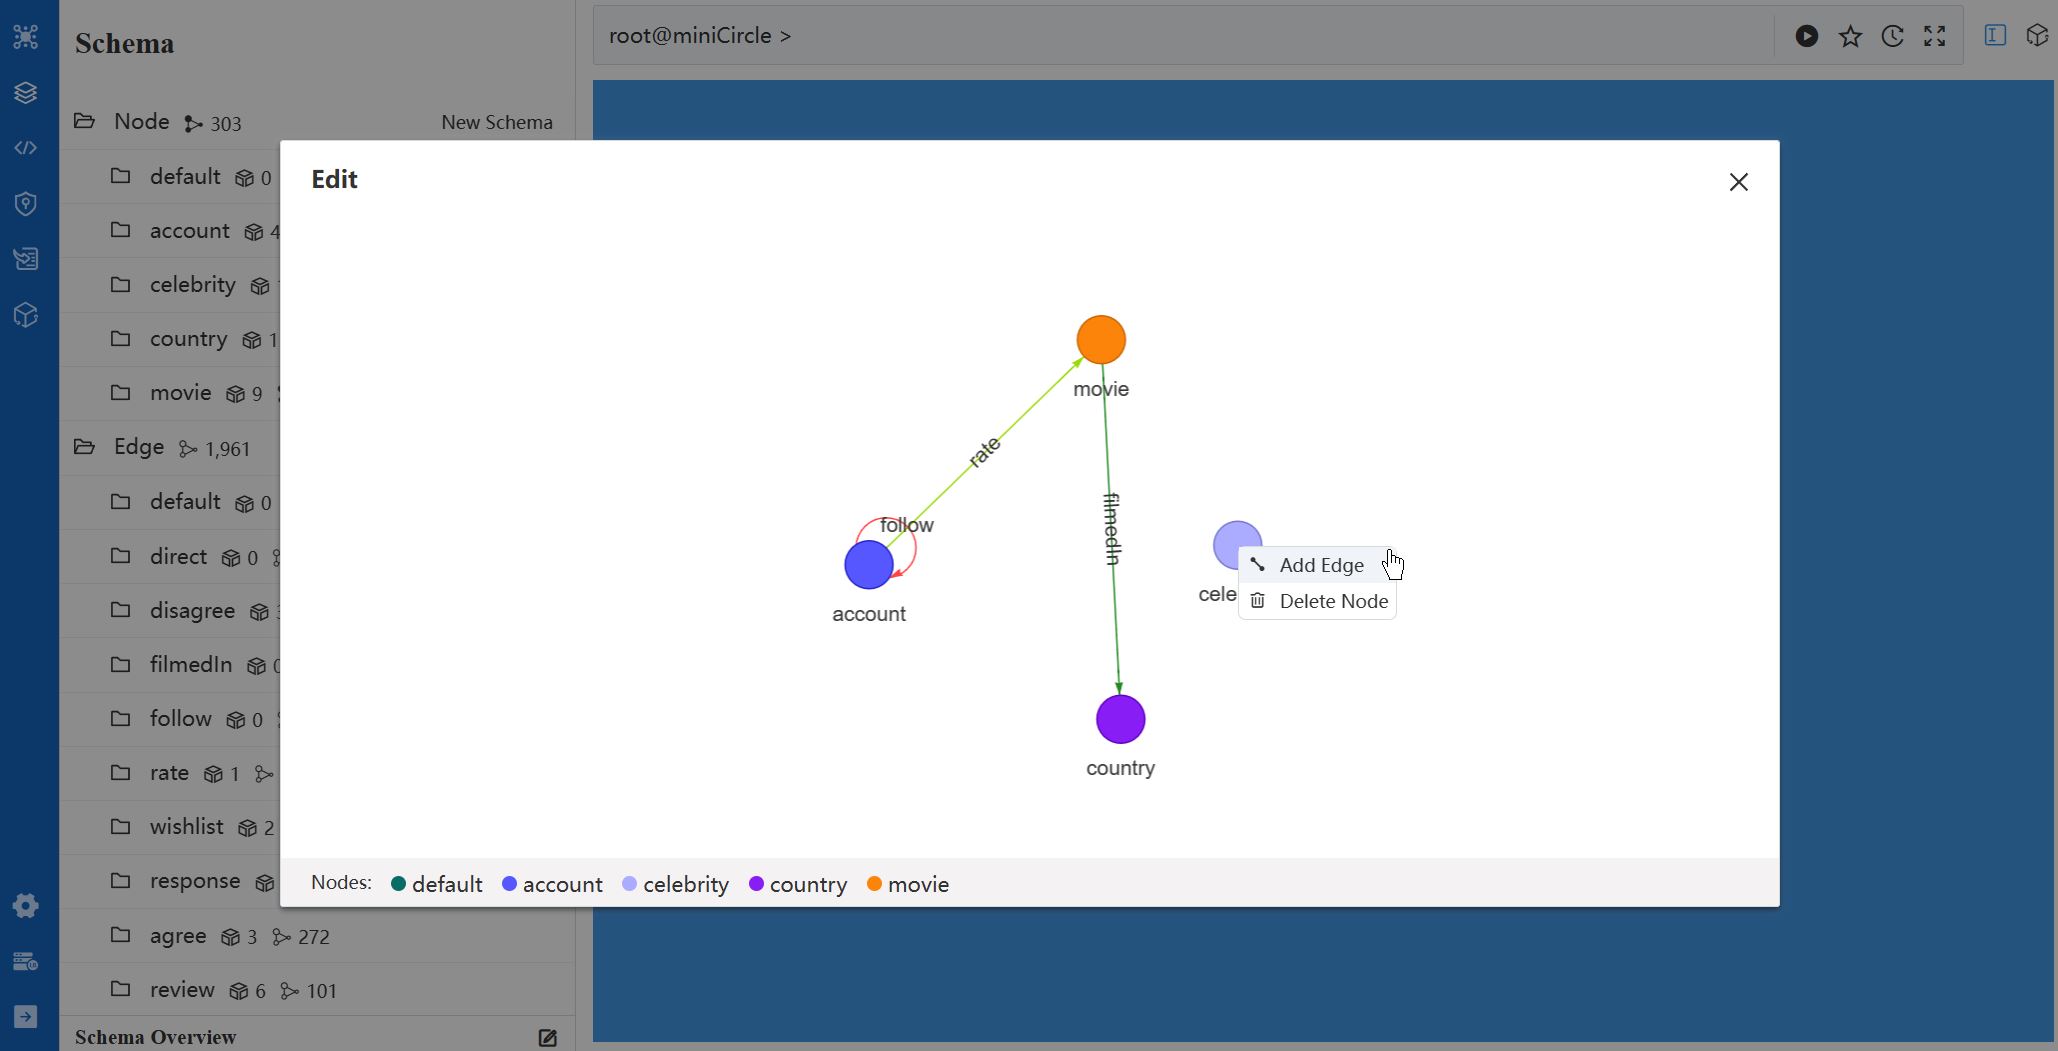
In the Schema Overview, you can visually represent the relationships between node and edge schemas, i.e., the graph model. This is beneficial for a shared understanding of the graph structure and future reference.
Operations:
- All node schemas are listed at the bottom of the canvas. You can drag and drop any of it onto the canvas.
- Right-click on any node schema in the canvas and select Add Edge. A dashed line will appear, connecting your mouse cursor and the node schema. After clicking on another node schema, you can choose the edge schema that you want to add between them.
- Or right-click on any node schema in the canvas and select Delete Node to remove it from the canvas.