This article is based on the retail business graph model built in the previous section and explains how to use Ultipa Manager and Ultipa Transporter-Importer to batch import data into an Ultipa Server.
Prepare data file
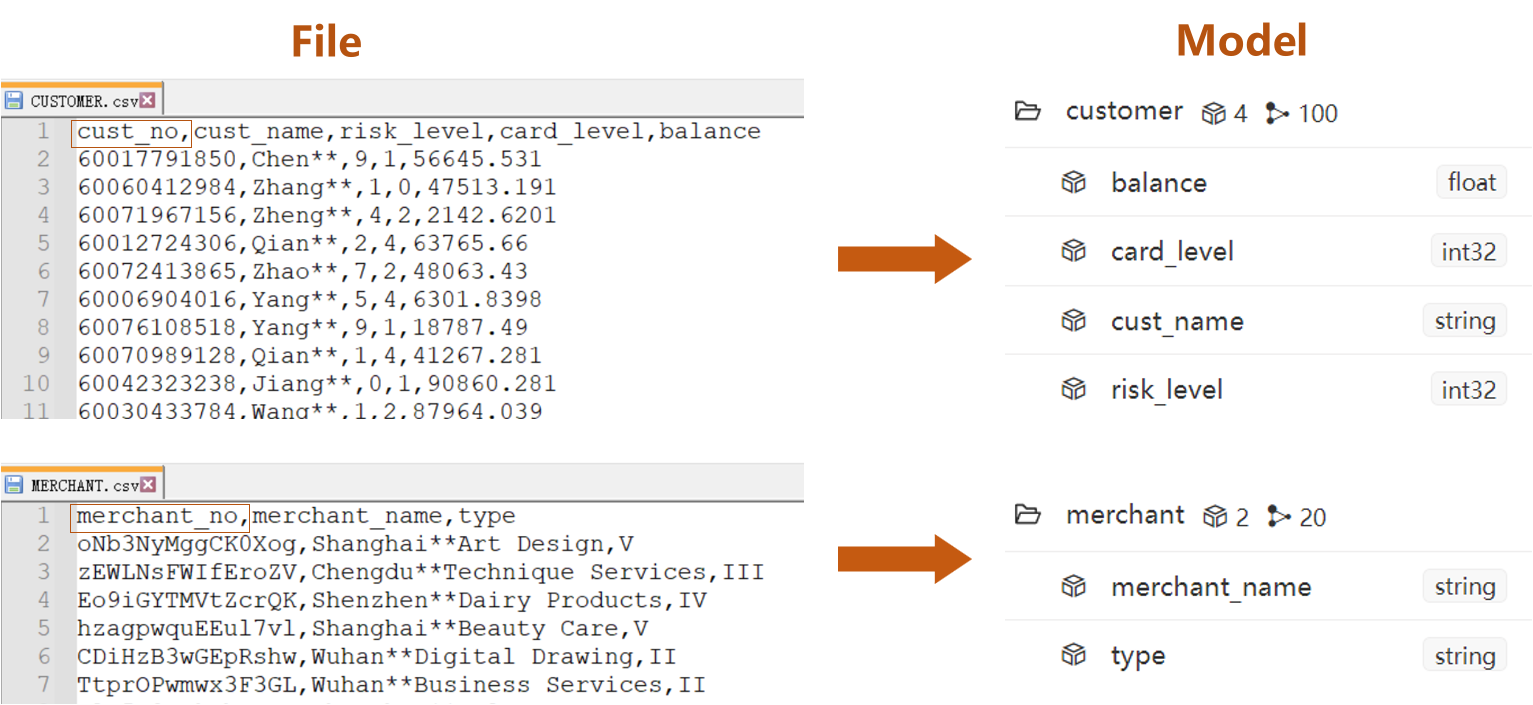
The process of importing graph data files to Ultipa graphset is called graph import. Each graph data file represents a node schema or an edge schema;each row of data (excluding the column header) in the file represents a node or an edge, each data column represents a property; column delimiters such as ,
,\t
,|
, and ;
are supported.
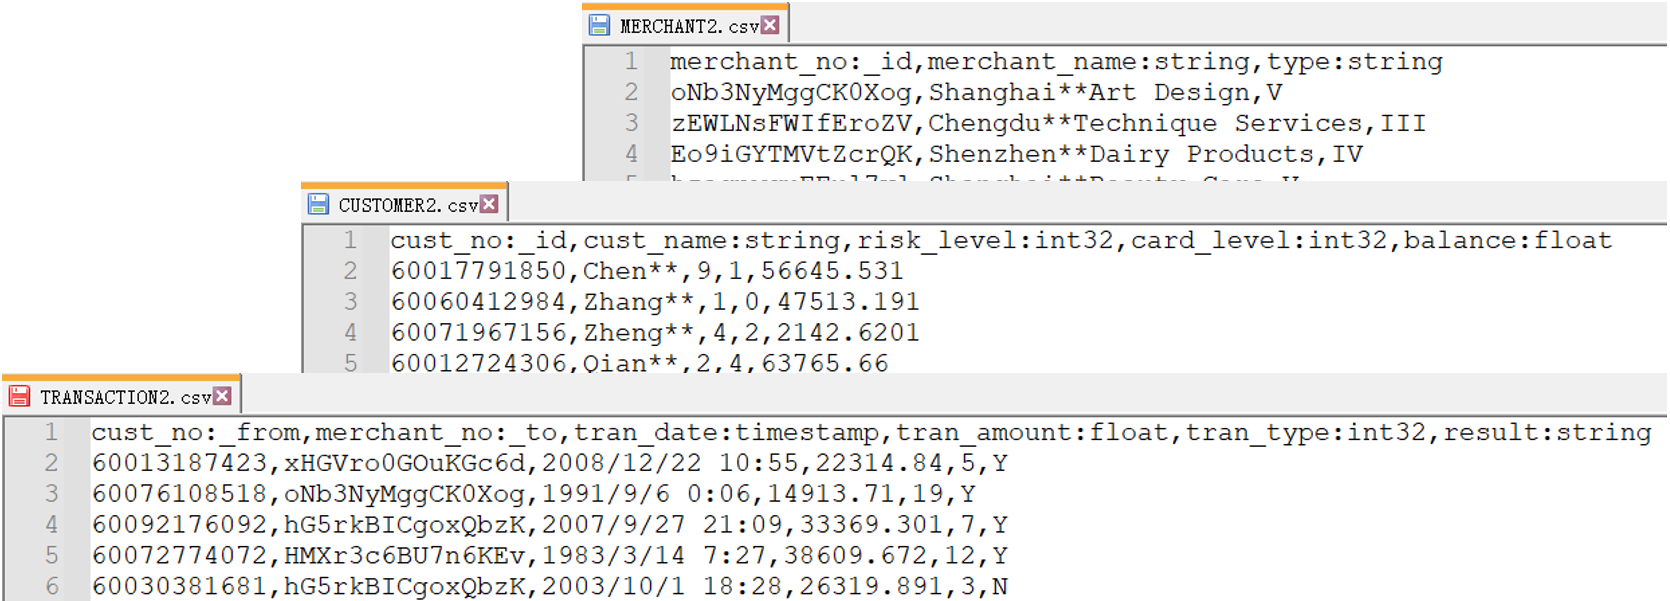
The below are the data files of schemas customer
, merchant
, and transfer
, with file names CUSTOMER.csv, MERCHANT.csv, and TRANSACTION.csv:

Download the 3 files in CSV format:CUSTOMER.csv,MERCHANT.csv,TRANSACTION.csv
These files use comma ,
as column delimiter. The cust_no
and merchant_no
in the column headers represent either the _id
of node or _from
and _to
of edge, these headers should be altered as the correct system property names, either by revising the files or by declaring during the graph import operation.
Graph Import via Manager
The graph import via Manager is an easy and highly-visualized procedure.
Prepare graphset and Schema
Make sure the graphset and graph model (node schema and edge schema) have been created before importing graph via Manager.
- Create graphset
Run the UQL command in the CLI window on top of Manager to create graphset:
create().graph("retail_test")
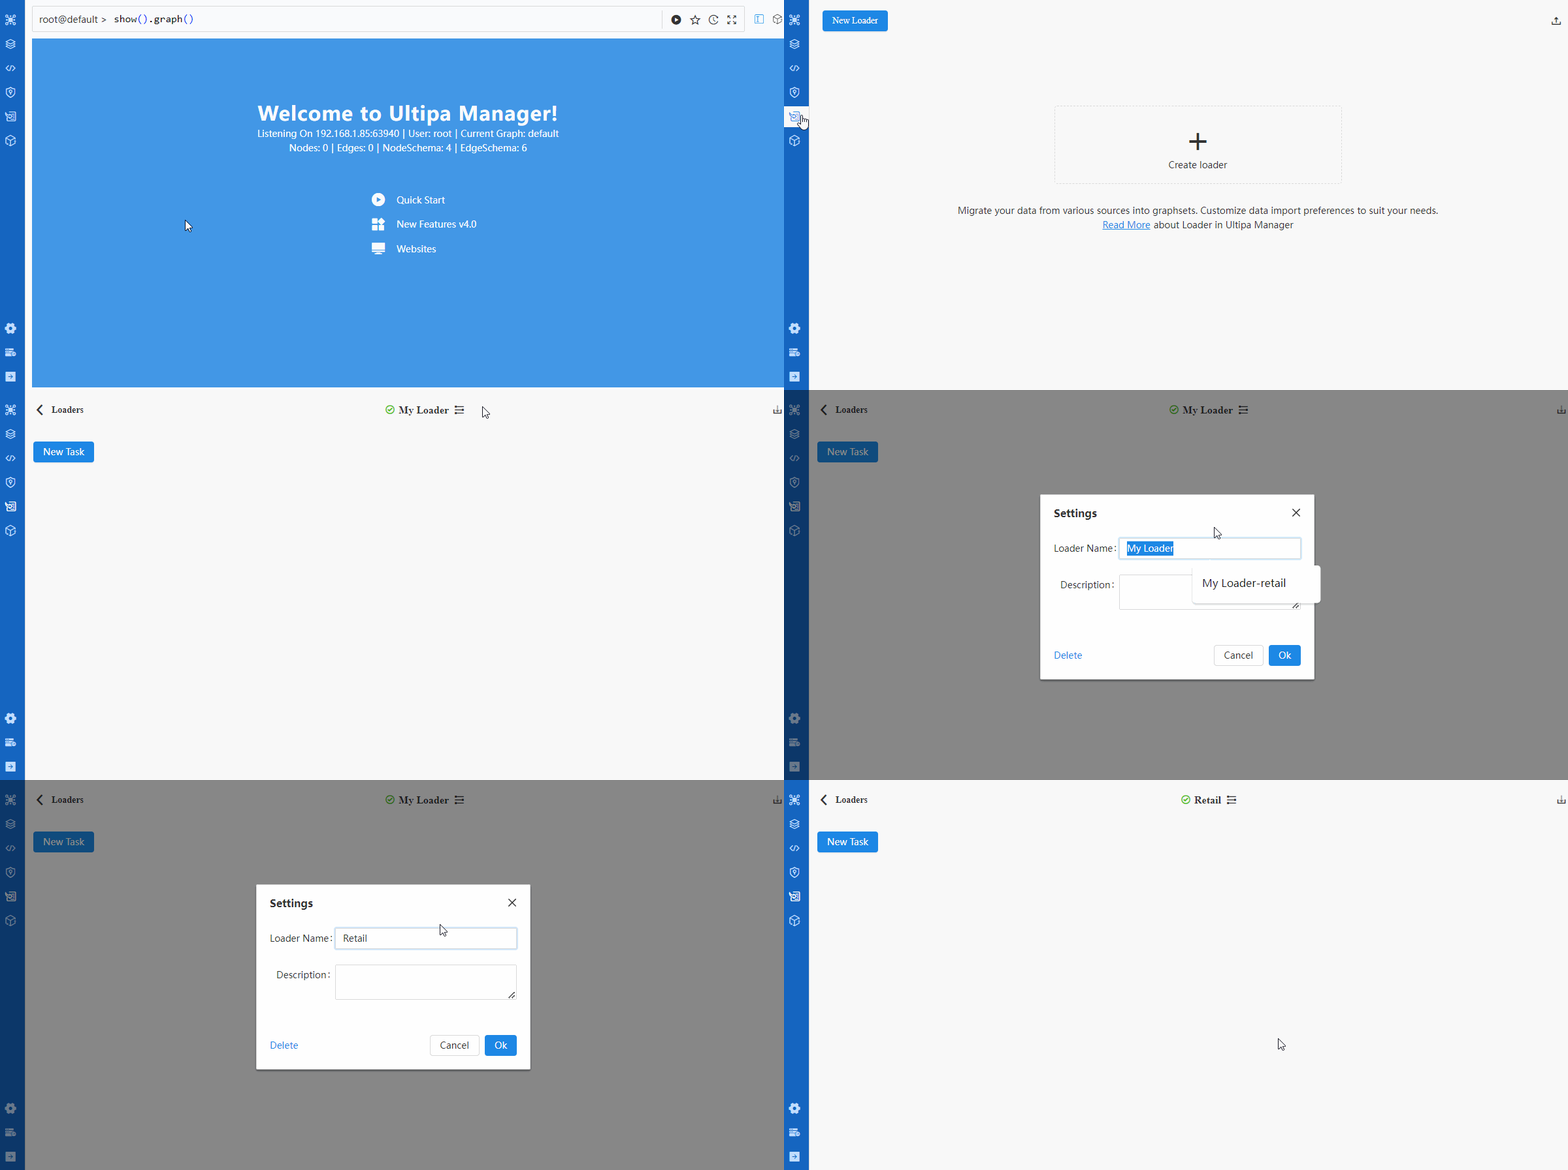
Or create graphset via UI interface:

Note: don't forget to switch to the new graphset after the graph is created.
- Create schema
Run the UQL command in the CLI window on top of Manager to create schemas:
create()
.node_schema("customer")
.node_schema("merchant")
.edge_schema("transfer")
Or create schemas via UI interface:

Import node data
Due to the fact that the nodes represented by the
_from
and_to
of edge must already exist in the graphset when importing edges, node data has to be imported prior to edge data.
Take importing CUSTOMER.csv as an example,the operation includes 4 steps:
- Upload files
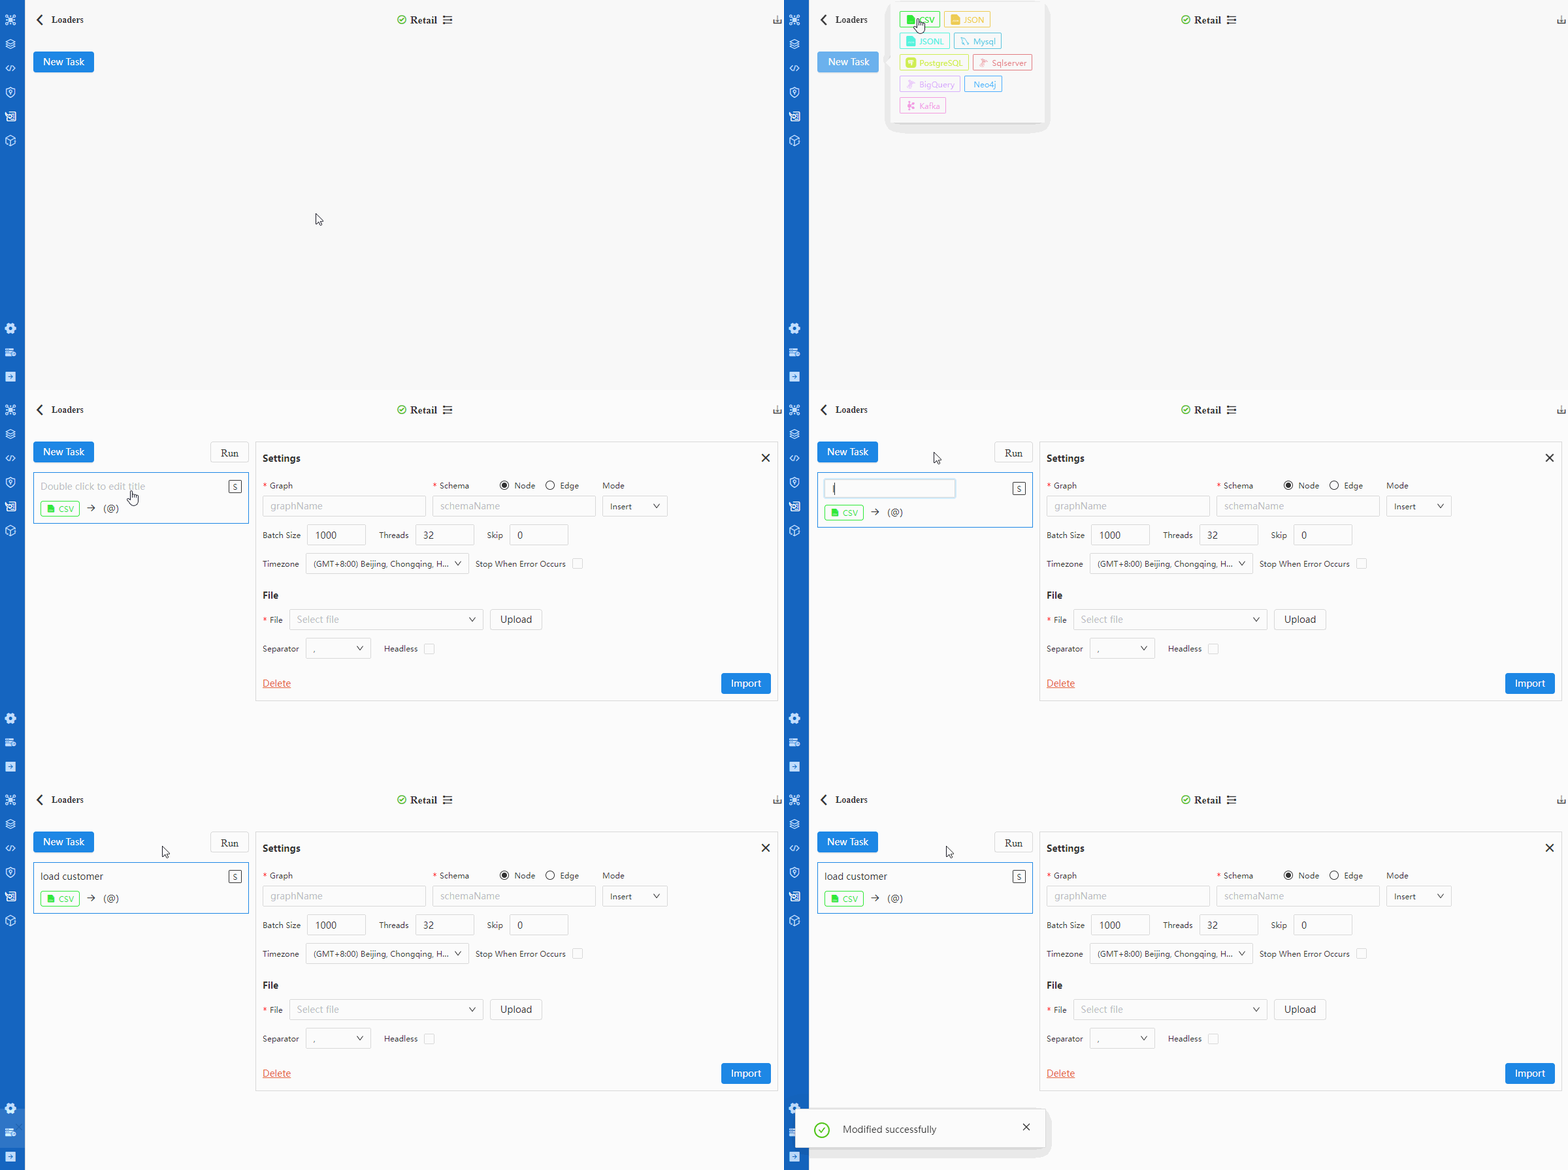
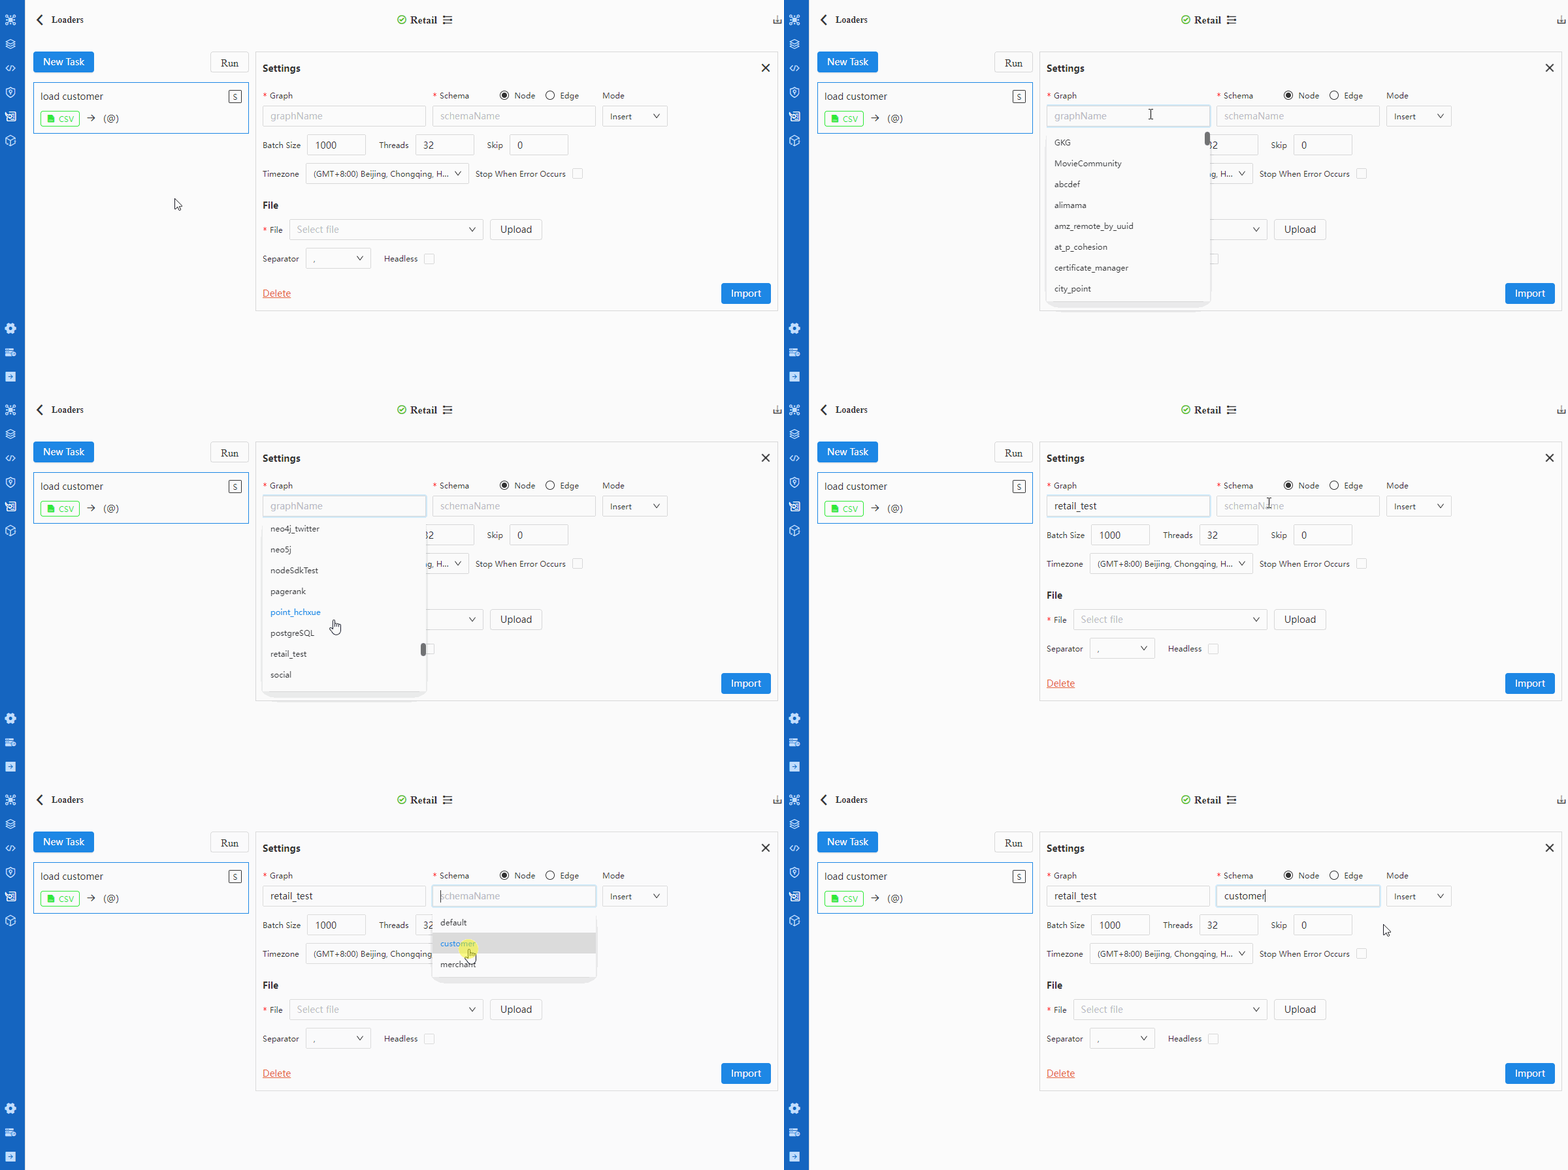
Click 'File' on the left menu of Manager,find "Import" in the popup panel and click '+' on the right,choose '+ Node' and upload the CUSTOMER.csv from local path:

- State delemiter and headers
This step affects whether the data columns and headers can be correctly identified. The CUSTOMER.csv file uses ,
as column delemiter and has headers, complete these selections and click 'Preview' to check that the data columnes are separated properly, and the headers are identified, not being taken as a node record):

- State schema and property data types
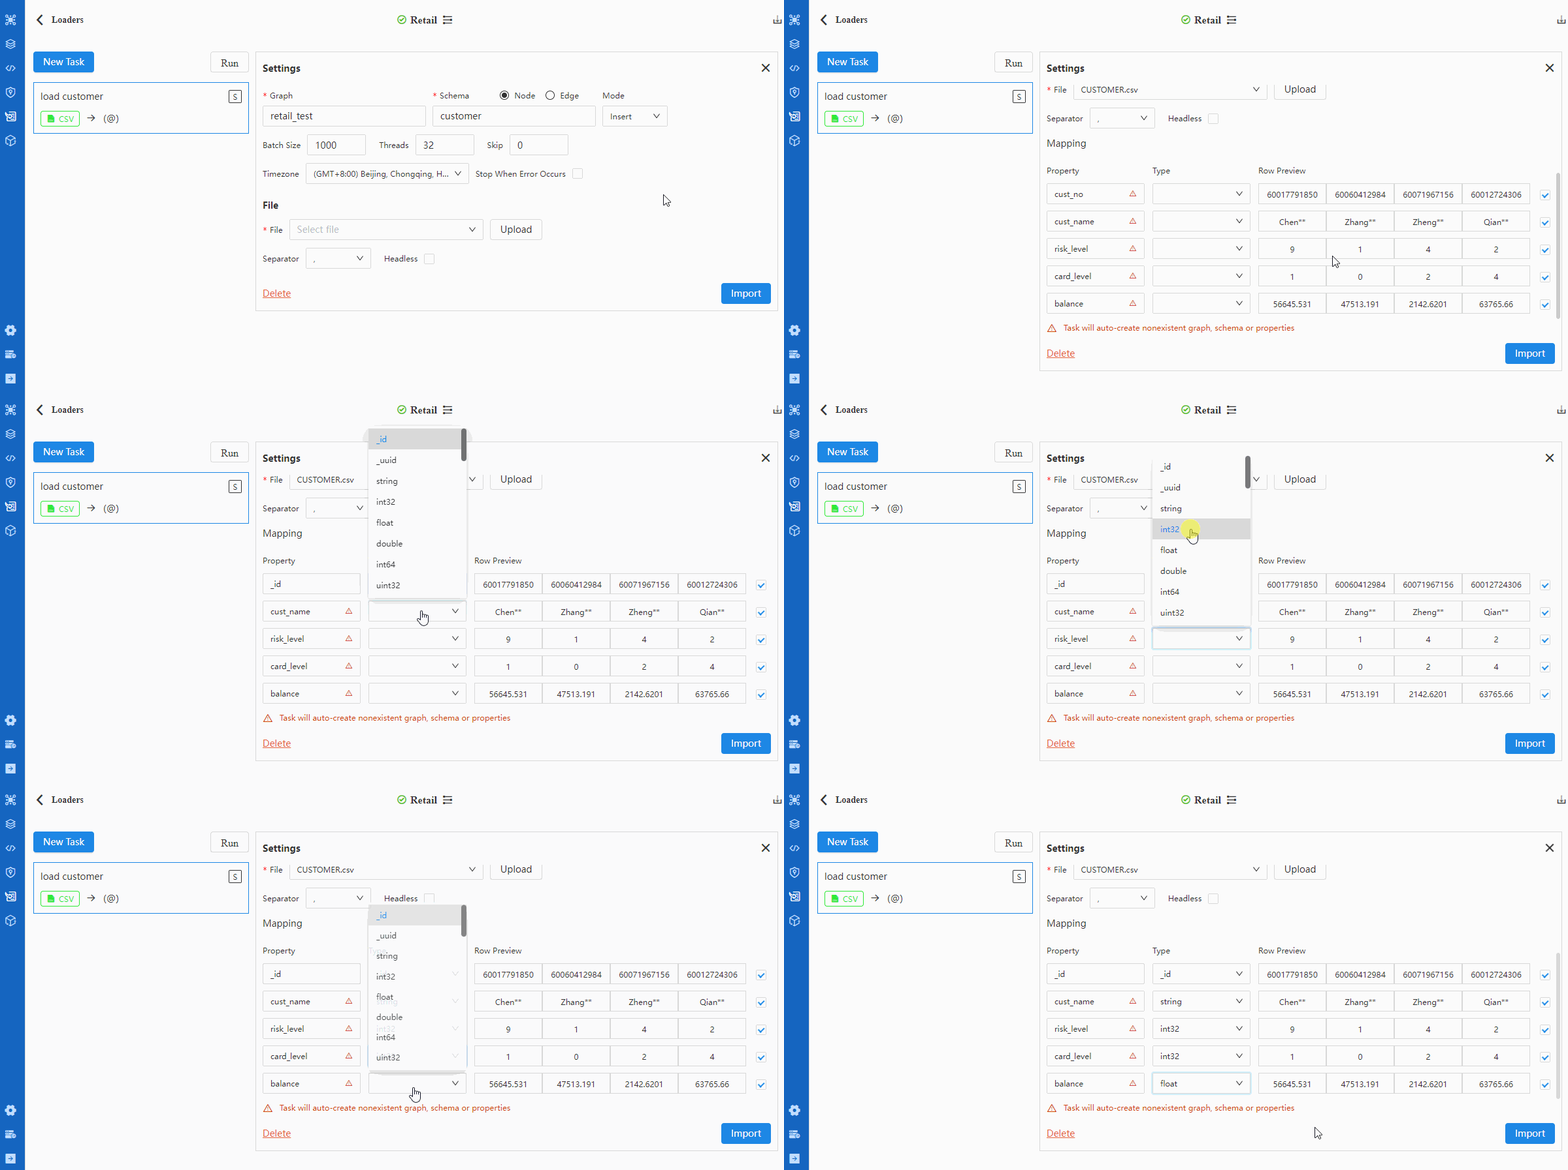
This step affects whether the data columns can be identified (or created) as the properties they represent. As the CUSTOMER.csv represents node schema customer
, choose customer
from the schema list. The red triangular icons on the left side indicate the properties that are not yet in the schema customer
. Frist, change cust_no
into _id
and find the red triangular icon disappeared, representing the column has been identified as the system property _id
; then create the rest of the columns as custom properties by filling their data types and clicking the '+' on bottom. When all red triangles disappear, all properties are created.

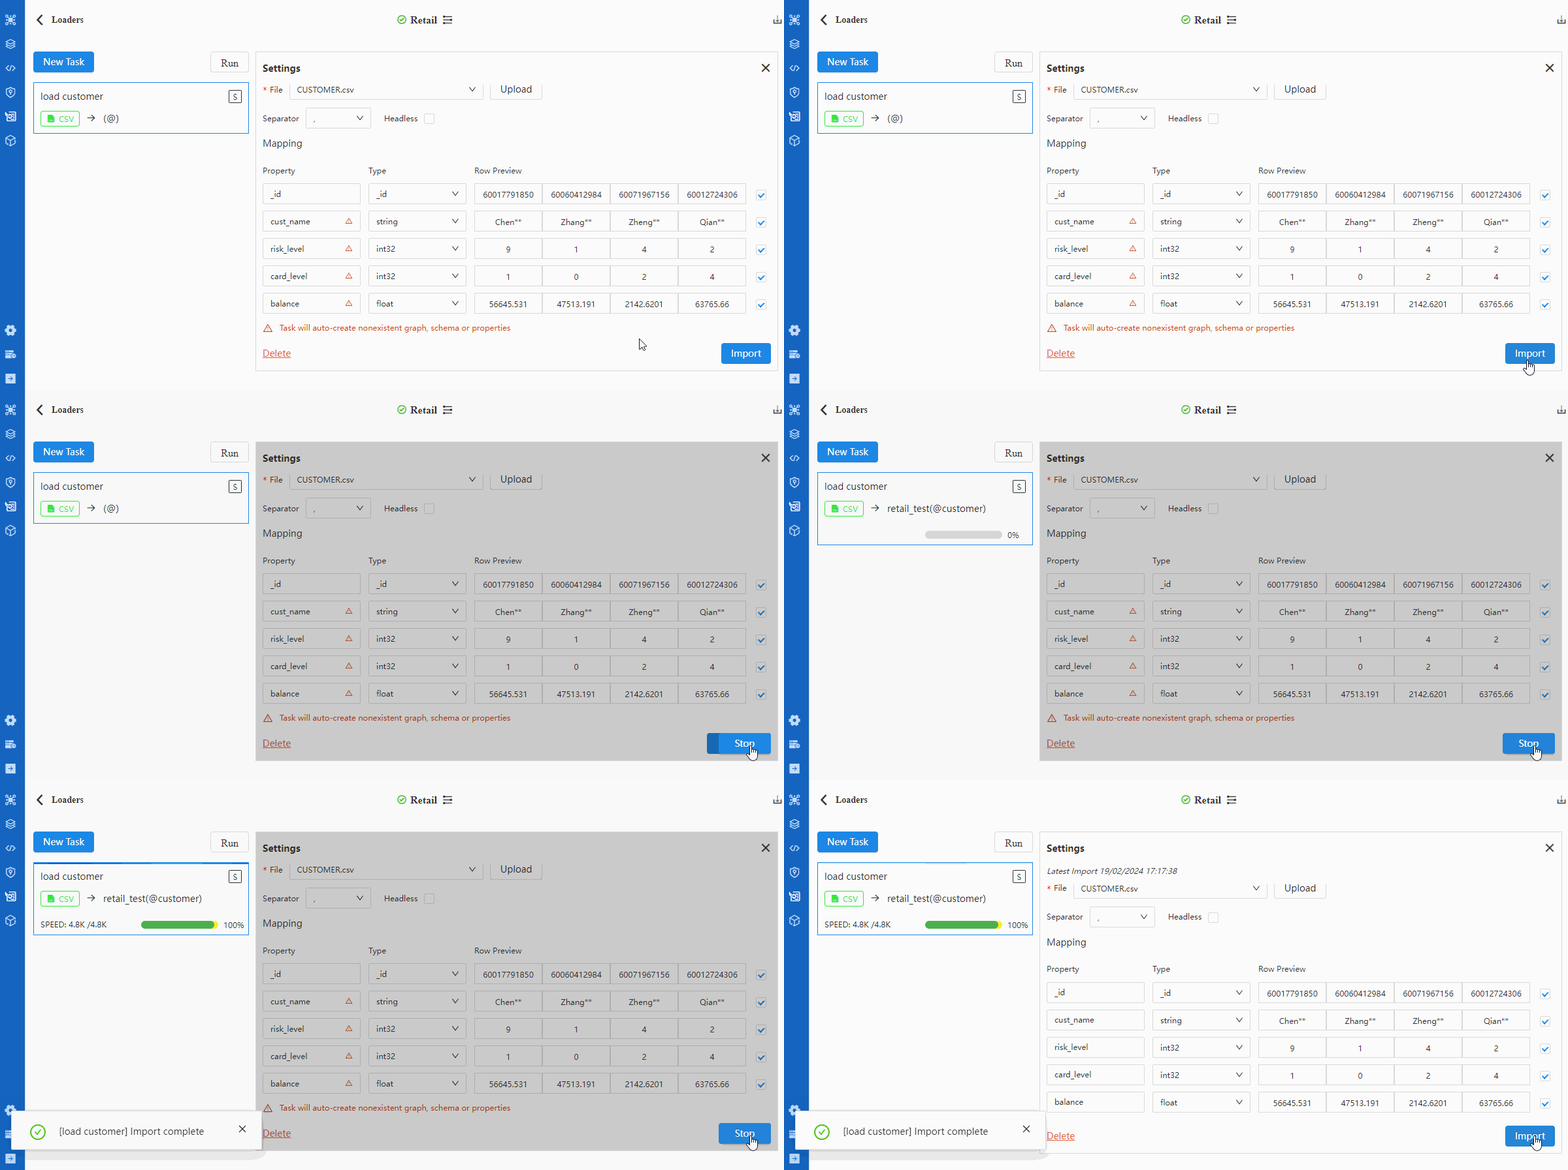
- Import
When importing files, users can choose to upsert or overwrite. As for importing new data, both modes work the same.

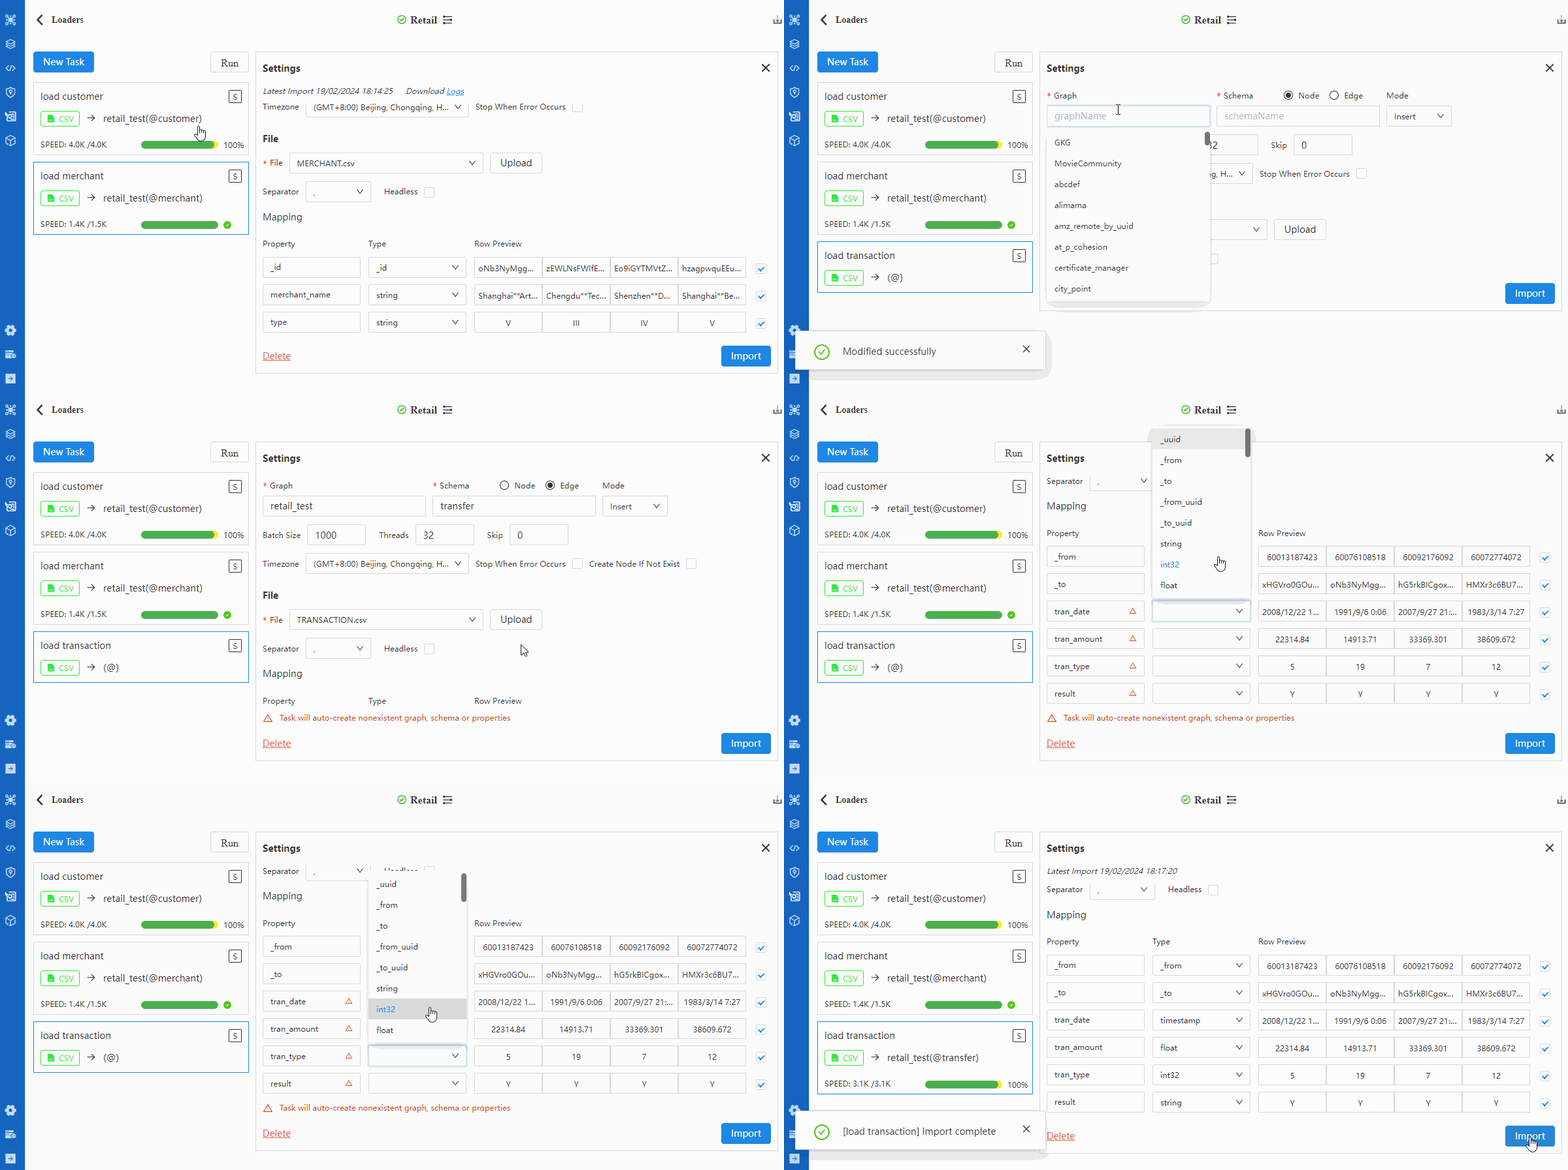
Importing MERCHANT.csv file is similar to operations above.
Import edge data
After inputting node files CUSTOMER.csv and MERCHANT.csv, we are ready to import edge file TRANSACTION.csv. Choose '+ Edge' and select file path; select transfer
from schema list, change column headers cust_no
and merchant_no
into _from
and _to
respectively, and also create the rest of data columns as custom properties.

Verification
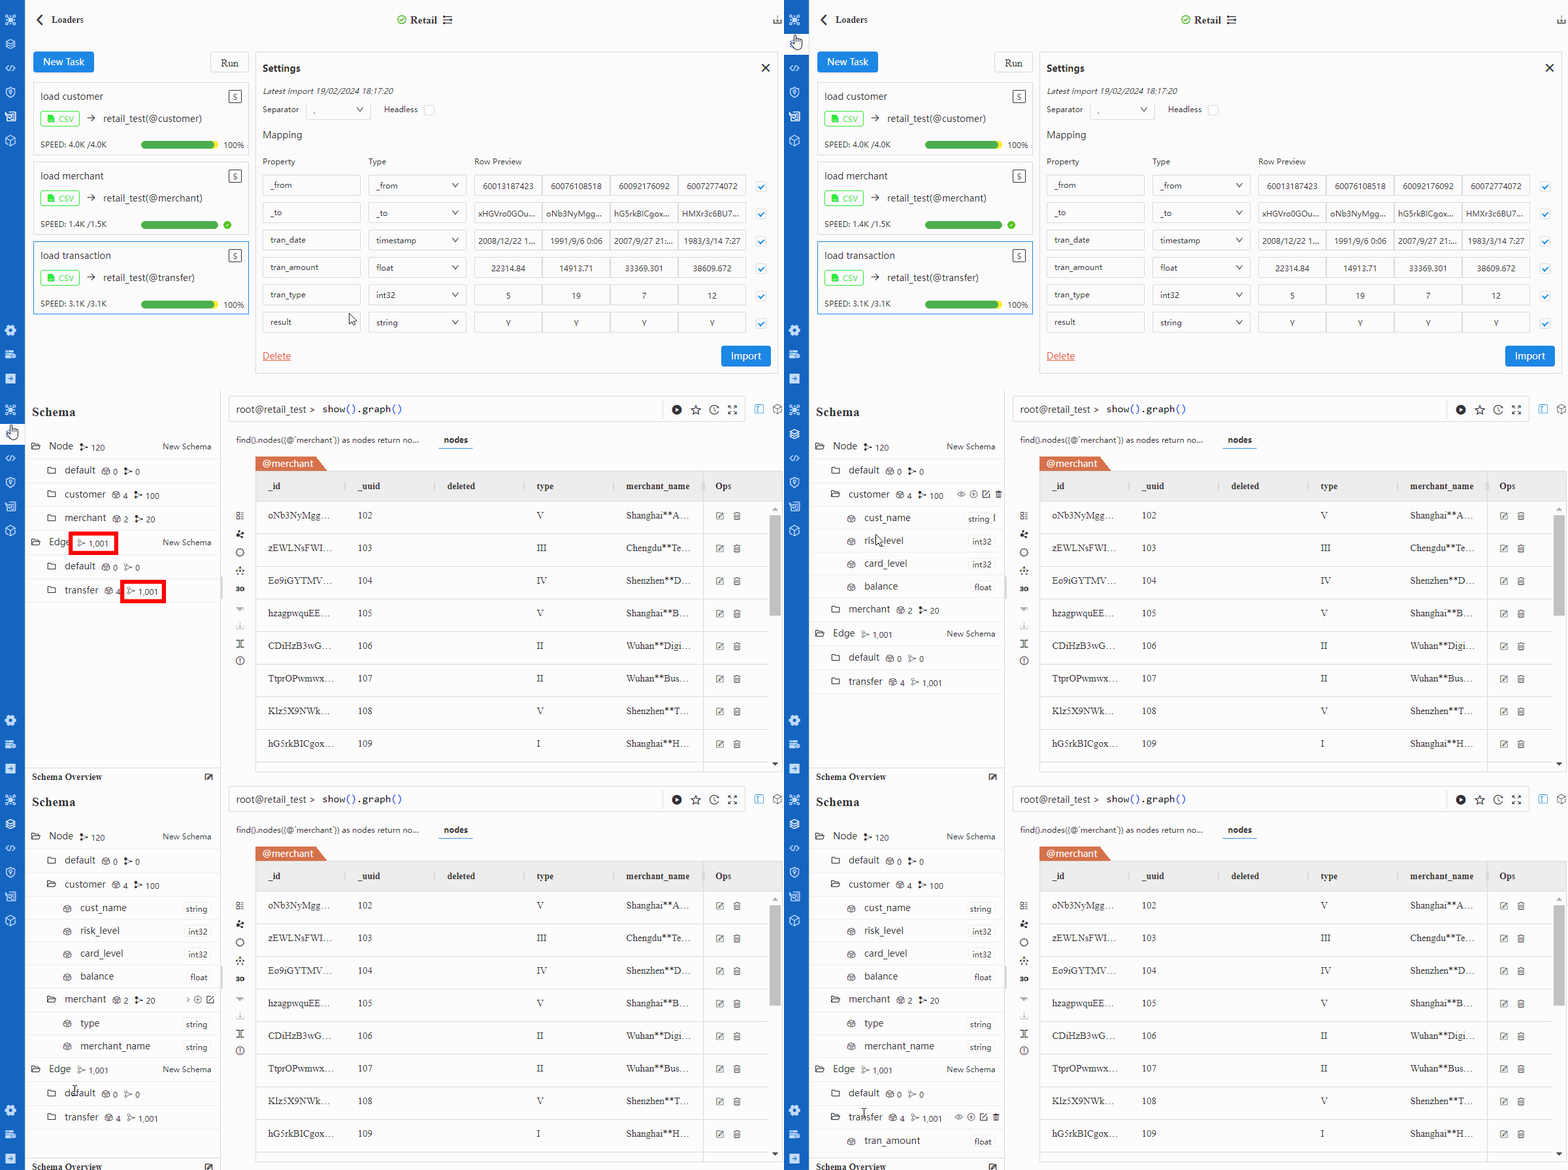
This step is to verify the results after import operation. Click 'Schema' on the left menu of Manager, check the tree structure of schema in the popup panel, and verify the numbers of nodes and edges. Users can also view the property names and data types under each schema.

Graph Import via Transporter
Compared with Manager, the import operation via Transporter-Importer is faster and supports one-click-import of multiple schemas.
Prepare YAML files
The Importer tool of Ultipa Transporter does not require the graphset and schemas to be created beforehand, but will need a YAML file to declare the configuration of server connection information, the target graphset name, the schema of each data file, and the property name and type of each data column, etc. The YAML file also states column delimiter, import mode, as well as details on how to handle data in batches, etc.
The yaml file contains 4 sections:
- Section 1 Server Information
server:
host: "192.168.100.100:60010"
username: "root"
password: "root"
graphset: "retail_test"
crt: ""
Server connection information host
, username
, and password
should be provided by the server administrator; graphset
is the name of graphset, either created or not; crt
can be skipped if TLS is not used for server communication.
- Section 2 Node File Information
nodeConfig:
# Below is about CUSTOMER.csv
- schema: "customer"
file: "./CUSTOMER.csv"
types:
- name: cust_no
type: _id
- name: risk_level
type: int32
- name: card_level
type: int32
- name: balance
type: float
# Below is about MERCHANT.csv
- schema: "merchant"
file: "./MERCHANT.csv"
types:
- name: merchant_no
type: _id
Data columns cust_no
and merchant_no
are stated as system property _id
, these two data columns will be automatically read as string;risk_level
, card_level
, balance
will be read as int32, int32, and float respectively; data columns that are not mentioned in the yaml file, such as cust_name
from CUSTOMER.csv, merchant_name
and type
from MERCHANT.csv, will be read as string by default.
- Section 3 Edge File Information
edgeConfig:
# Below is about TRANSACTION.csv
- schema: "transfer"
file: "./TRANSACTION.csv"
types:
- name: cust_no
type: _from
- name: merchant_no
type: _to
- name: tran_date
type: timestamp
- name: tran_amount
type: float
- name: tran_type
type: int32
Data columns cust_no
and merchant_no
are stated as system properties _from
and _to
, these two columns will be automatically read as string; tran_date
, tran_amount
, and tran_type
will be read as timestamp, float, and int32; result
will be read as string as it is not mentioned.
- Section 4 Global Information
settings:
separator: ","
importMode: insert
yes: true
batchSize: 10000
threads: 8
State the column delimiter as comma ','; either 'insert', 'overwrite', or 'upsert' will work for importing new data; state yes
as 'true' for allowing auto-creation of designated graphset, schema, and property if not existent; state batchSize
and threads
, the size of each import batch and the number of concurrency, as per need.
When indenting a line in the yaml file, users need to click space bar twice, instead of using tab key once.
Save all the 4 sections above in configuration file import_retail.yml (Click and download)
Import node and edge files
Place the Importer tool 'ultipa-importer', the data files CUSTOMER.csv, MERCHANT.csv, TRANSACTION.csv, and the configuration file import_retail.yml under the same directory, open the command line tool under the directory (e.g. right-click Powershell) and execute command below:
./ultipa-importer --config ./import_retail.yml
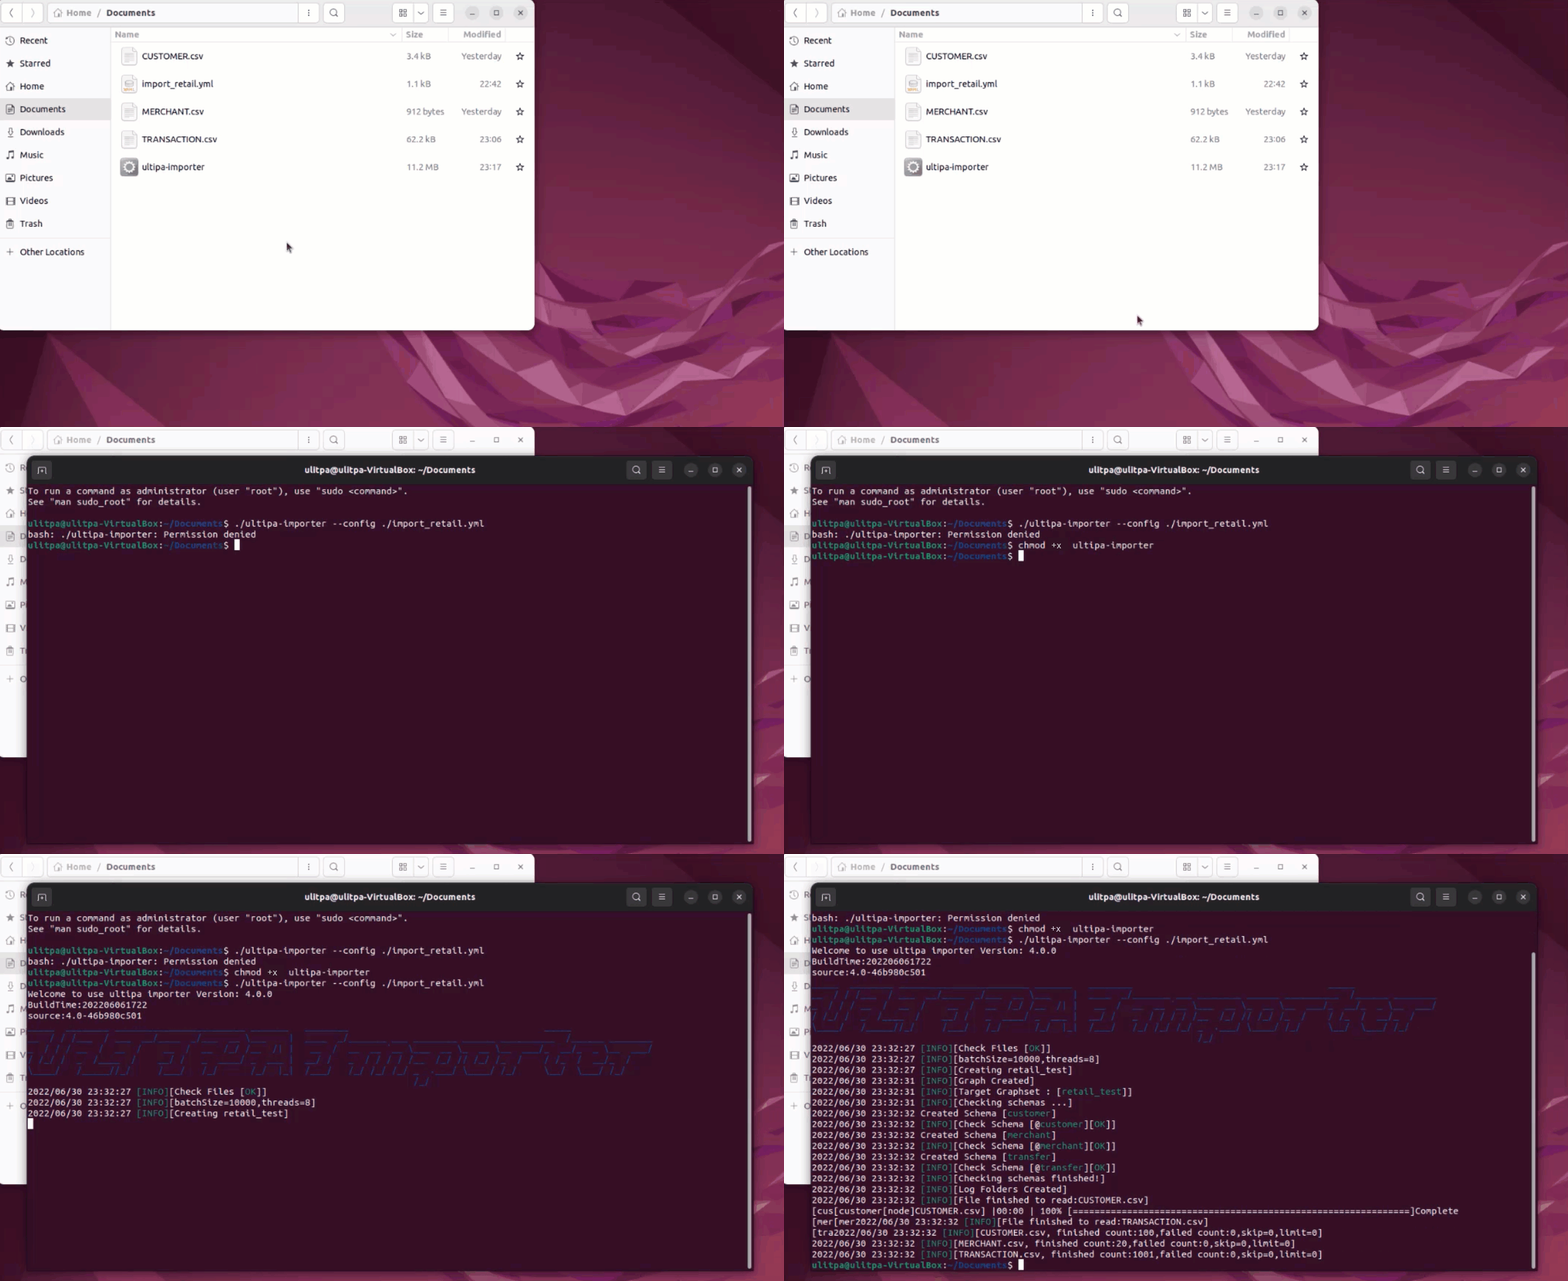
If message is received as
bash: ./ultipa-importer: Permission denied
when running the Importer tool, it suggests that relevant execution privileges are not granted; runchmod 777 ultipa-importer
to grant privileges required and run the Importer again.
When importing CSV files via Importer, make sure the data format of columns representing properties with type of datatime and timestamp are
yyyy-mm-dd hh:mm:ss
. For instance,2022/3/2 22:12:56
might need to be changed to2022-03-02 22:12:56
.