Manage Graphs, Structure, and Data
A graph database can contain multiple graphs. This page explains how to manage those graphs and their structures.
Manage Graphs
Show All Graphs
Click the name of the current graph in the Editor to view all graphs in the database:
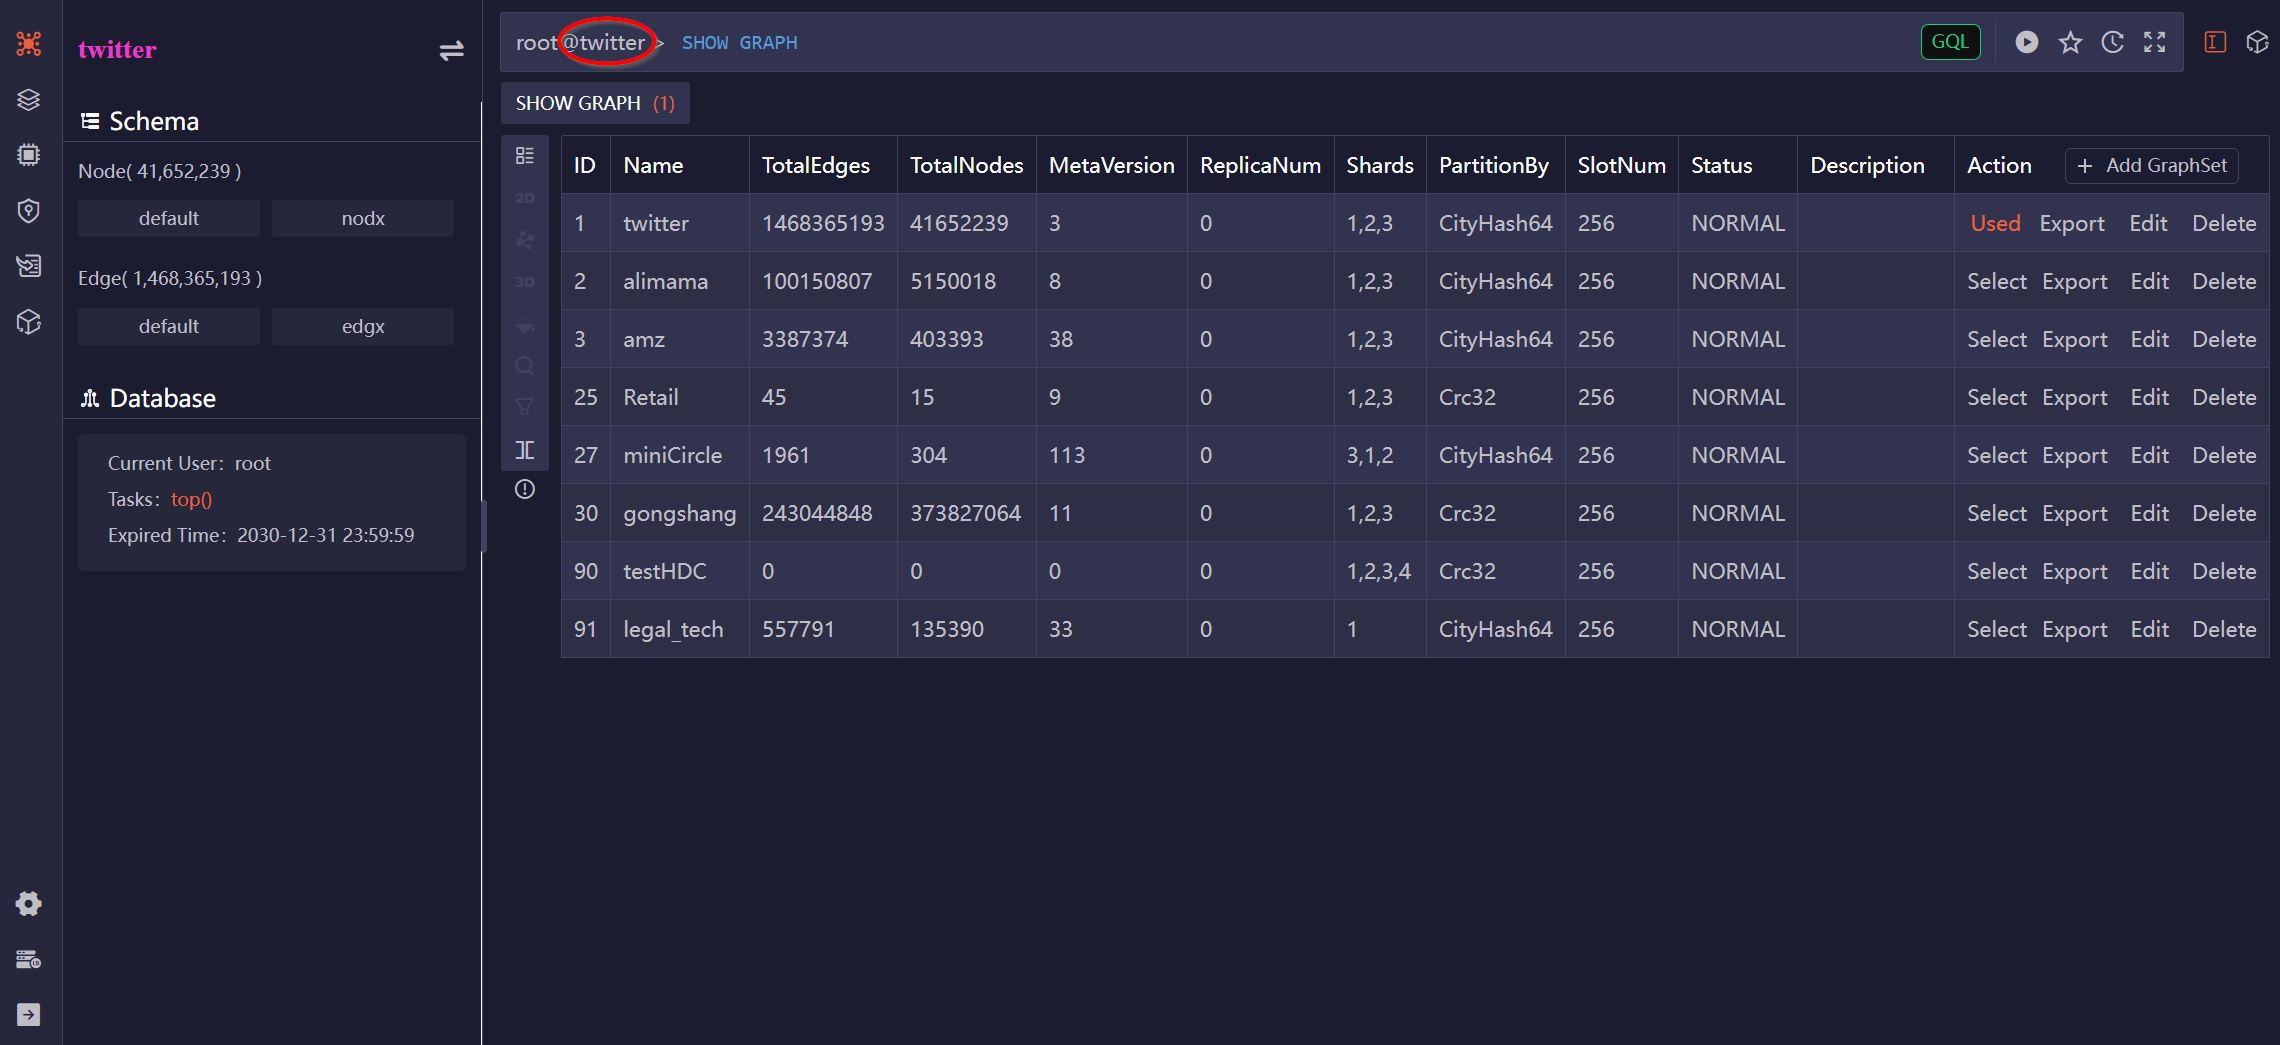
The list displays information for each graph, including its name, number of shards, total number of nodes and edges, and more.
Select a Graph
Only one graph can be selected as the current graph at a time. Queries, algorithms, and most database operations are executed against the current graph.
To switch the current graph, click Select in the Action column of the graph list:

Edit a Graph
Click Edit in the Action column of a graph to modify its name and description.
Delete a Graph
Click Delete in the Action column of a graph, it offers the following options:
- Node: Delete all nodes from the graph while retaining the node schema and property definitions.
- Edge: Delete all edges from the graph while retaining the edge schema and property definitions.
- All data: Delete all nodes and edges from the graph while retaining all schema and property definitions.
- GraphSet and data: Delete the graph entirely.
Create a Graph
Click Add GraphSet at the top of the Action column to create a new graph. When creating the graph, you can select one or more deployed shard servers to store the graph. Additionally, you'll need to choose the shards and partition method for the graph.

Export a Graph
Click Export in the Action column of a graph, it offers the following options:
- Export Structure: Export the UQL queries that can create the graph, its structure, indexes, etc.
- Export Nodes: Export nodes into CSV files from the graph.
- Export Edges: Export edges into CSV files from the graph.
Manage Graph Structure
Schema and Property
Click Schema in the left sidebar to view the node and edge schemas defined for the current graph:
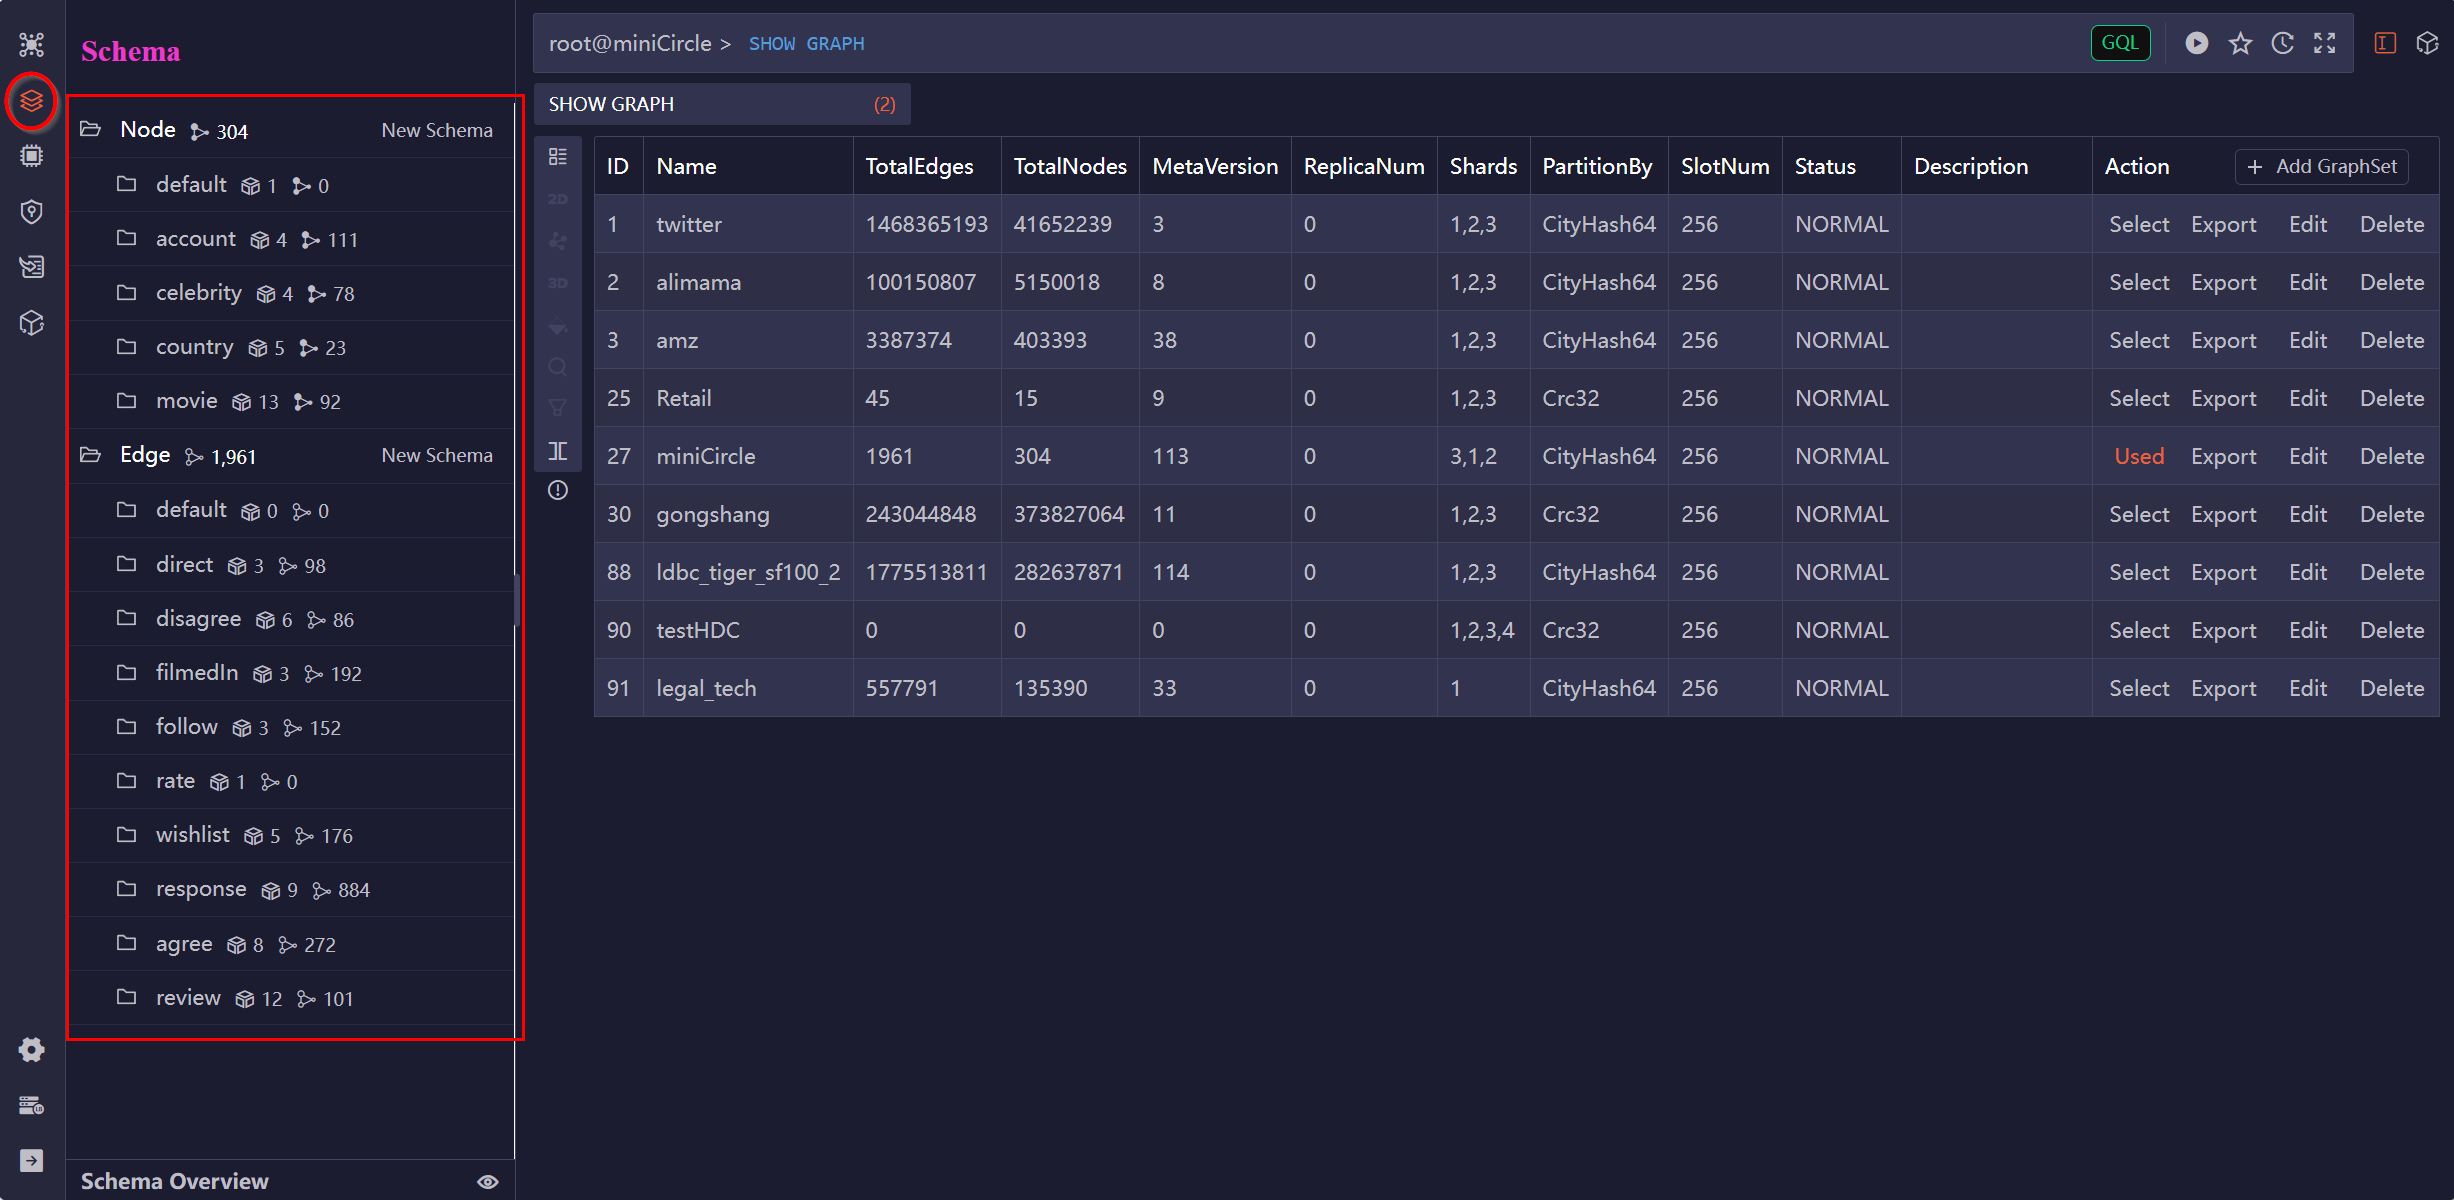
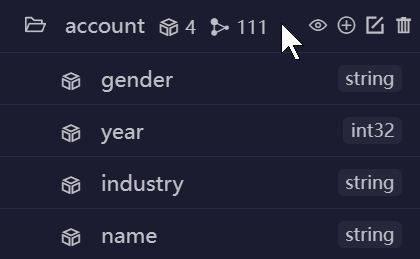
The number of associated properties and nodes (or edges) is displayed next to each schema name. Click a schema name to view its properties:
You can create, edit, and delete schemas and properties directly from the Manager interface.
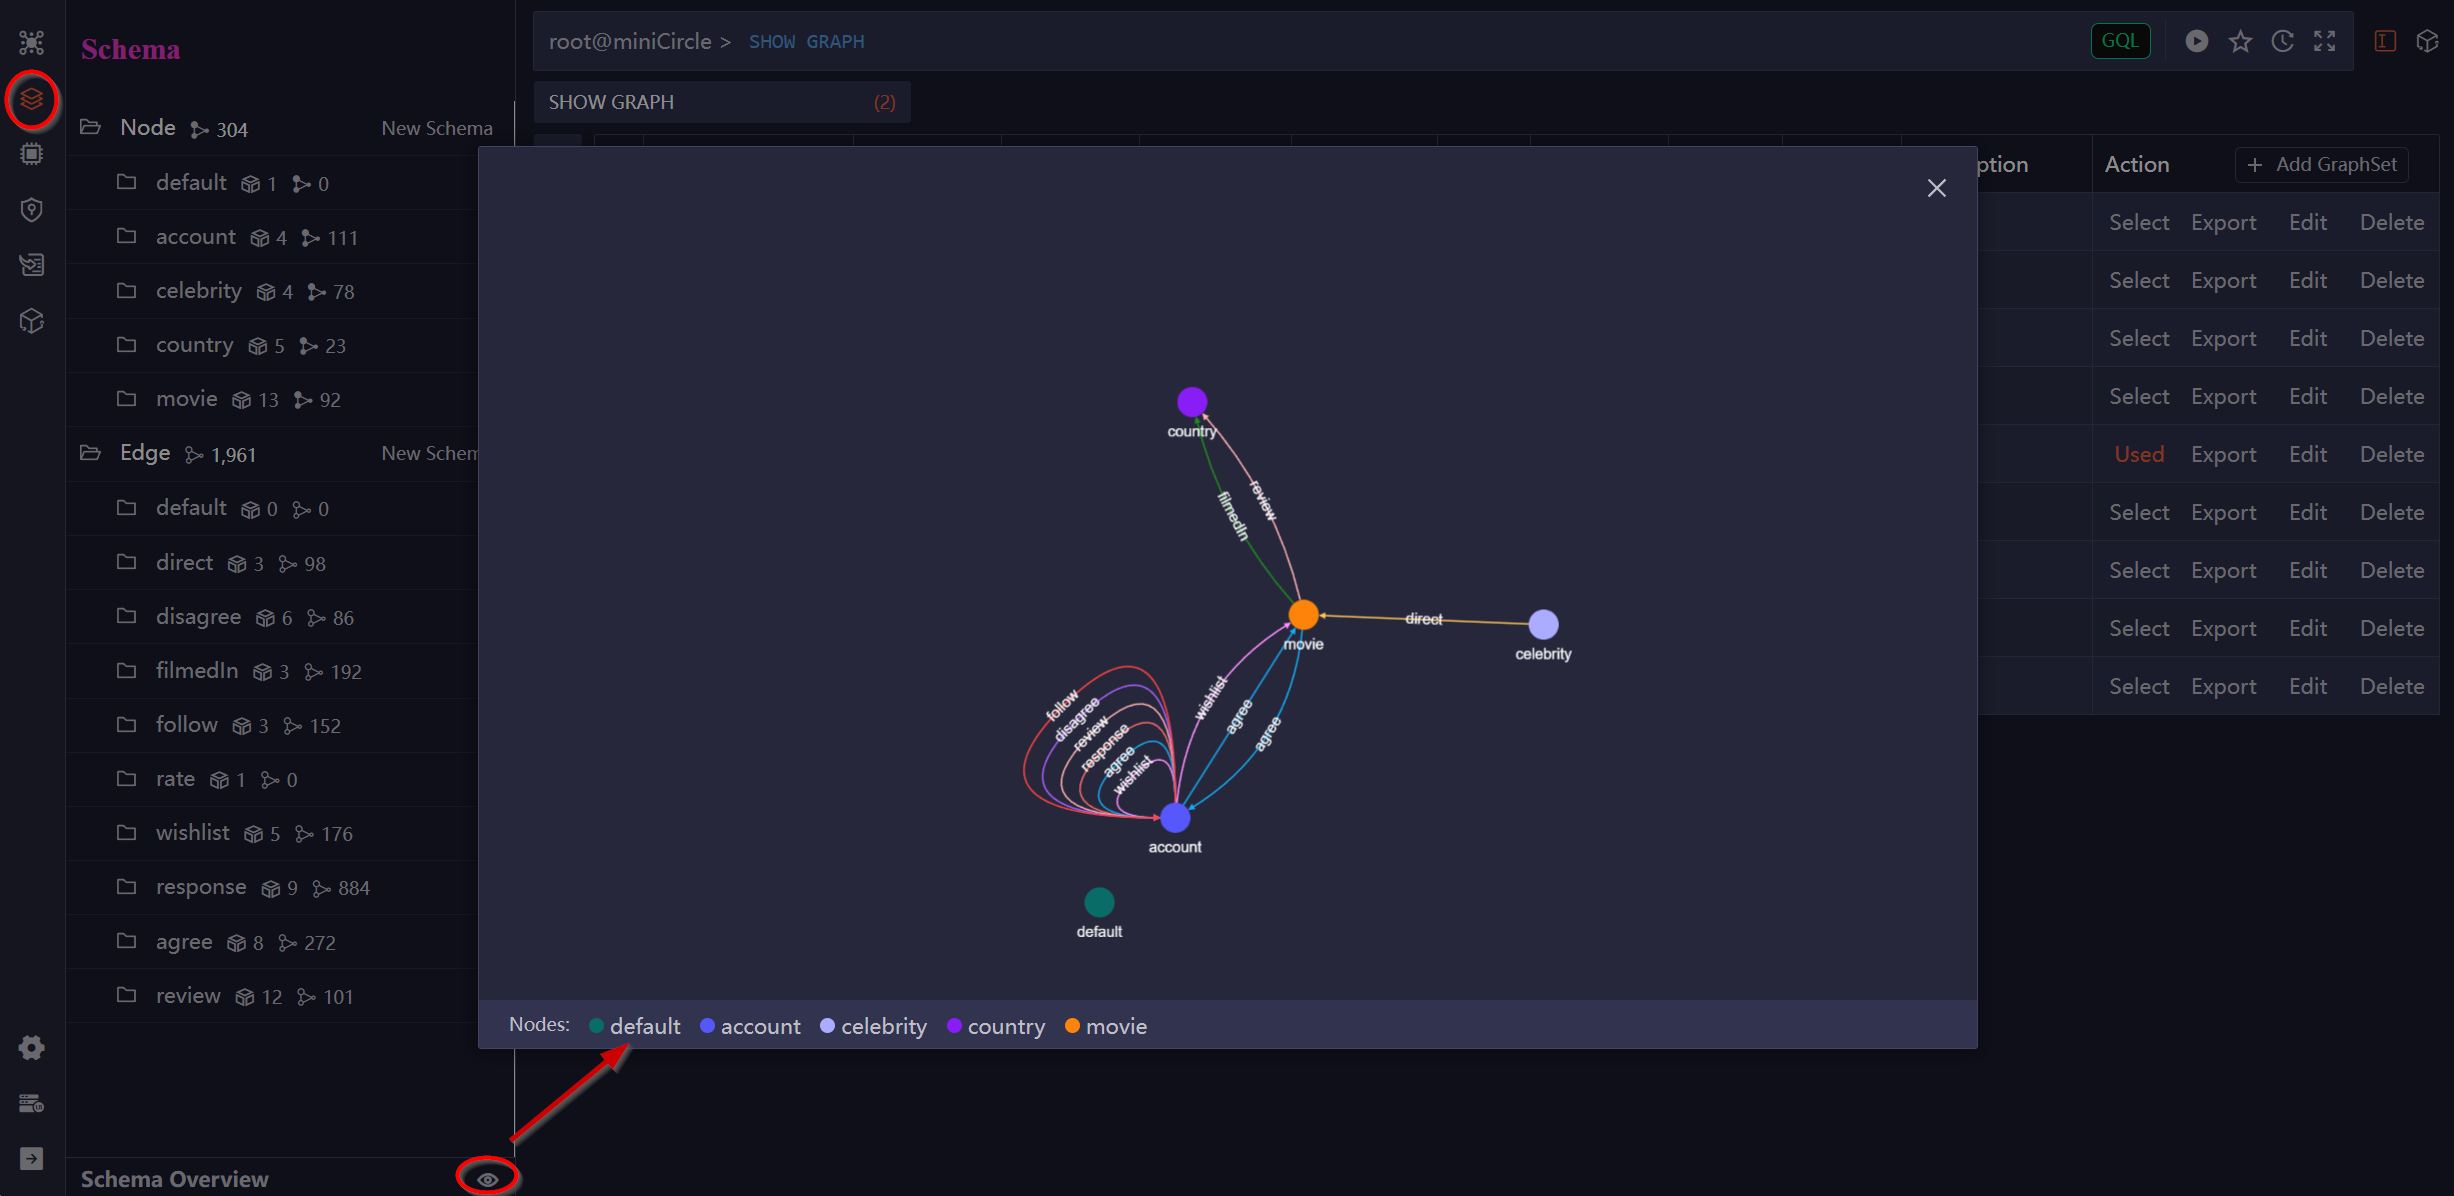
Schema Overview
To view the graph structure, click Schema in the left sidebar and then click the View icon next to Schema Overview at the bottom. The visualization shows how nodes and edges across different schemas are interconnected.
Manage Graph Data
Retrieve Nodes or Edges
Hover over a schema name and click the View icon. A GQL query to retrieve a limited number of nodes or edges from that schema will be auto-filled into the Editor. Click the Run icon to execute the query:
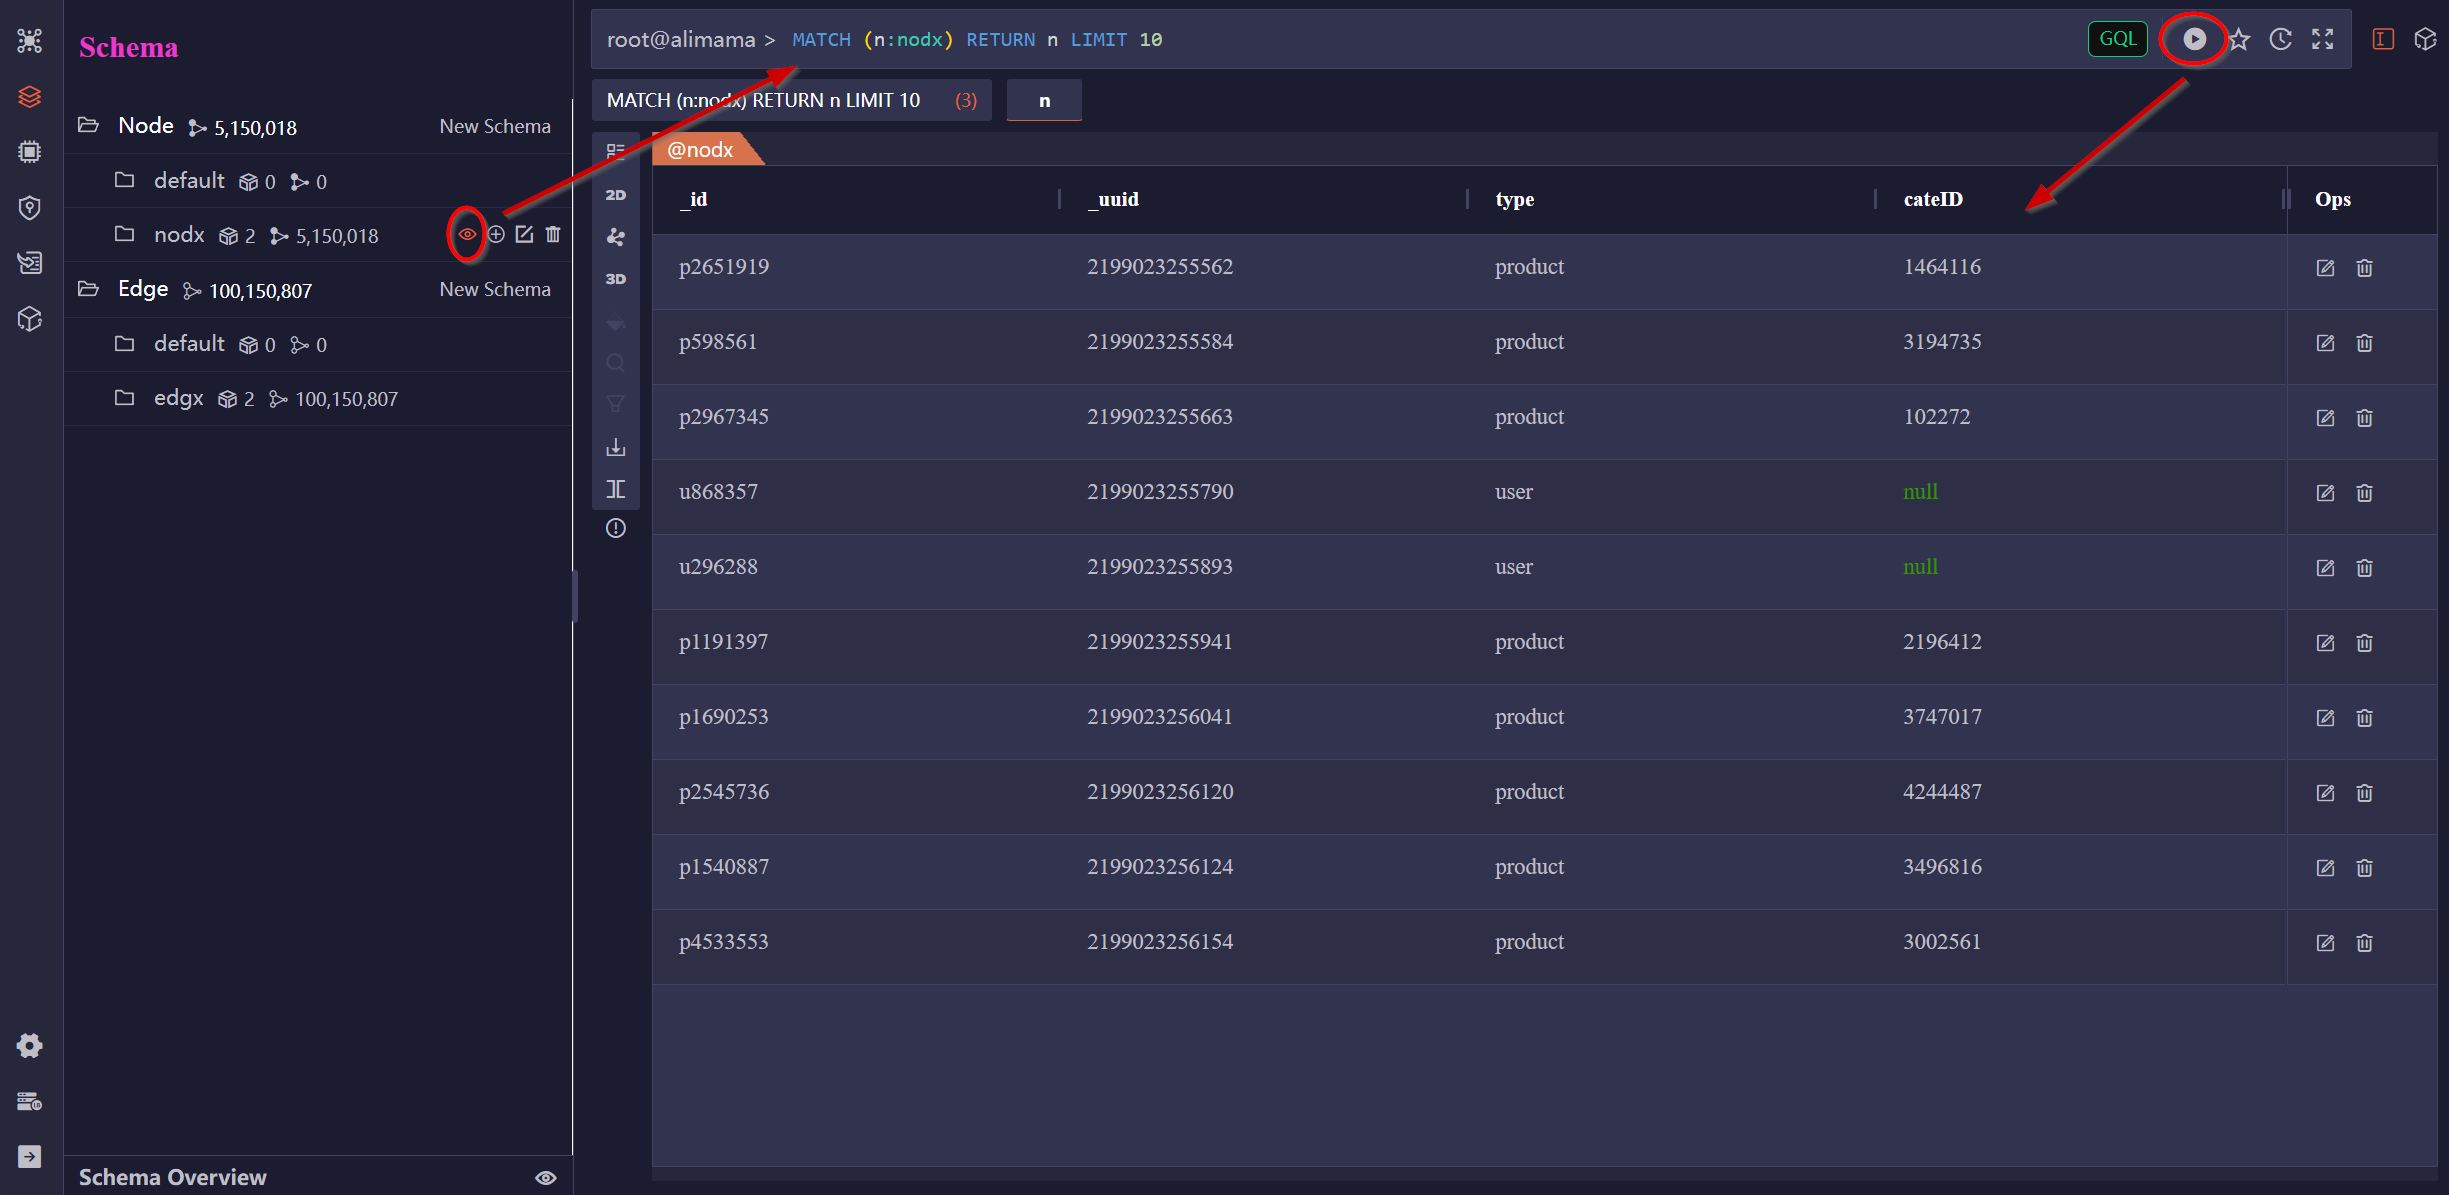
By default, 10 nodes or edges are retrieved. To change this, you can manually set the number in the LIMIT statement in the GQL query before executing it.
Update/Delete Nodes or Edges
The retrieved data can be displayed in either the List or Graph view.
In the List view, you can click the Edit or Delete icon in the Ops column to modify or delete the node or edge:

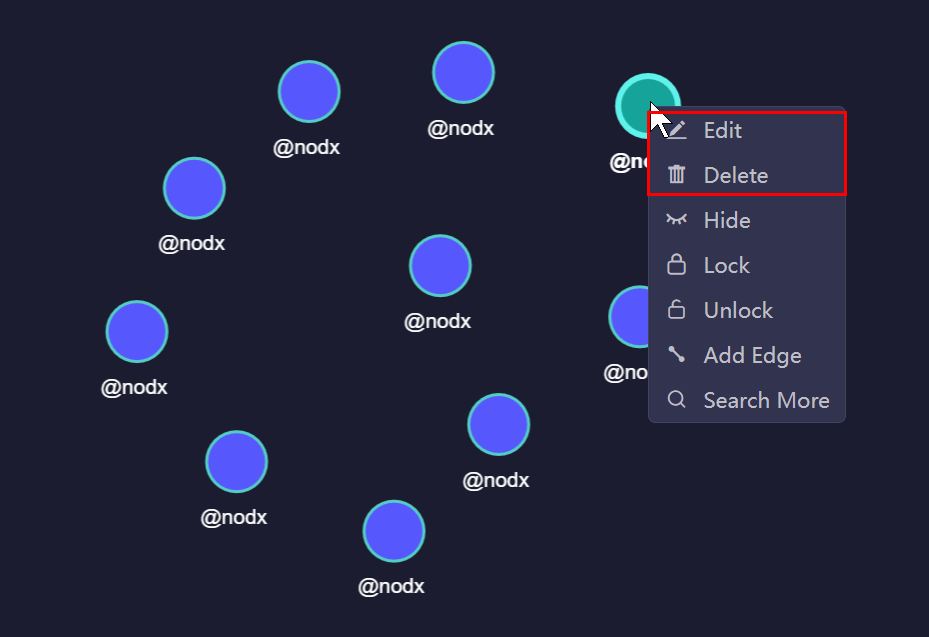
In the Graph view, right-click on a node or left-click on an edge to display the Edit and Delete options:
Add Nodes or Edges
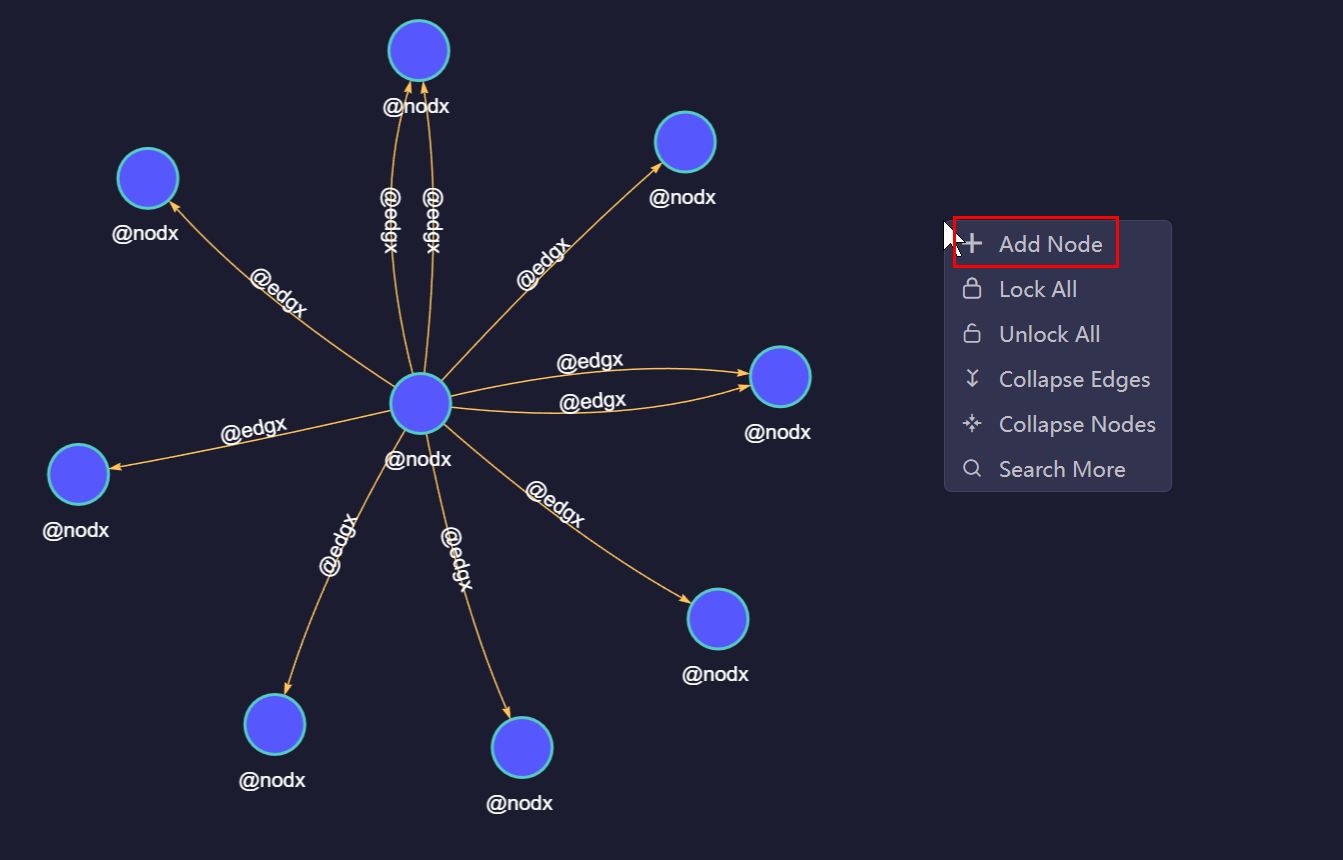
After retrieving some data and visualizing it in the Graph view, you can right-click on an empty space to add a node:
Alternatively, right-click on a node to add an edge:
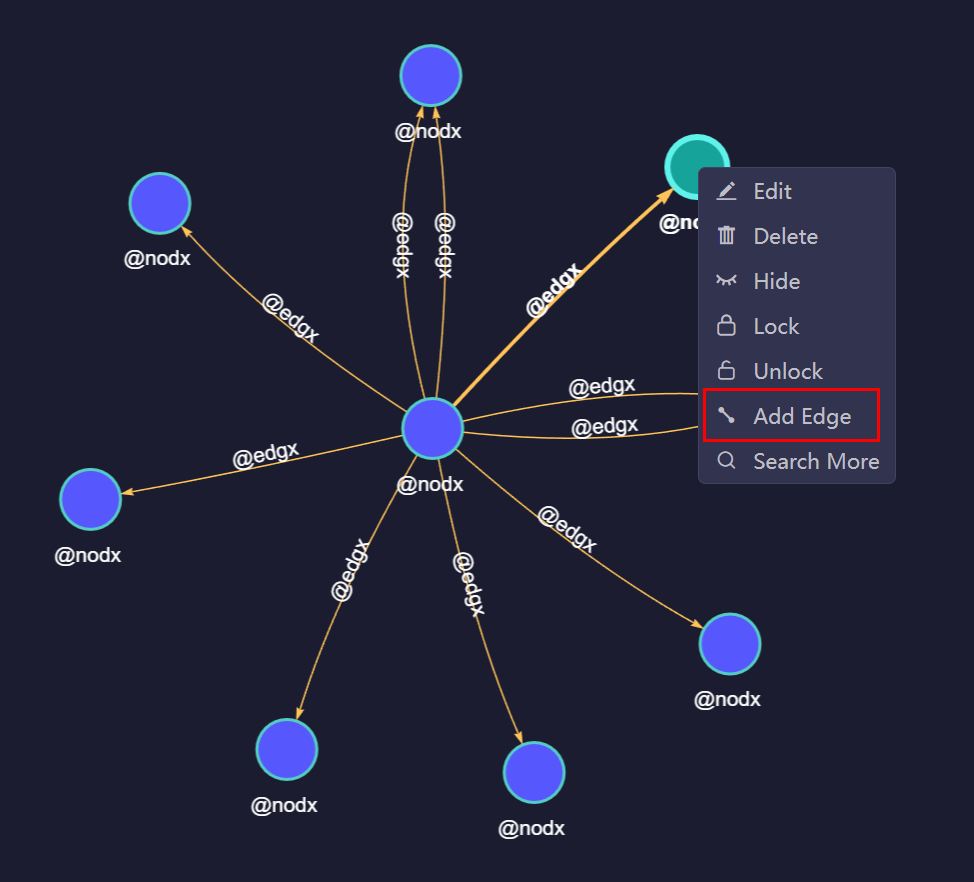
The selected node will become the source node of the edge, and you will be able to choose a destination node from the graph. You can also change both the source and destination nodes after the New Edge window pops up.