Load Data
Click Loader in the left sidebar to import data from various sources into Ultipa. Supported data sources include CSV, JSON, JSONL, PostgreSQL, SQL Server, MySQL, BigQuery, Neo4j, and Kafka.
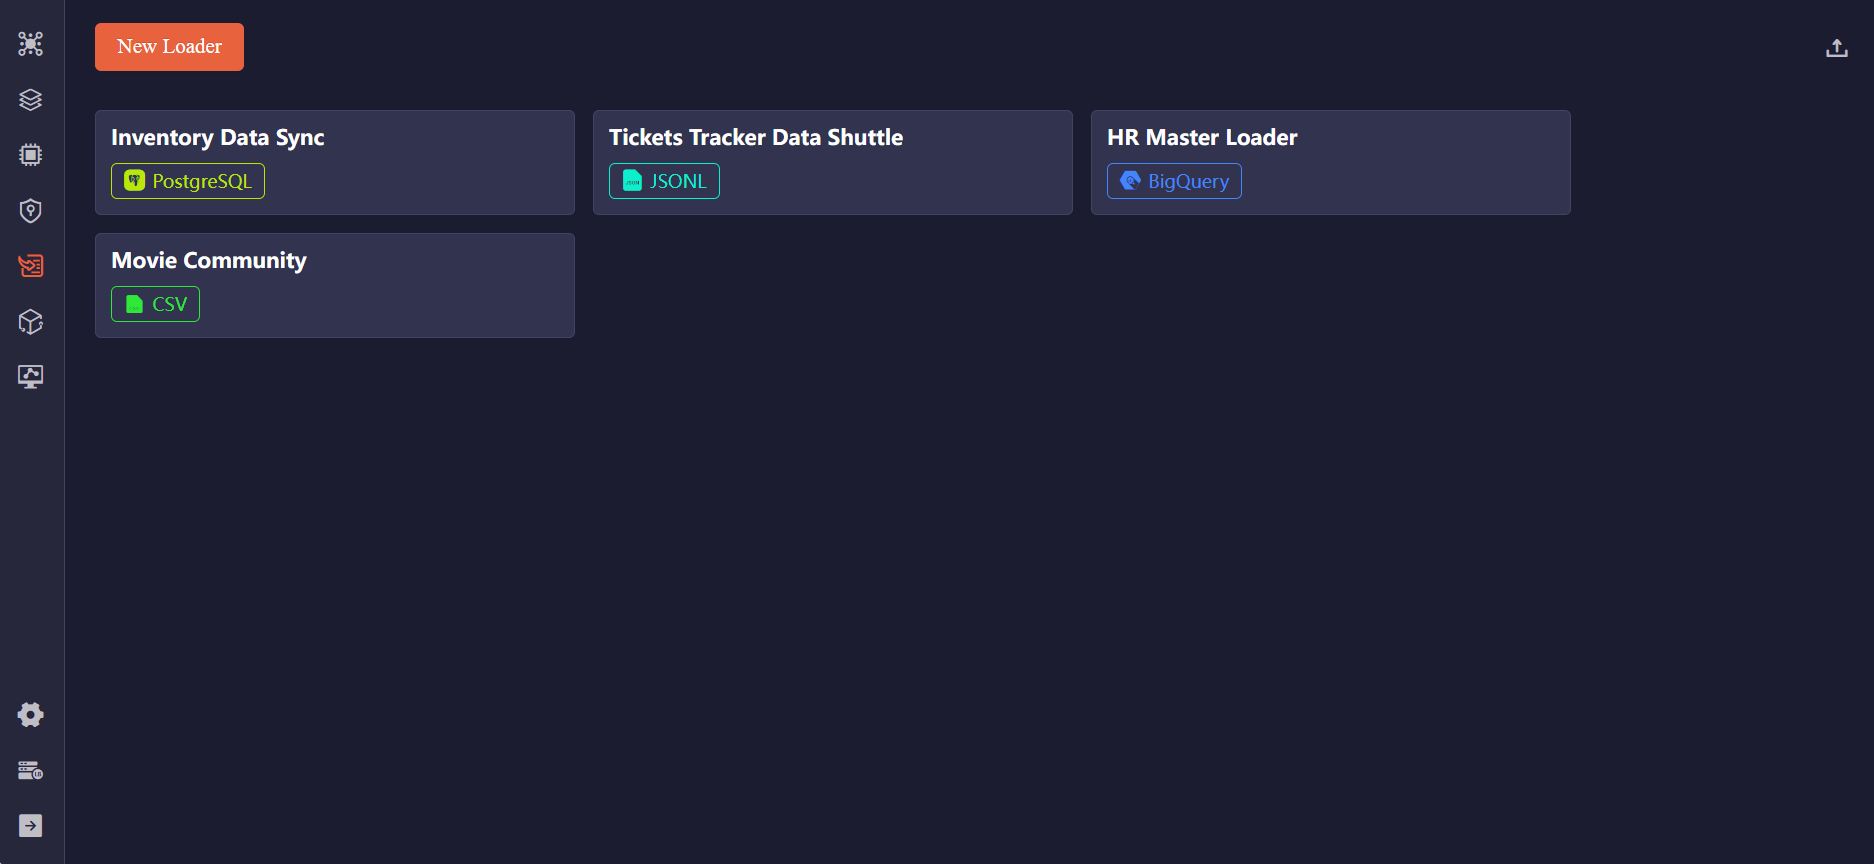
Create a Loader
Click New Loader to create a loader. On the loader configuration page, you can rename it and edit the description by clicking the Settings icon next to the loader name.
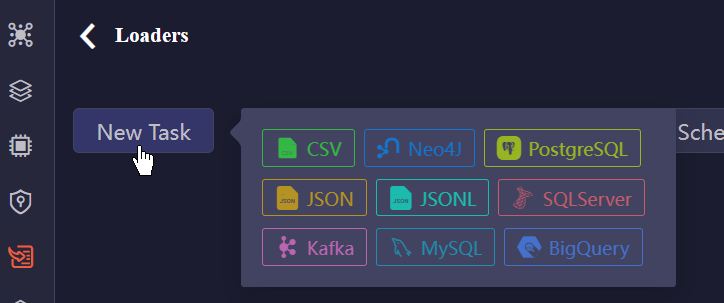
Next, you can add tasks to the loader. Click the New Task button and choose the type of data source:
To further configure the task, refer to Task Configurations.
Execute Import
Import a Task
You can click the Import button in the task configuration pane to execute a single task.
Run Loader
Click the Run button above the task list triggers the import of all tasks in the loader, following the specified order and processing mode:
- Tasks are executed from top to bottom. You can reorder them by dragging and dropping the task cards.
- Use the
S(Serial) orP(Parallel) tag on each task card to toggle its processing modes. - Consecutive
Ptasks, along with theStask immediately preceding the firstPtask, form a parallel group and are imported concurrently.

NOTEErrors may occur when importing nodes and edges concurrently, as edge creation relies on the prior existence of their end nodes. To avoid such issues, consider importing nodes before edges.
Import Log

A fully successful import is indicated by a green progress bar. If any errors occur during the task, a portion of the progress bar turns yellow, representing the percentage of failed data rows.
The latest import log is displayed at the top of the task configuration pane, where you can also download the Logs for further inspection.
Create Schedule
You can create a schedule to run the loader automatically. Click Create Schedule and configure the trigger strategy:
- Occurrence: Choose One-Time, or set it repeat Weekly or Monthly.
- Timezone: Select the timezone for the scheduled start time.
- Start Time: Specify when the loader should begin execution.
Click Start Schedule to activate it. You can view the execution history from Execution Logs.
Import/Export Loaders
You can export loaders for backup or sharing purposes, and import them to quickly restore or replicate configurations.
Task Configurations
Each task includes two parts of configurations: general settings and data source–specific settings.
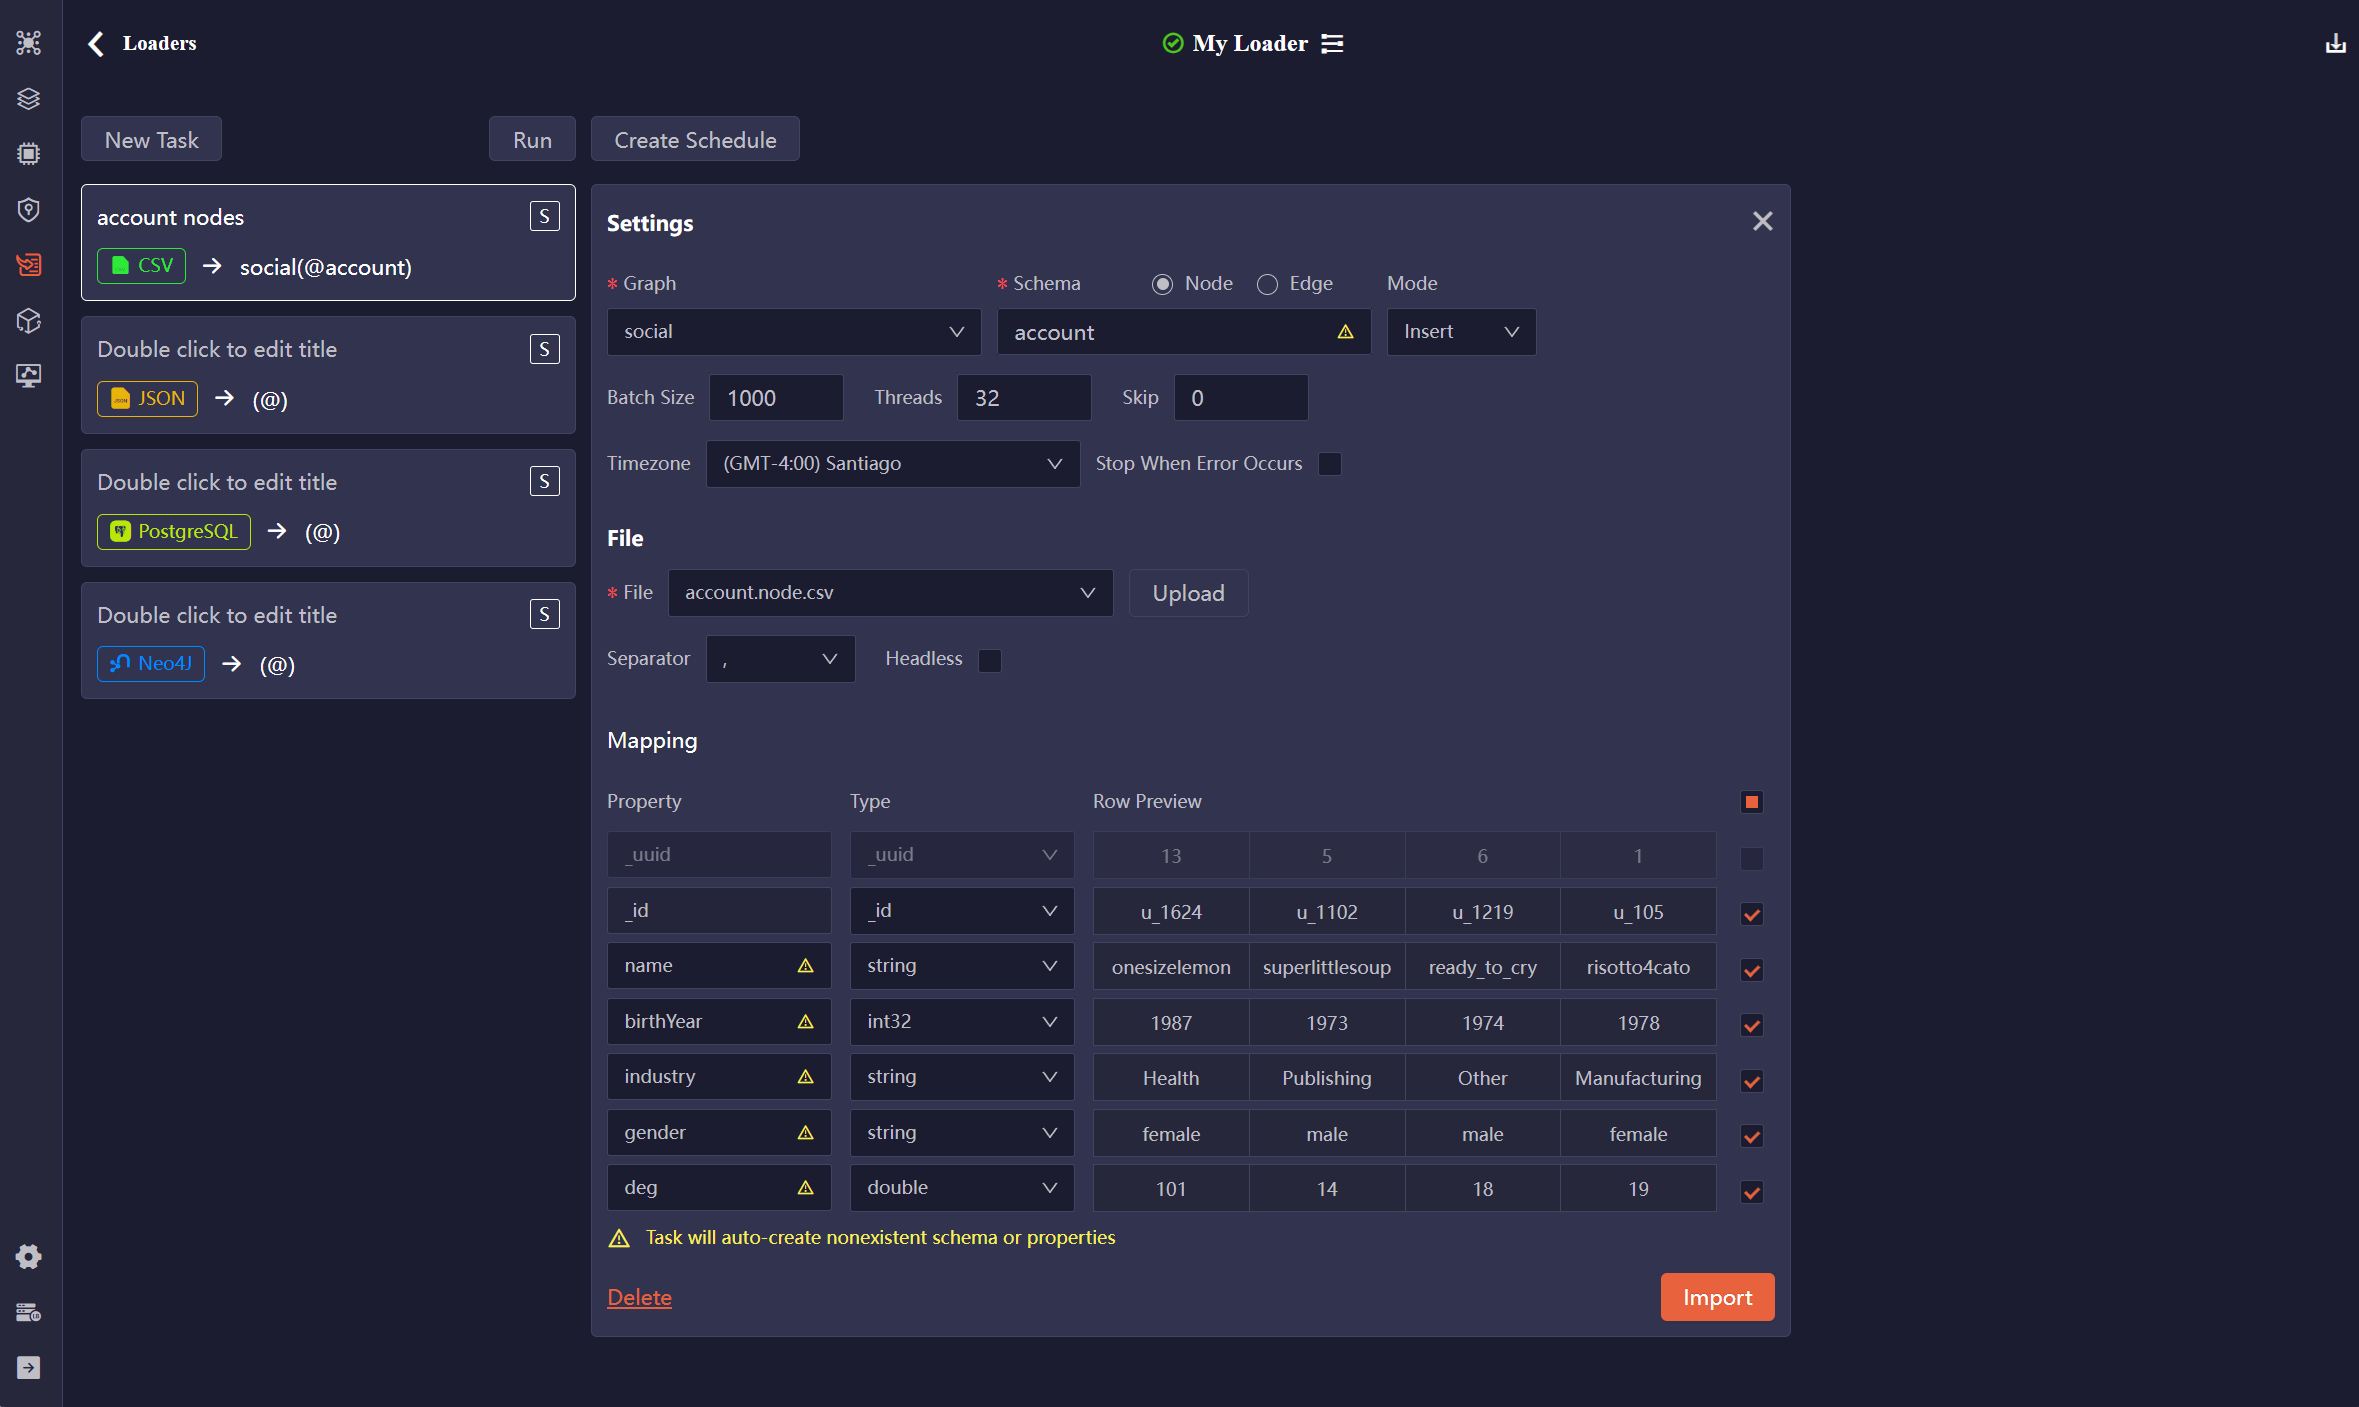
General Settings
Item | Description |
|---|---|
| Graph | Select an existing graph. |
| Schema | Choose between Node and Edge. The Schema name field will populate with corresponding schemas from the selected graph. You can also enter a schema name to create a new one. |
| Mode | Select the import mode: Insert, Upsert, or Overwrite. |
| Batch Size | Specify the number of data rows per batch. |
| Threads | Set the maximum number of threads to use during import. |
| Timezone | Select the timezone for converting timestamps. By default, your browser's timezone is used. |
| Stop When Error Occurs | Specify whether to stop the import if an error is encountered. |
CSV, JSON, JSONL
File
Item | Description |
|---|---|
| File | Upload a file or choose a previously uploaded one. |
| Separator | Specify the delimiter used in the CSV file: ,, ;, or |. |
| Headless | Indicate whether the CSV file includes a header row with property names and types. If unchecked, the file is treated as headless (data rows only). |
Example files:
_id:_id,username:string,brithYear:int32 U001,risotto4cato,1978 U002,jibber-jabber,1989 U003,LondonEYE,1982
Mapping
Item | Description |
|---|---|
| Property | Edit the property name. These fields are auto-filled with the property names in the header (if has) of the CSV file or the keys in the JSON/JSONL file. |
| Type | Select the property value type. These fields are auto-filled from the types specified in the CSV header (if has). If the property already exists under the selected schema, its type cannot be modified. |
| Original | Keys in the JSON/JSONL file are displayed here for reference. |
| Row Preview | Display a preview of the first several data rows. |
| Include/Ignore | Uncheck to exclude a property from the import process. |
PostgreSQL, SQL Server, MySQL
Source Database
Item | Description |
|---|---|
| Host | The IP address of the database server. |
| Port | The port of the database server. |
| Database | Name of the database to import. |
| User | Username of the database. |
| Password | Password of the above user. |
| Test | Check if the connection can be successfully established. |
SQL
Write SQL to retrieve data from the database, then click Preview to map the results to the properties of nodes or edges.
Mapping
Item | Description |
|---|---|
| Property | Edit the property name. These fields are auto-filled with the column names in the query results. |
| Type | Select the property value type. These fields are auto-filled with the data type of each column in the query results. If the property already exists under the selected schema, its type cannot be modified. |
| Original | Column names in the query results are displayed here for reference. |
| Row Preview | Display a preview of the first several data rows. |
| Include/Ignore | Uncheck to exclude a property from the import process. |
BigQuery
Source Database
Item | Description |
|---|---|
| Project ID | The ID of your Google Cloud Platform project. |
| Key (JSON) | The service account key, which is a JSON file. Upload a new JSON file or choose a previously uploaded one. |
| Test | Check if the connection can be successfully established. |
SQL
Write SQL to retrieve data from BigQuery, then click Preview to map the results to the properties of the nodes or edges.
Mapping
Item | Description |
|---|---|
| Property | Edit the property name. These fields are auto-filled with the column names in the query results. |
| Type | Select the property value type. These fields are auto-filled with the data type of each column in the query results. If the property already exists under the selected schema, its type cannot be modified. |
| Original | Column names in the query results are displayed here for reference. |
| Row Preview | Display a preview of the first several data rows. |
| Include/Ignore | Uncheck to exclude a property from the import process. |
Neo4j
Neo4j
Item | Description |
|---|---|
| Host | The IP address of the database server. |
| Port | The port of the database server. |
| Database | Name of the database to import. |
| User | Username of the database server. |
| Password | Password of the above user. |
| Test | Check if the connection can be successfully established. |
Cypher
Write Cypher to retrieve nodes or edges from Neo4j, then click Preview to map the results to Ultipa.
Mapping
Item | Description |
|---|---|
| Property | Edit the property name. These fields are auto-filled with the property names of the retrieved nodes or edges. |
| Type | Select the property value type. These fields are auto-filled with the data types of properties in Neo4j. If the property already exists under the selected schema, its type cannot be modified. |
| Original | Property names in Neo4j are displayed here for reference. |
| Row Preview | Display a preview of the first several data rows. |
| Include/Ignore | Uncheck to exclude a property from the import process. |
Kafka
Kafka
Item | Description |
|---|---|
| Host | The IP address of the server where the Kafka broker is running. |
| Port | The port on which the Kafka broker listens for incoming connections. |
| Topic | The topic where messages (data) are published. |
| Offset | Select the offset to specify which messages you want to consume (import):
|
| Test | Check if the connection can be successfully established. |
| Preview | Map the retrieved messages to the properties of the nodes or edges. |
Mapping
Item | Description |
|---|---|
| Property | Edit the property name. Property values are identified within the message content by commas (,), and the default property names are col<N>. |
| Type | Choose the property type. If the property name already exists under the specified schema, the type cannot be changed. |
| Row Preview | Display a preview of the first several data rows. |
| Include/Ignore | Uncheck to exclude a property from the import process. |
NOTEThe Kafka task (consumer), once started, will continue running to import newly published messages. You need to manually stop the task as needed.