
1. Install & Connect
There are two paths to spin up a GQLDB instance:
- Run locally: A database running on your machine, on macOS, Linux, or Windows.
- Ultipa Cloud: A fully-managed database with nothing to install.
However you launched it, you can use Ultipa Manager to connect to it, a visual tool for managing your database and running queries.
Option A: Run Locally
Open your terminal and run the GQLDB installer for your platform.
macOS / Linux (in a terminal):
Bashcurl -fsSL https://download.ultipa.com/gqldb/install.sh | sh
Windows 10/11 (in PowerShell):
Powershellirm https://download.ultipa.com/gqldb/install.ps1 | iex
Then verify the installation:
Bashultipa-gqldb -version
On macOS, if the first run fails with a Gatekeeper quarantine error, clear the attribute: xattr -d com.apple.quarantine "$(command -v ultipa-gqldb)" 2>/dev/null
Create a database:
Bash# Create a project directory and enter it
mkdir my-gqldb
cd my-gqldb

# Create a database
ultipa-gqldb -db ./my.gdb -rbac -admin-pass myPassword -port 60061
The database instance immediately runs on localhost:60061. It runs in the foreground, so its logs stream in this terminal, that is normal and means the server is up. Keep this terminal open (closing it, or pressing Ctrl+C, stops the server). To keep it running in the background instead, launch it with nohup.
A few things worth knowing:
- The data directory is created as
my.gdbin your current folder. - The admin credential is created as
admin/myPassword. - No license file is needed. The database is initialized with a
defaultgraph, and you may create one more graph. Each graph has up to 1M nodes and 1M edges, plenty for most demo projects.
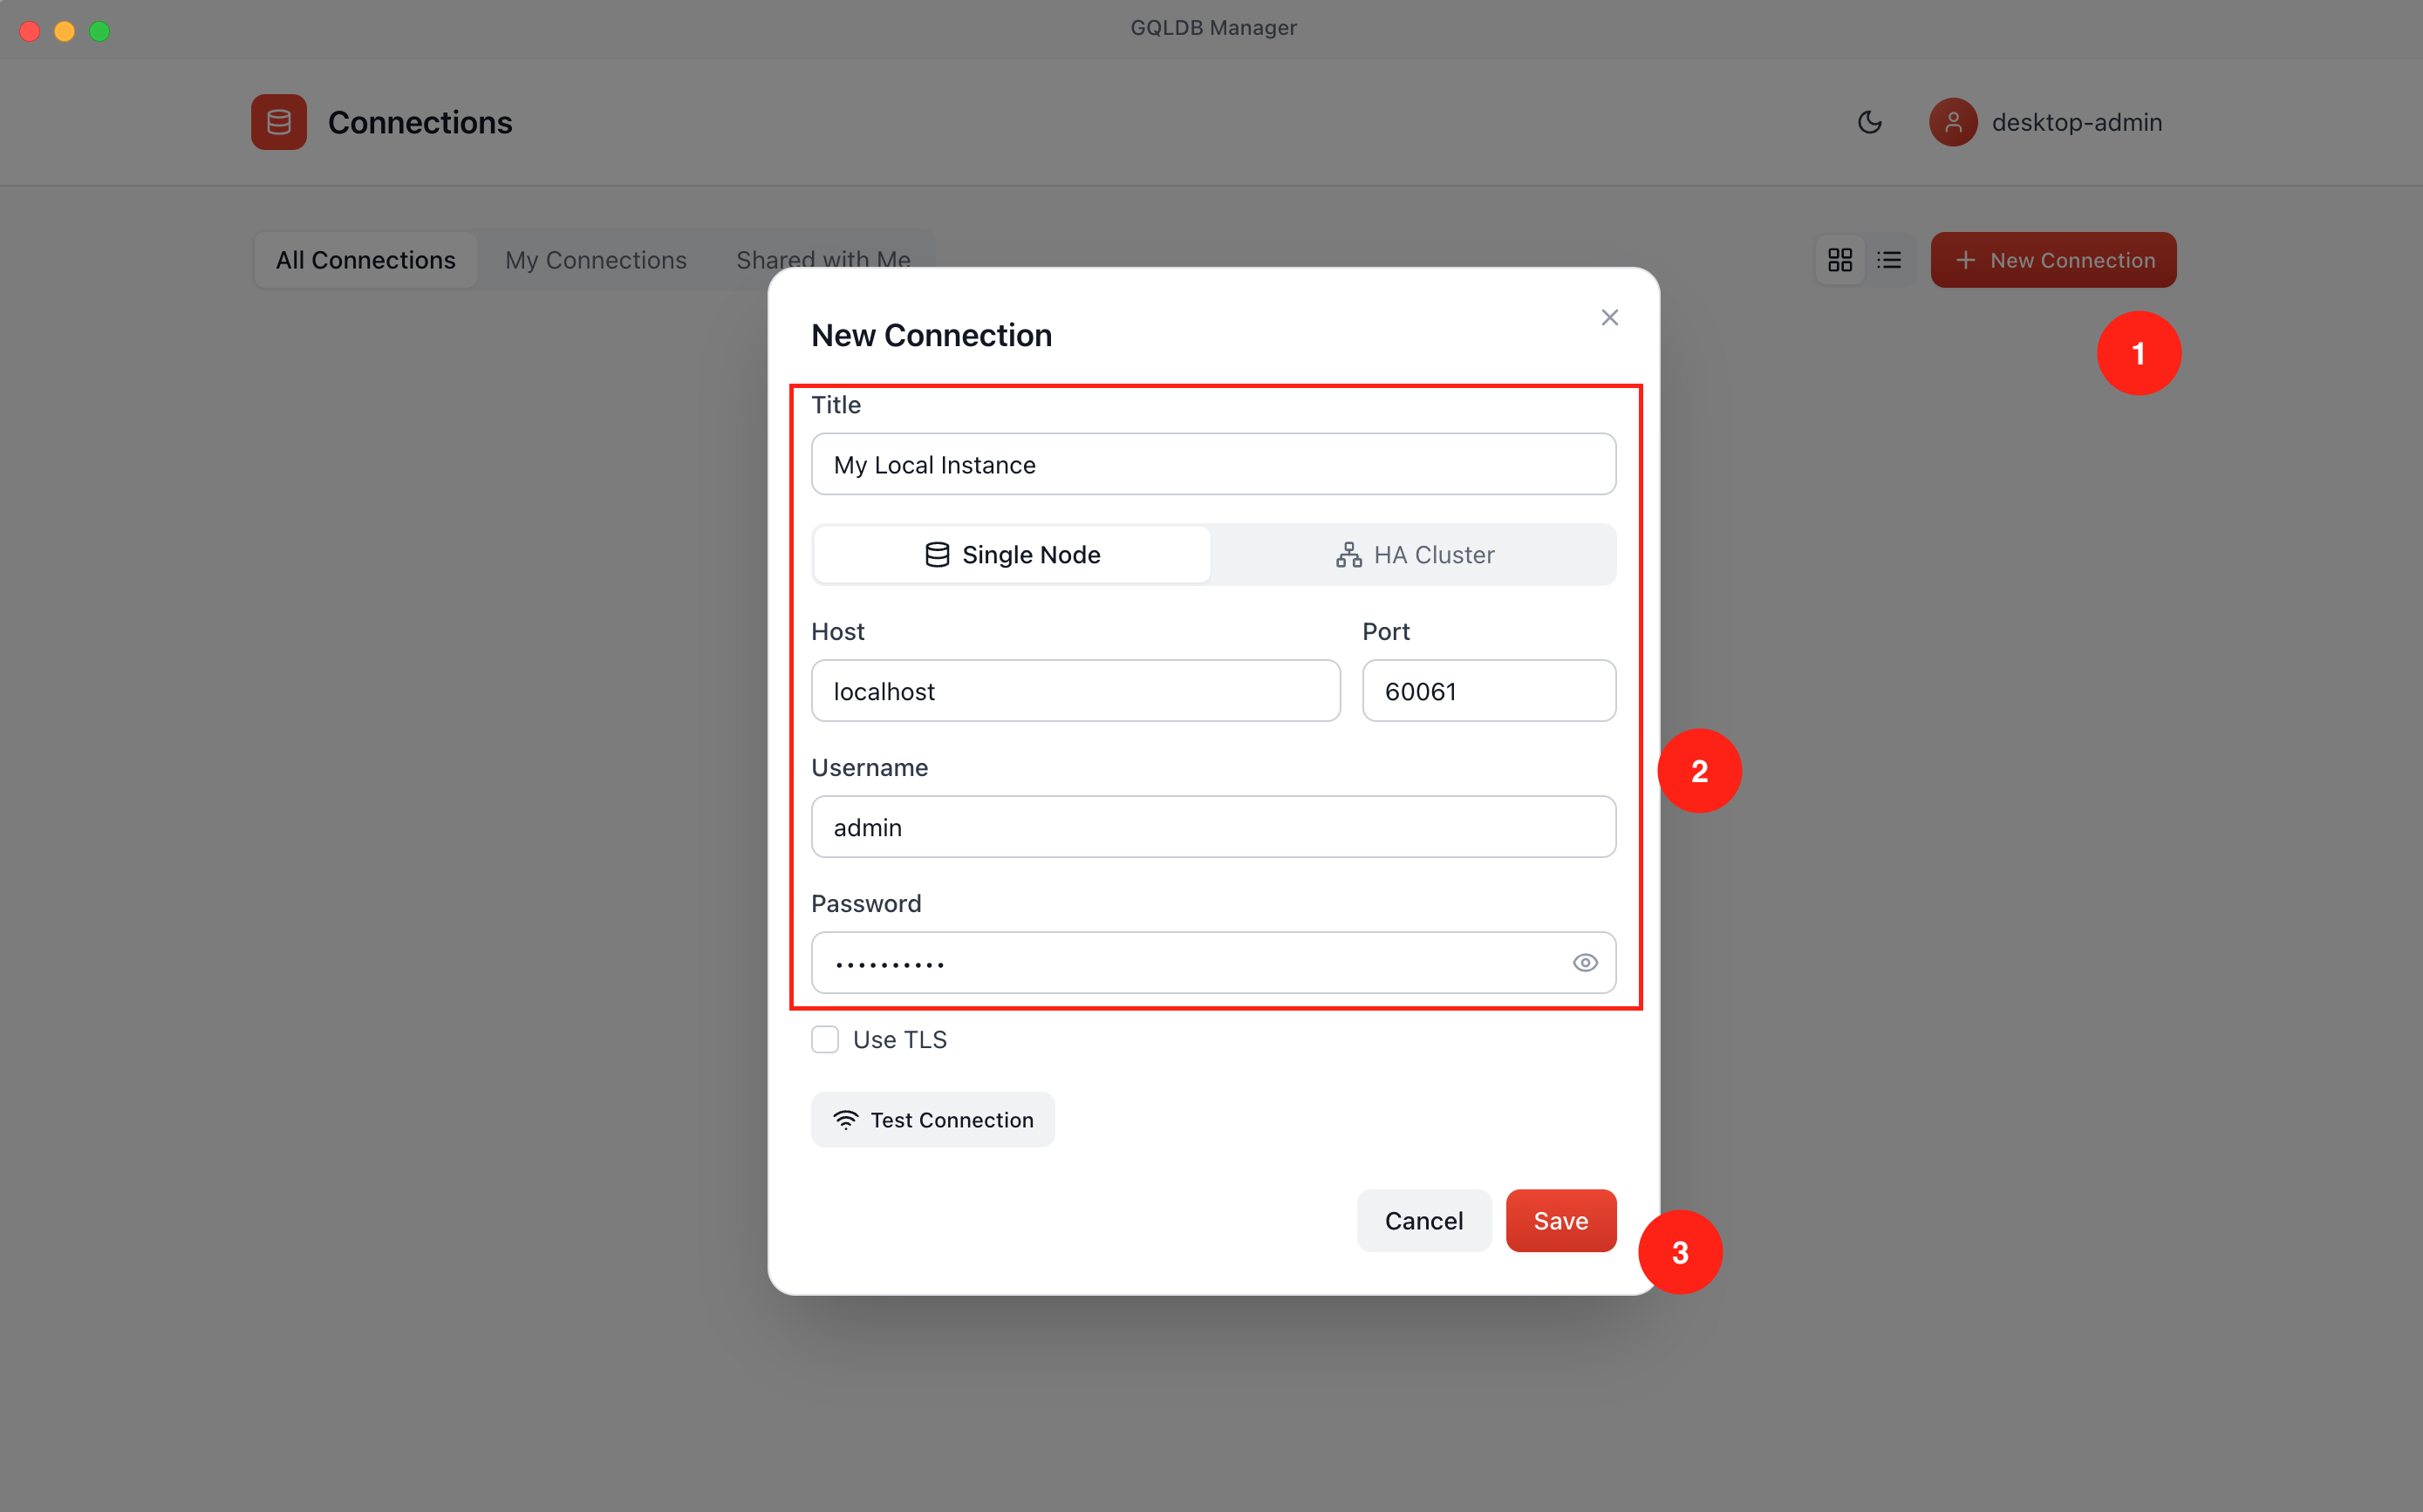
To connect to the database and run queries with a visual tool, download the GQLDB Manager desktop app from here, choosing the build for your platform (macOS, Windows, or Linux). Open it, add a new connection to your local instance with host localhost, port 60061, and the admin / myPassword credentials, then save and open the connection.
Option B: Ultipa Cloud
Create a fully-managed GQLDB instance on Ultipa Cloud, with nothing to install:
- In a browser, open Ultipa Cloud, sign in or create an account.
- From the Dashboard, click Create instance. New accounts get a free trial, selected by default, so just confirm to create it.
- Wait until the instance status shows RUNNING.
- Click Details to see the instance endpoint (
xxx.dbaas.ultipa.com:443) and credentials (adminand a password you can copy) under Connection Info.
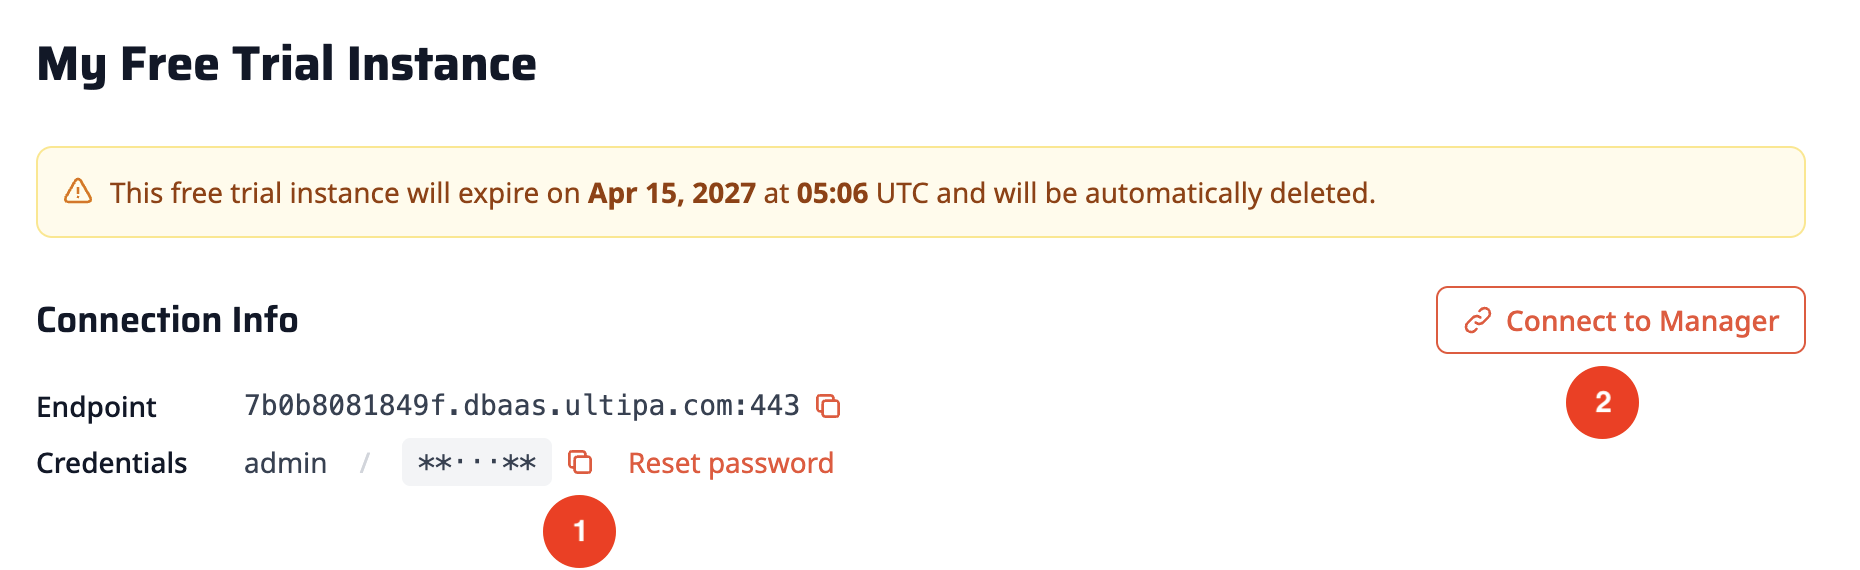
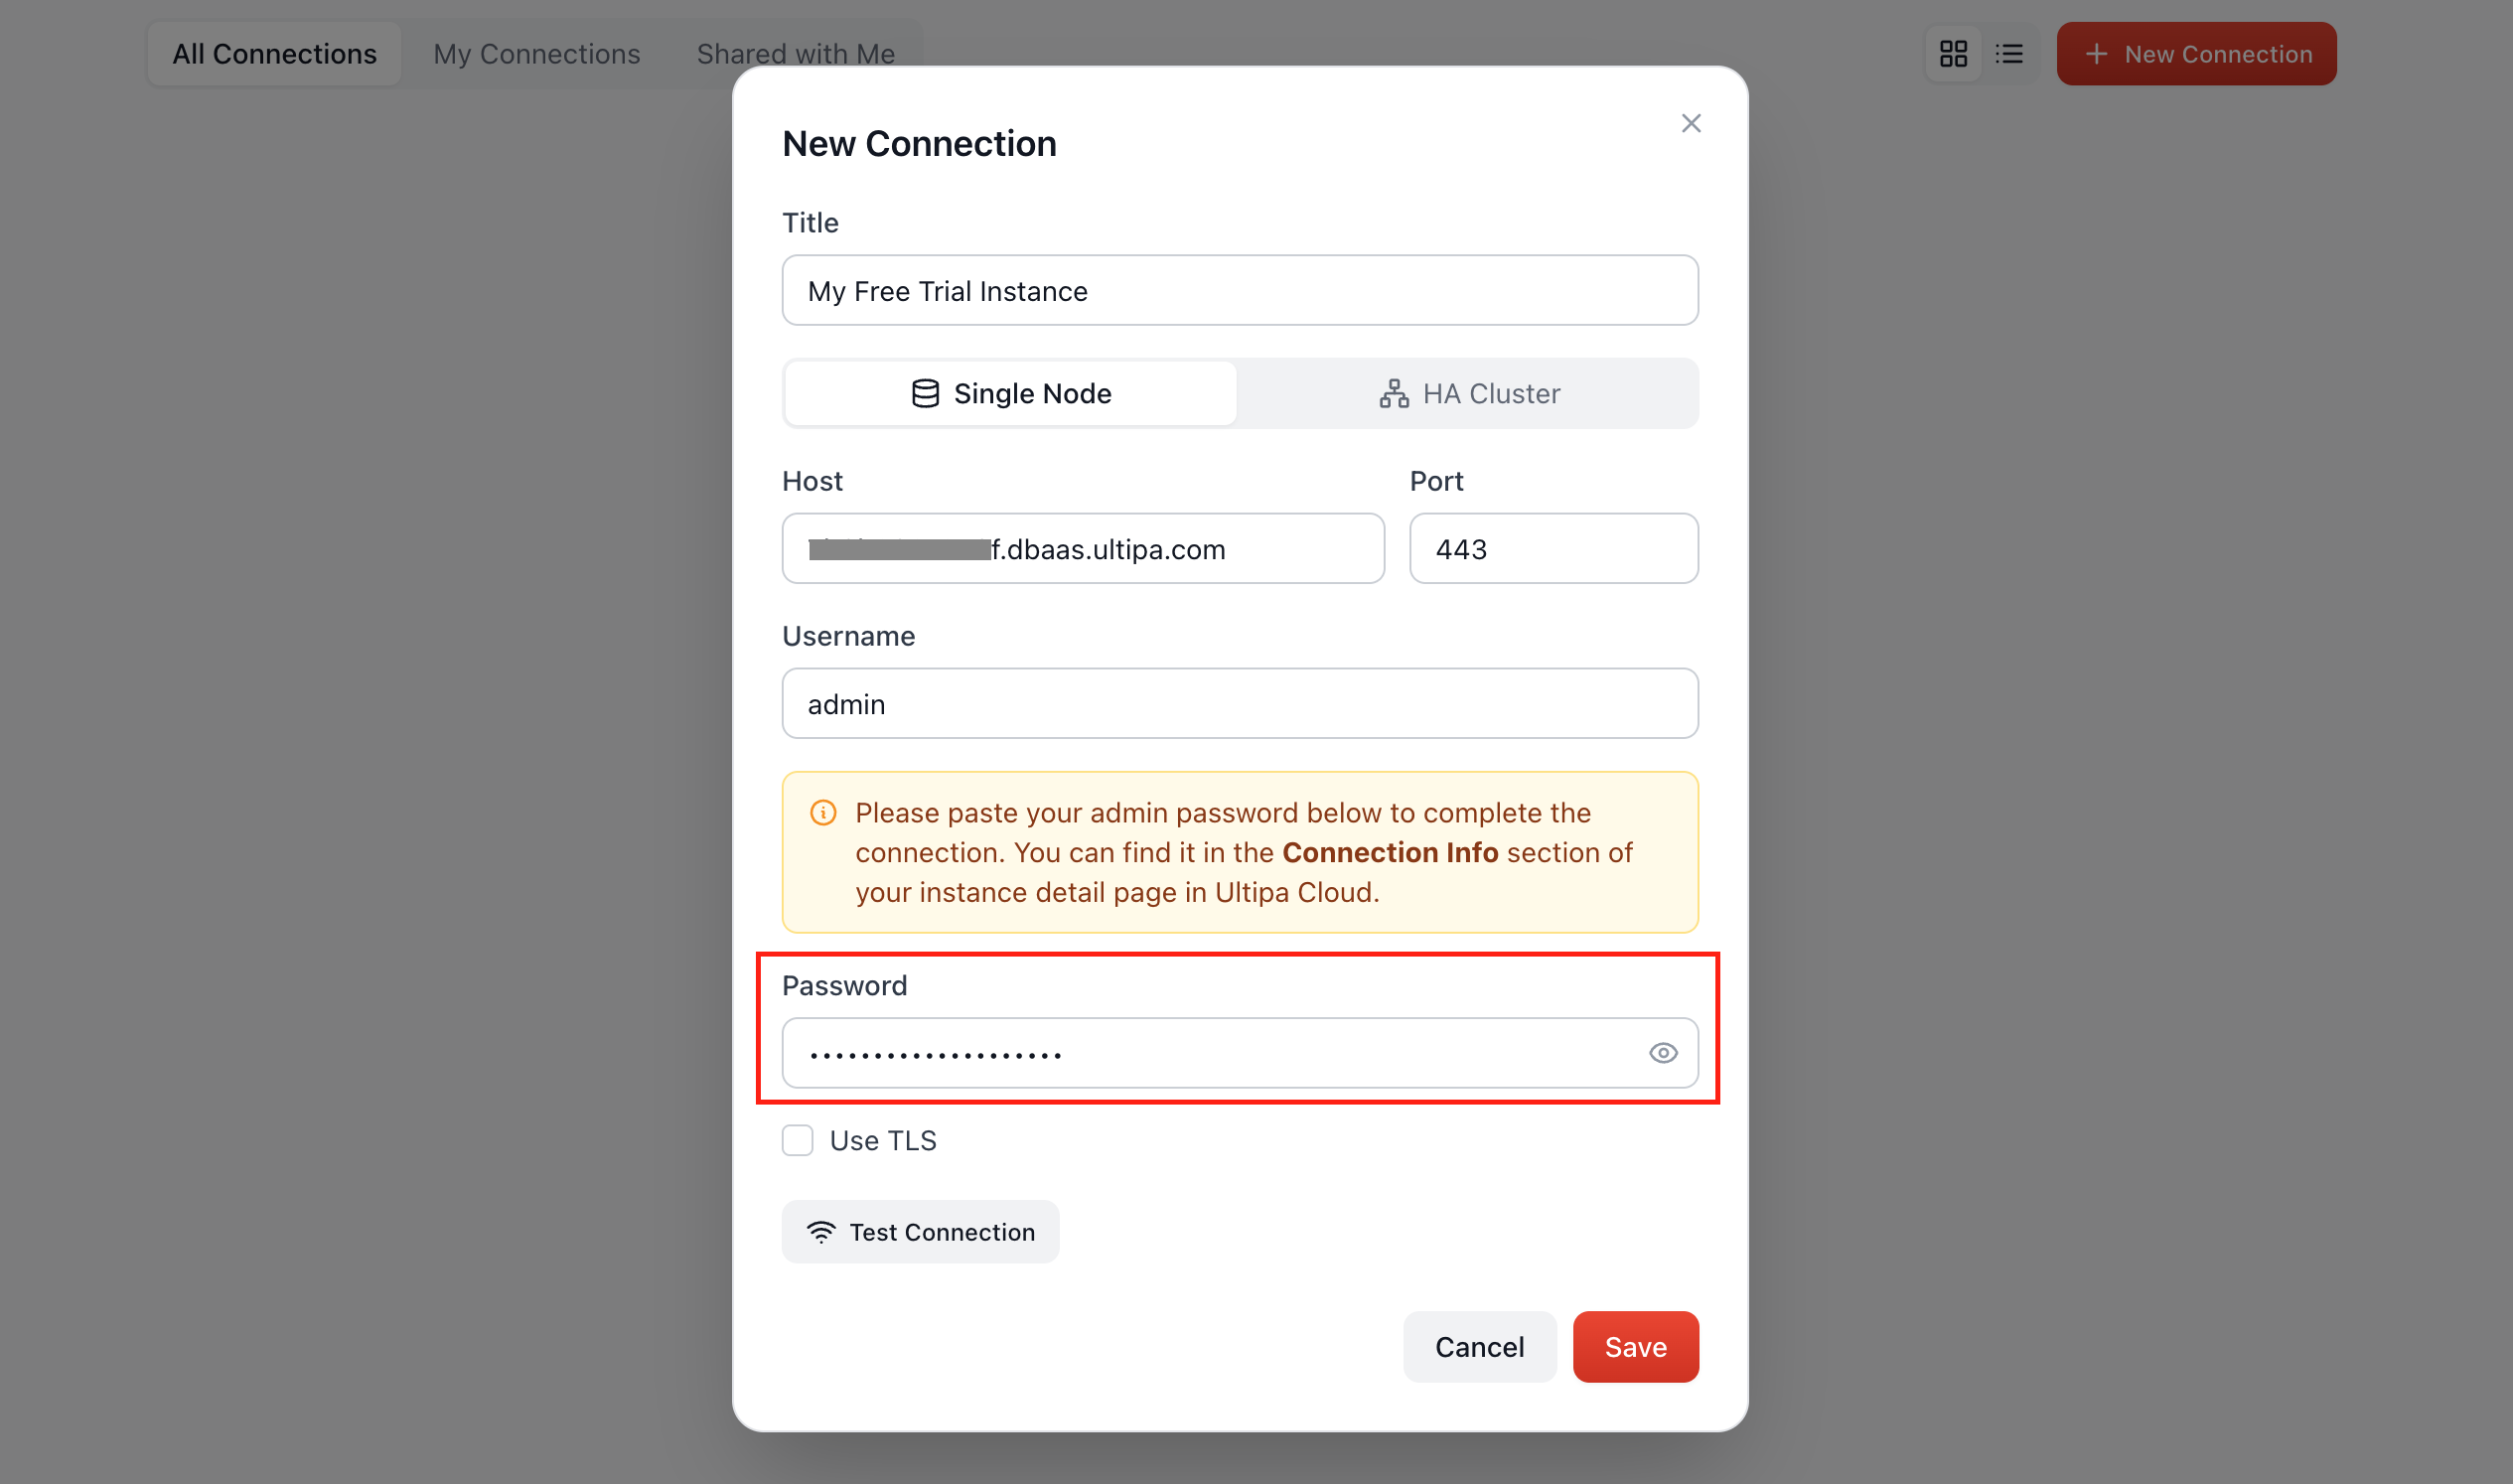
Copy the password and click Connect to Manager; Ultipa Manager opens in a new tab. The first time, you will be prompted to add the connection. All fields are auto-filled except the password, paste it and click Save:
You will see the connection card added, with a green status indicator next to the connection name. Click the card to enter the connection.
Run Your First Query
In Manager, you can run the following GQL statement using the query editor to check your database version:
GQLRETURN db.version()
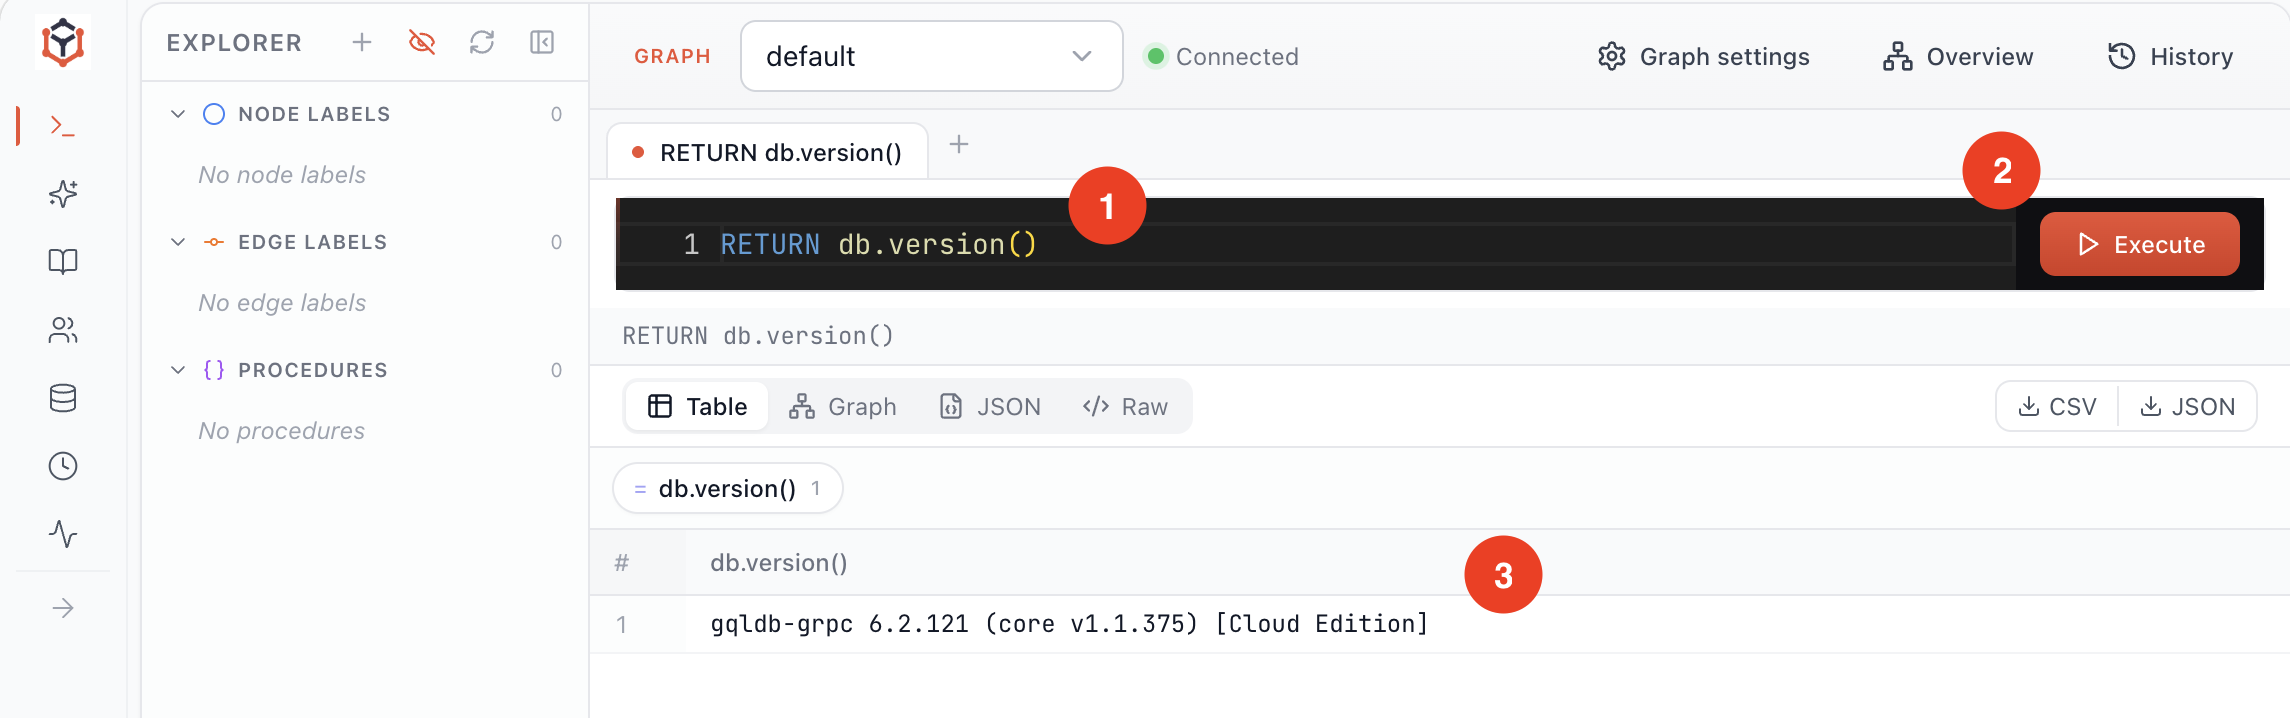
You have a running instance and a client that can reach it. Next, put some data in it: Load Your Data.